Would you like to work on several screens at the same time? Switching them is confusing, time consuming, and in rare cases can be a nightmare. There is a solution with Windows 11 split-screen capability. In this guide You will learn 2 simple and easy ways to split your screen into two, three and four sections on a Windows 11 computer.
You can split your screen into multiple sections to improve your productivity. The split screen allows you to view and access multiple windows at the same time. View up to 4 app windows at the same time, each window taking up a quarter of the screen. The split-screen function makes multitasking easier than ever.
2 ways to share your screen on Windows 11 PC & Laptop
When using the split screen function in Windows 10, the process was significantly different. Windows 11 made it a lot easier, but it kept the traditional approach covered in the section below.
Below are 2 methods that you can use to split your screen into different sections. But first you need to enable Snap Assist.
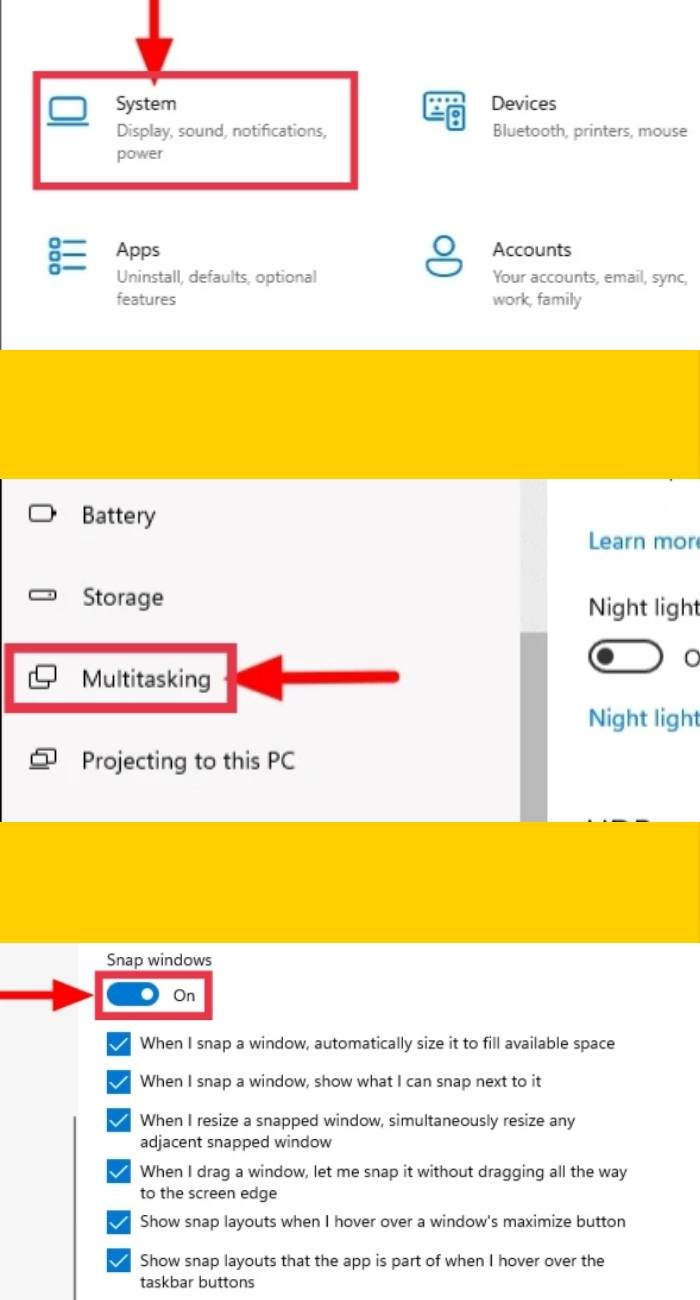
To enable Snap Assist in Windows 11, press WINDOWS + I to the ‘the settings‘, then click’system‘and then tap’multitasking‘Tab. Now click on the switch to activate the fishing aid.
Method 1: split your screen on Windows 11 using the Maximize button
With Windows 11, screen sharing just got a lot easier and faster. No more scrolling to drag windows or using keyboard shortcuts to bring multiple windows across the screen.
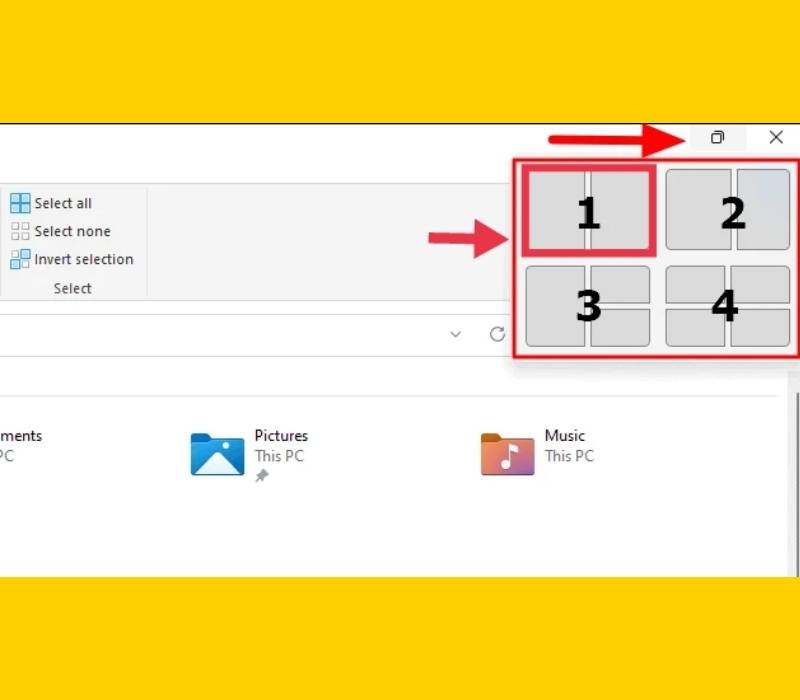
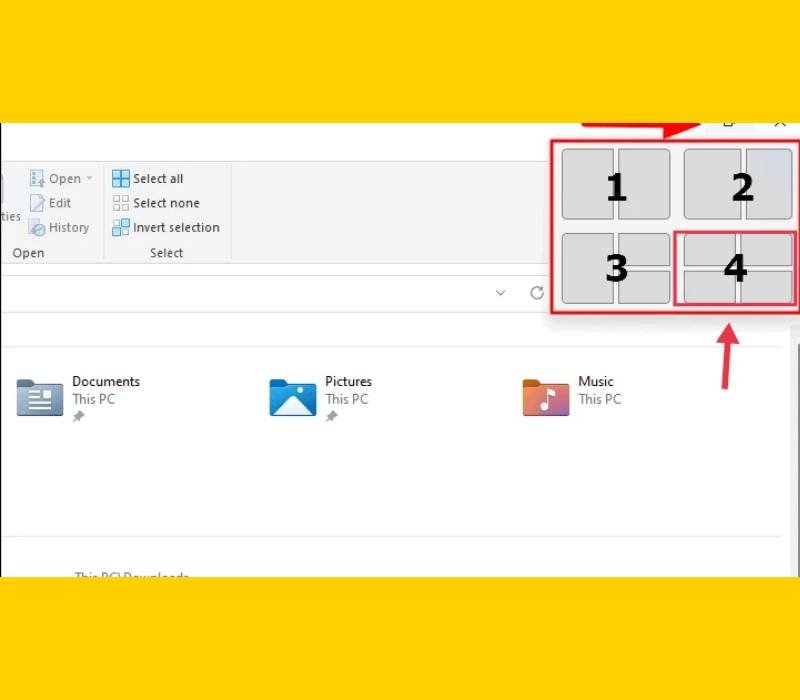
To split the screen in Windows 11, hover your cursor over the maximize button in the upper right corner of the window. You will see a small box with four split screen options.
- The first option splits the screen into two identical parts so that both window screens take up the same space.
- The second option also split the screen in two, but there is an uneven distribution in terms of the screen area it occupies. In this case, the left one takes up more space than the right one.
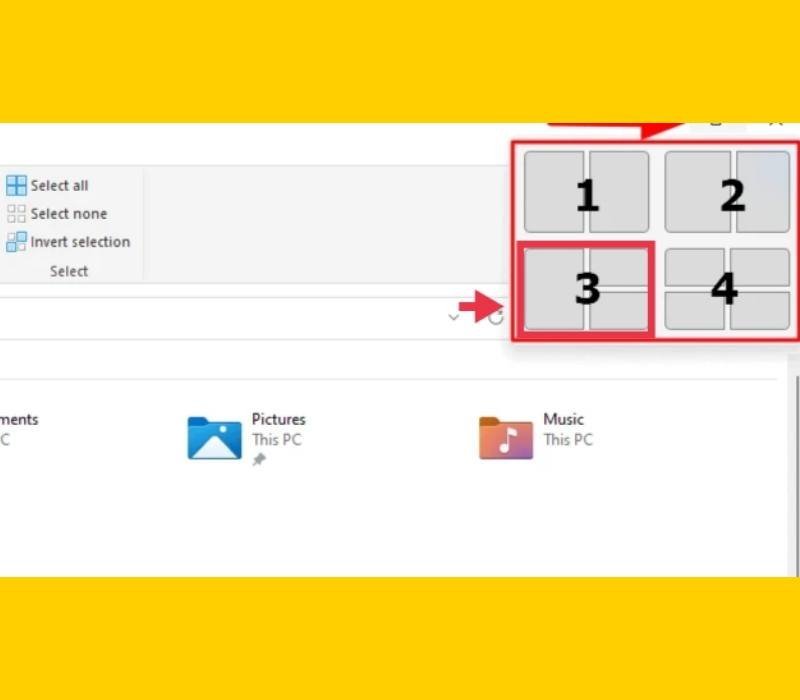
- The third option divides the screen into three parts, with the left half being taken into a window and the right half being taken into two quarters.
- The fourth option divides the screen into four parts, with each window taking up a quarter of the screen.
Now let’s see how to split your screen into two, three, and four sections in Windows 11.
Divide your screen into two sections
If you want to use two apps at the same time, there is an option to split the screen into two parts.
- Move the cursor over the maximize and choose one of the parts of the first choice.
- Now the current application window takes up the selected half of the screen and you can find other applications open as thumbnails in the other half. Select the one you want to add to the other half of the screen.
- After all, you have two app windows on the screen and you can access and work on them at the same time.
Divide your screen into three sections
If you want to work on three apps at the same time, you can split the screen into three parts.
- Move the cursor over the maximize and choose one of the three parts in the third option.
- Now select your desired app for each of the open windows to continue working.
- Finally, you now have three windows open on the screen, divided according to your choice.
Divide the screen into four sections
Splitting the screen into four is pretty much the same as in the last section.
- Move the cursor over the maximize of the current window, select the quarter you want in last chance.
- Now select the other apps that you want to appear on the split screen.
- You now have four app windows on the screen and can access and work on them at the same time.
Note: Splitting the screen into three or four windows compromises visibility and clarity, defeating the entire purpose. Therefore, it is recommended that you only do this on a larger display.
Method 2: split your screen on Windows 11 by manually aligning Windows to the sides
There are two ways to split the screen to show multiple windows at the same time. You can press and hold the windows and drag and drop them to the desired corner or use keyboard shortcuts. Let’s start by dividing the screen in two Move up to four.
To split the screen into two parts by manually snapping windows on the side, Press and hold the desired window and drag it to either side until the cursor moves. Release the cursor when you find a blurry outline indicating the position you want the background application to occupy. You can also just open the window you want and the WINDOWS + LEFT/RIGHT ARROW KEY to split the screen in two.
With the default settings, the other open windows will be displayed in the other half as soon as one of the windows takes up half of the screen. Select the one you want to add to the other side of the screen.
Likewise, you can split the screen into three and four sections while viewing and accessing the same number of application windows. This makes multitasking very easy.
last words
That’s all about how to split your screen into two, three, and four sections on a Windows 11 PC and laptop using two simple methods. You can use the new method introduced in Windows 11 or any of the existing methods to multitask that wasn’t available before.
Also read:
- How to create a bootable USB drive for Windows 11 using CMD
- How to Quickly Find HP Laptop Serial Number on Windows 10
- How to Quickly Clear Command Prompt Screen on Windows 10