The Windows Sandbox feature was first introduced in Windows 10 and is still part of Windows 11. This is a useful feature for isolated environments. It’s like a virtual machine using Microsoft’s hypervisor and hardware virtualization to run a separate kernel to isolate a Windows sandbox session from the host. It’s about 100MB in size and it installs and runs untrusted classic applications in isolation from the main installation.
“Isolated” means that the application you are running on sandbox does not have access to the files, registry, and other resources of your main Windows operating system. As soon as you close the sandbox, all data is automatically deleted from your application.
See also: How do I install Windows 11 on a VirtualBox virtual machine?
Microsoft Windows Sandbox is efficient because it uses a built-in kernel scheduler, intelligent memory management, and virtual graphics, and is disposable. The best thing about Windows Sandbox is that once you close this app, all data is deleted. This means every time you run the Windows sandbox function; You begin by reinstalling Windows 11. This is a useful feature if you want to download and run software from an untrusted source.
In short, we can say that running Windows Sandbox is just like running another copy of your Windows 11 in a virtual machine. The only difference is that Sandbox is built into Windows 11 and changes are not saved when you exit. Conversely, if you are using a third party virtual machine, Oracle VirtualBox, your data will remain on your virtual PC and can be accessed when you start your virtual machine.
By default, the Windows Sandbox feature is left disabled in order to use it; You have to activate it. Once you have installed or enabled the sandbox feature, you can access this application. This Gearupwindows article guides you to enable and disable the Windows Sandbox feature on Windows 11.
How do I enable or disable Windows Sandbox on Windows 11?
Step 1. Press
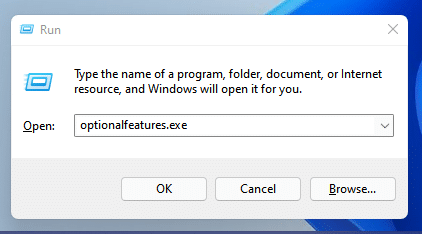
Step 2. In the Run box, enter the following and press Enter using the keyboard to call up the Windows functions Dialog box: –
optionalfeatures.exe
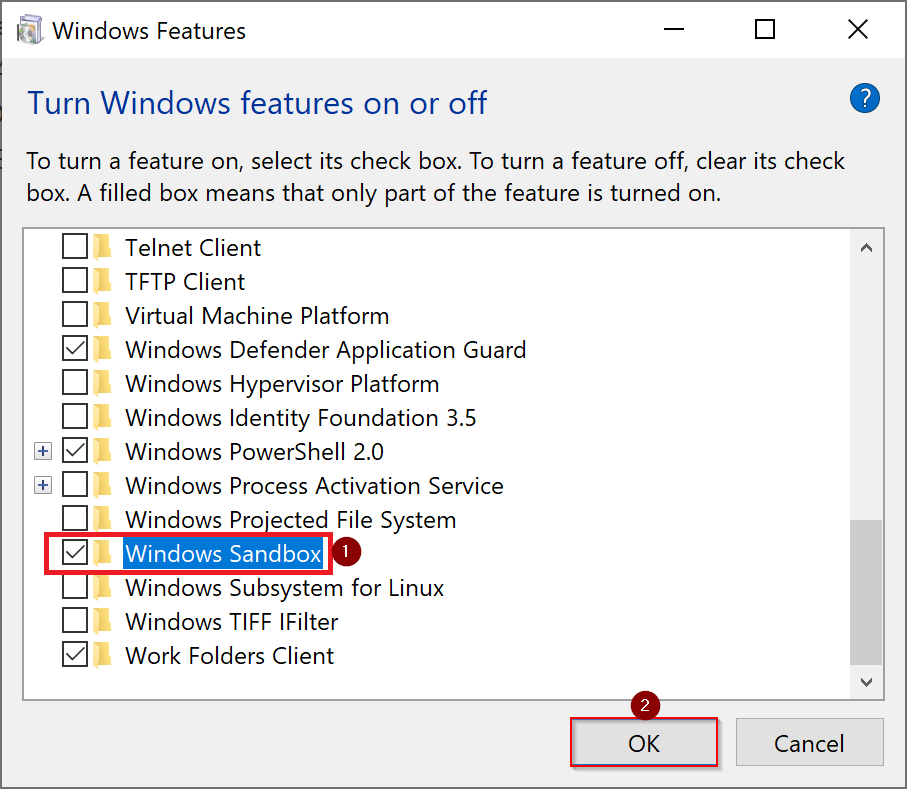
Step 3. Scroll down and check the Windows Sandbox option and then click OK Button.
Step 4. Now click on that Restart now Button.
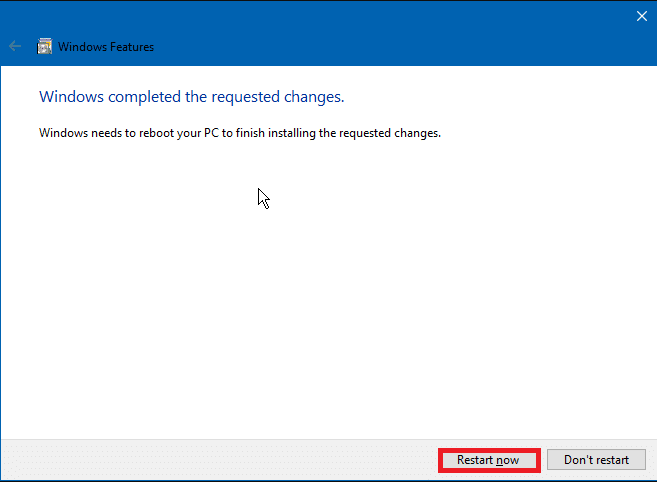
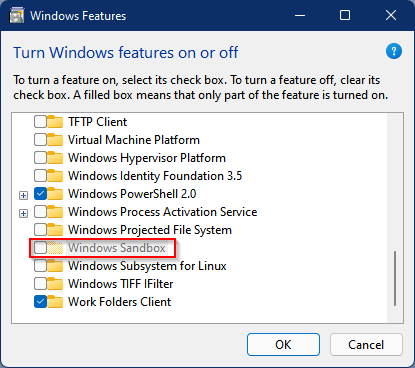
Your computer will restart to install and enable the Windows Sandbox feature in Windows 11. If you want to disable the sandbox function on your PC, repeat the steps above and in step 3 disable the “Windows Sandbox” option. click OK to restart your PC and remove or disable the sandbox function.
If Windows Sandbox is grayed out on your PC or you cannot select it, your PC either does not support hardware virtualization or is not enabled in the BIOS / UEFI.
To access the Windows Sandbox, click the Start button and type sandbox. In the search result, click Windows Sandbox to start it. It should also be noted that the sandbox function is not available in the home editions of Windows 11. It is only available for Pro and Enterprise editions.