How do I change my login picture on Windows 11? Don’t want to see a boring Windows 11 profile picture? You can change the profile picture of your user account or set it to something else. Your account or profile picture is what you see on the Windows login screen and in the Start menu. When you create an account on your Windows 11 PC, a general profile picture is assigned. However, it’s easy to change this to any image you want.
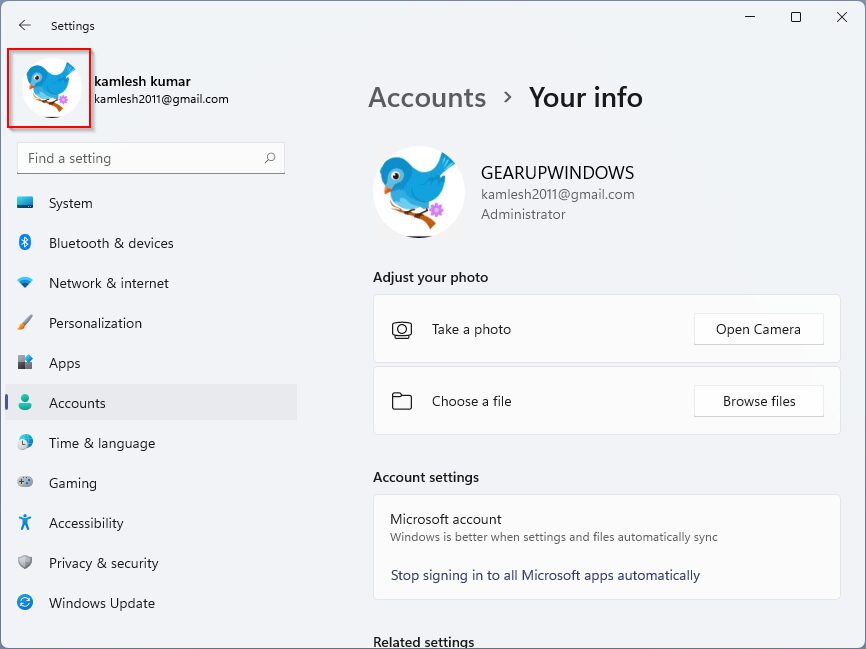
If you a. use Microsoft account that already has a picture associated with it, Microsoft has set your profile picture to the default Windows user picture. In this Gearupwindows article, we are going to show the steps to change or assign a picture to your user account profile. Whether you are using a local account or a Microsoft account, you can use these article steps to set or change your user profile picture.
Photos you upload to your profile are associated with your and what the account represents. If you want to boost your account profile in Windows 11, add a cool and precise photograph to outline who you are and what you care about.
Windows permits you to feature picture on your profile to distinguish your account and discover you at the login screen from different Windows profiles.
By default in case you don’t add photo for your account profile, a black photograph area will be delivered and left clean. All users could have the same photograph, besides precise account names.
When setting up account image, you may take and use picture which you snap from your computer digital camera or down load and import snap shots from everywhere. Once you add a photograph, you have to see the new image on the login screen to perceive your account.
How do I change a user profile picture in Windows 11?
In Windows 11, the profile pictures of the local account are controlled by the Settings app. That means you’ll need to access the Settings app to set or change your account profile picture. You can also use this method to change your account profile picture for your Microsoft account.
Step 1. Open the Settings app.
To access the Settings app, click the begin from the Windows 11 system tray and then click the settings. However, if you’d rather use the keyboard shortcut to open the Settings app, press Windows + me Buttons at the same time.
![]()
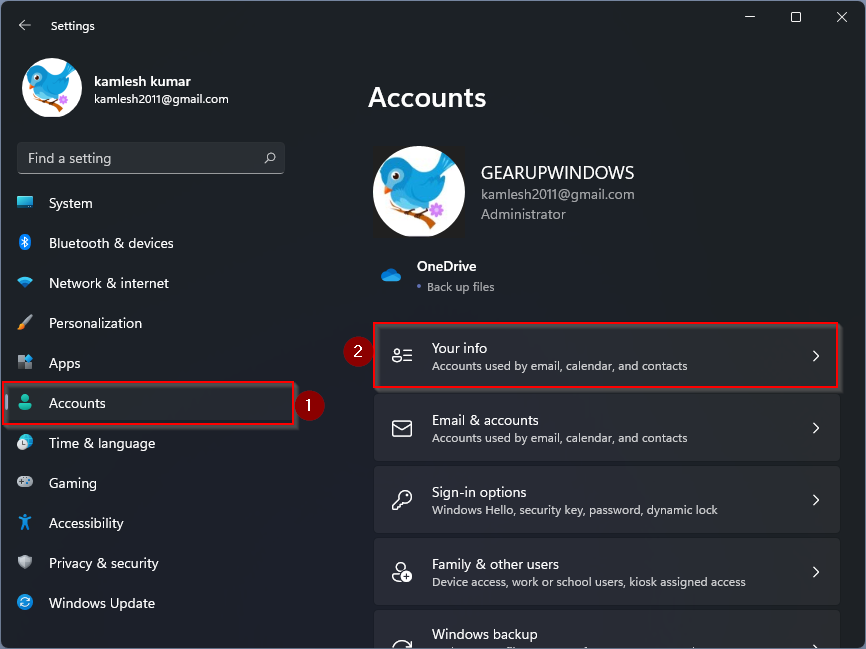
Step 2. In the settings window on the left, click the Accounts Category. Click the to the right of it Your info Tab.
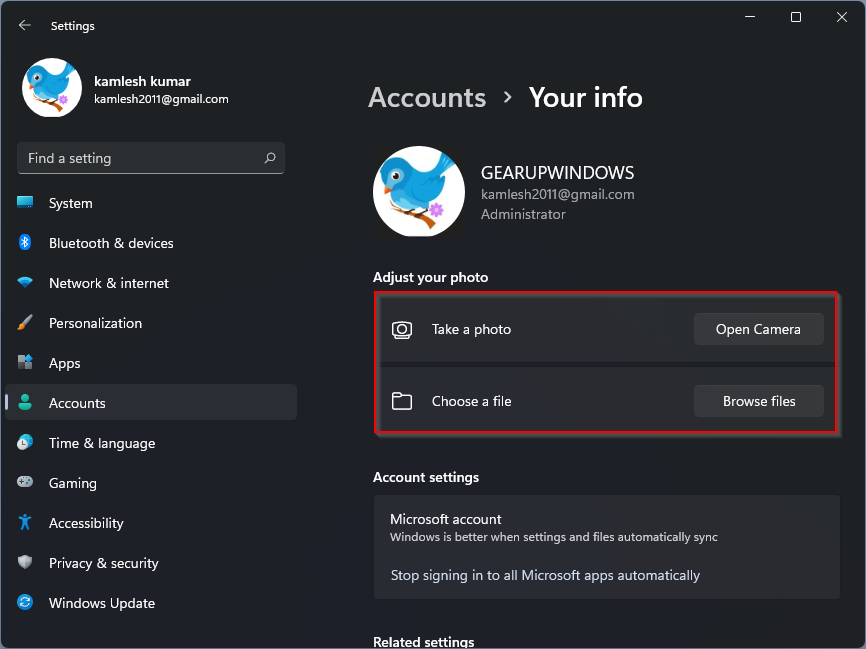
Step 3. In the “Customize Photo” section, you will see two options for setting your profile picture:
- Take Photo – Click the Open Camera button and take a photo to save as a profile picture.
- Choose File – This is useful when you don’t have a built-in camera on your computer or want to upload a picture from your PC as a profile picture.
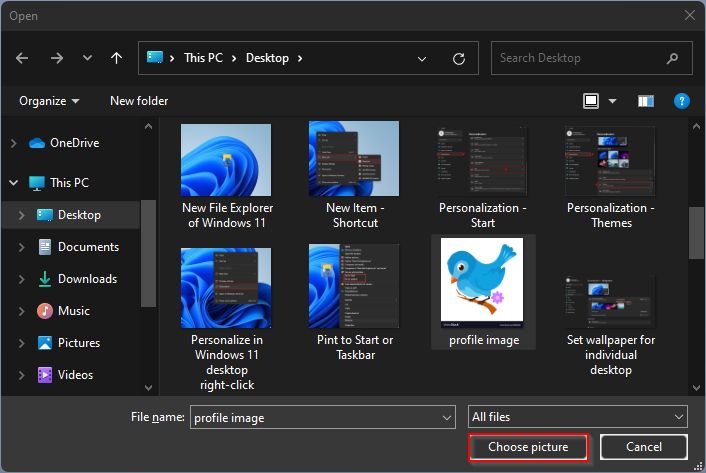
Step 4. If you’d rather upload a picture from your PC, click Browse files Button next to Choose a file and select the photo from your computer. Finally click on that choose picture to set or change your profile picture.
How do I change a user profile picture of a Microsoft account in Windows 11?
This is another method of changing or setting a user profile picture for a Microsoft account in Windows 11. The change will apply to any Microsoft service that displays your profile picture. Since this process runs through a Microsoft server, it may take a while for all sites and devices to display the new image. You need to do the following: –
Step 1. Sign in to Microsoft account, then click Your info Button at the top of the page.
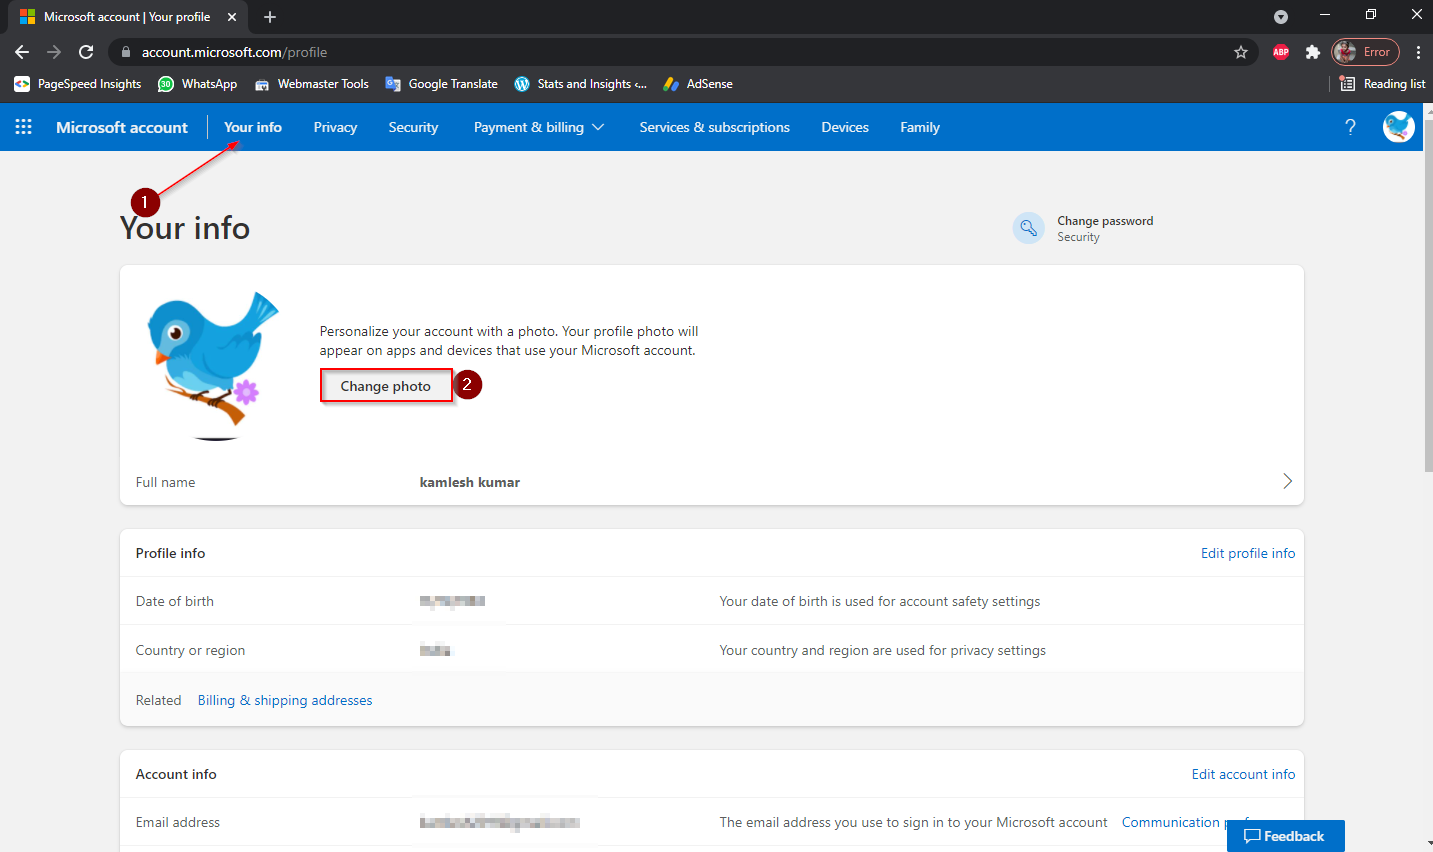
Step 2. Now click on change photo Button.
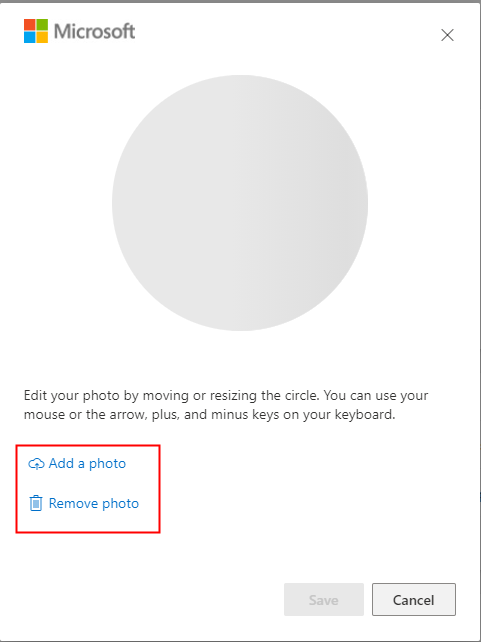
Step 3. A pop-up window will open. Here you can add a new photo or remove an existing one.
That’s all.