How do I bypass TPM 2.0 and Secure Boot on Windows 11 ISO? Windows 11 could finally hit the market this November month and most of the users have started installing it on their PC. Under the different minimum system requirements of Windows 11, Secure Boot and TPM 2.0 are mandatory. However, there are ways to bypass Secure Boot and TPM 2.0 when installing Windows 11. It’s even possible to bypass Secure Boot and TMP 2.0 during Windows 11 installation by deleting just a single file, appraiserres.dll. This means that if you delete the appraiserres.dll from the Windows 11 installation folder, you can easily install Windows 11 on any PC that does not support a Secure Boot or TPM 2.0 chip in the BIOS / UEFI. Users who want to install Windows 11 from a USB stick can use the Rufus utility to create a bootable USB stick.
In this Gearupwindows article, we’ll walk you through changing the Windows 11 ISO so that you can mount the ISO file and install Windows 11 on a VirtualBox. Oracle VM VirtualBox does not support Secure Boot and TPM modules, so you cannot install Windows 11 on a virtual machine using the standard Windows 11 ISO. As soon as you bypass Secure Boot and TPM 2.0, you can install Windows 11 on a VirtualBox without errors.
How do I bypass TPM 2.0 and Secure Boot on Windows 11 ISO?
Step 1. Download the free AnyBurn tool.
Step 2. Double-click the setup file and install it on your computer.
Step 3. Now start the AnyBurn software by double-clicking the shortcut icon on the desktop.
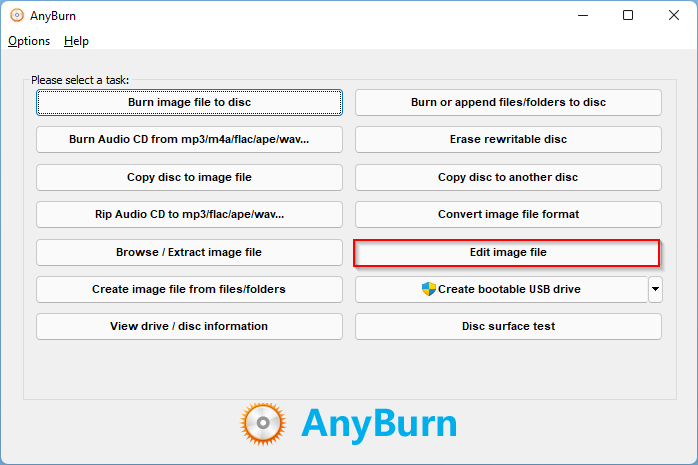
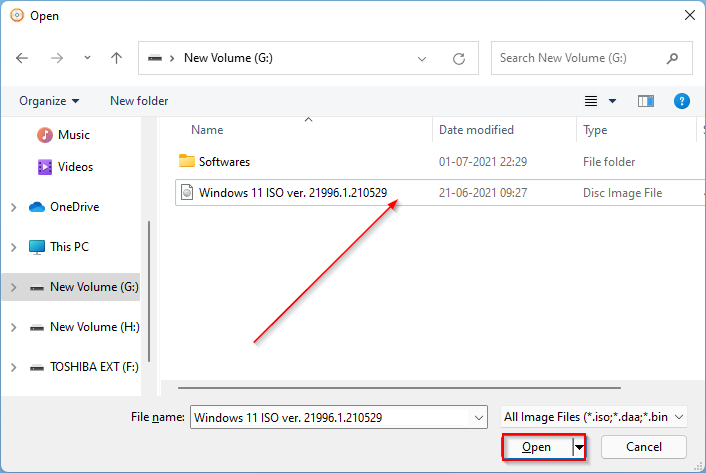
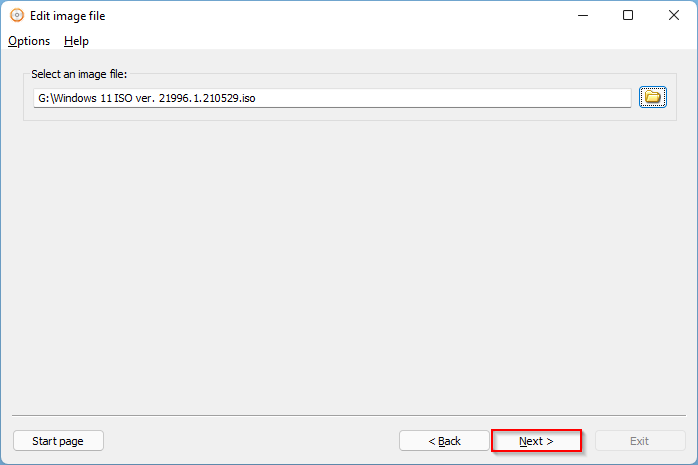
Step 4. In the AnyBurn user interface, click the “Edit Image File” option. In the next window, select the Windows 11 ISO you downloaded, then click to open Button.
Step 5. Now click on that Next Button.
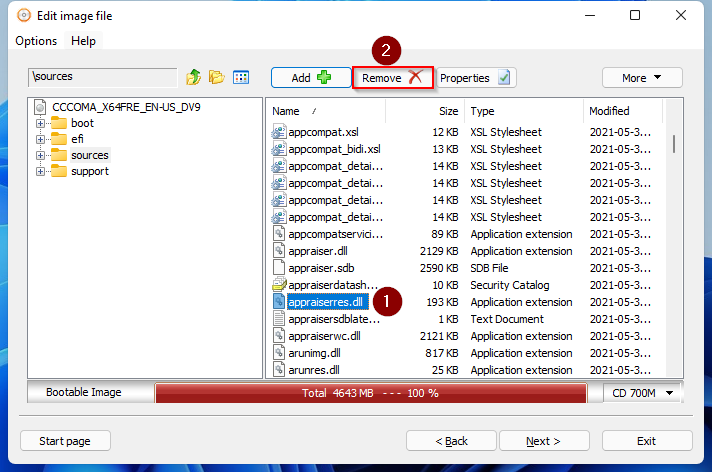
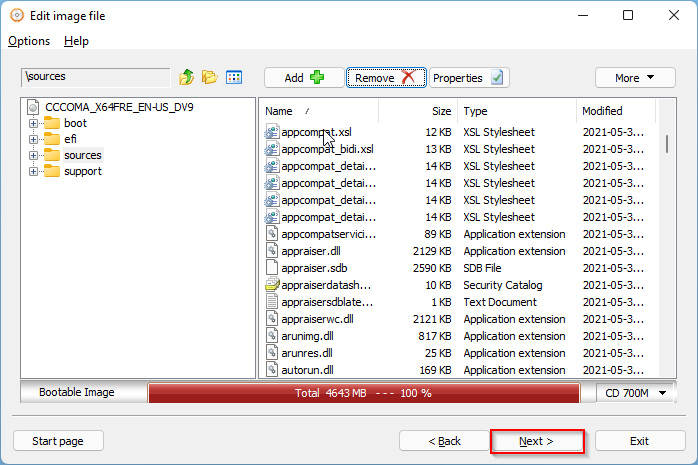
Step 6. Next, double click on that swell Folder. In the source folder, select the appraiserres.dll File by clicking on it. Now click on that Remove Button of the AnyBurn Toolbar.
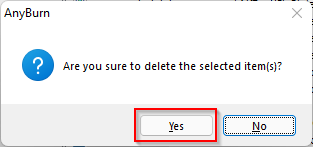
Step 7. When AnyBurn prompts, click Yes Button.
Step 8. Well that appraiserres.dll File is removed from Windows 11 ISO. Now we need to save the ISO image so that it remains bootable. Press the Next Button.
Step 9. Next, if you want, change the ISO file name and location; You need to click the folder icon next to the “Select Image File Name” box and then click the “Create Now” button.
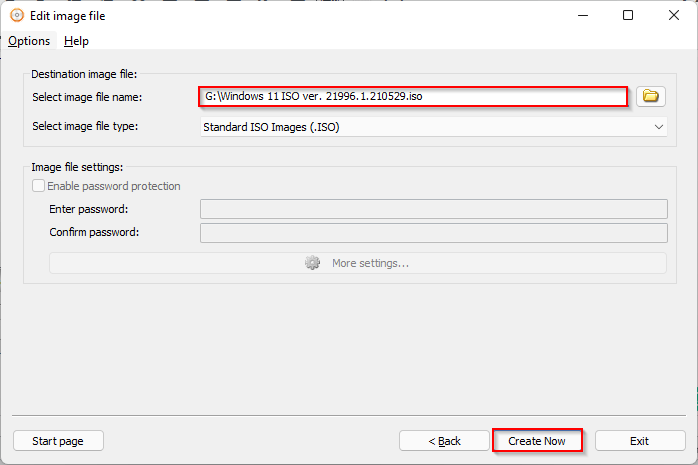
If you don’t want to change the new Windows 11 ISO file name and location, just click Create now Button.
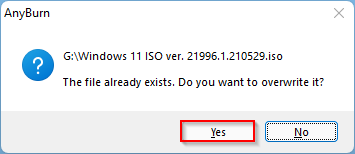
Step 9. Depending on your choices in the above step, you may be prompted to overwrite the file. Press the Yes , to continue.
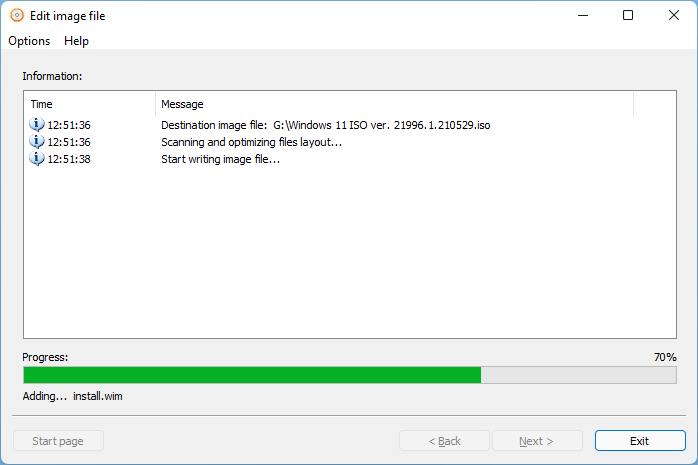
Now you will see a progress bar of the ISO image processing. When the progress bar reaches 100%, you can exit AnyBurn.
Once you have a Windows 11 ISO file with no appraiserres.dll file, it’s easy and quick to install Windows 11 on VirtualBox. You will not see an error from Secure Boot and TMP 2.0 as you have already bypassed it by editing the Windows 11 ISO.
Have fun!!!
also read: How do I install Windows 11 on a VirtualBox virtual machine?