Windows 11 comes with a handful of new widgets. Here’s how to access them, add or remove them, customize them, resize them, and rearrange them.
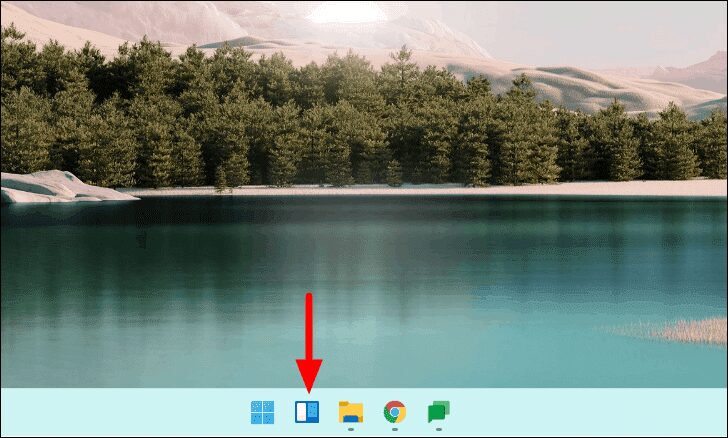
Windows 11 introduced a “Widgets” panel which brings you a wealth of information from various sources and applications. You can access the Widgets panel from the taskbar icon or by simply pressing the button Windows + W keyboard shortcut.
Widgets can help you stay connected to events, both local and across the world. It contains weather, sports, traffic, a to-do list, photos from Microsoft Drive, and more. Besides the widget, you have organized news according to your interests.
Windows 11 also allows you to add or remove widgets, resize and rearrange them, and customize the content of widgets in the Widgets panel. Let’s see how you do it all.
Add a widget in Windows 11
Adding or removing widgets on Windows 11 is pretty straightforward. Before continuing, identify the widgets you want to add or remove based on your needs and interests.
First, click on the “Widgets” icon in the taskbar or press WINDOWS + W to launch Widgets.
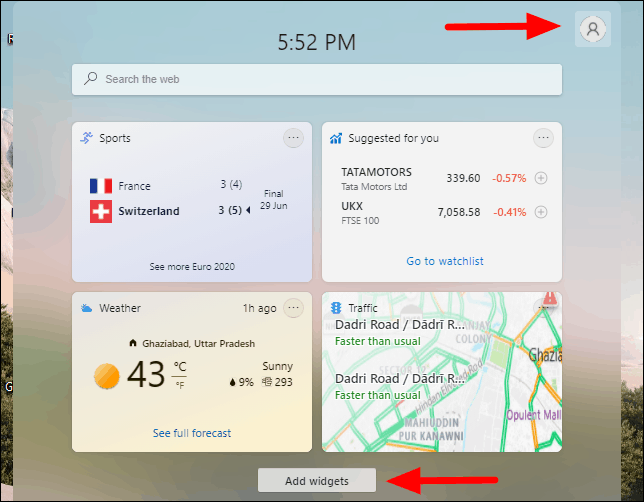
To add a widget, click on the profile icon in the upper right corner or on the “Add widgets” option.
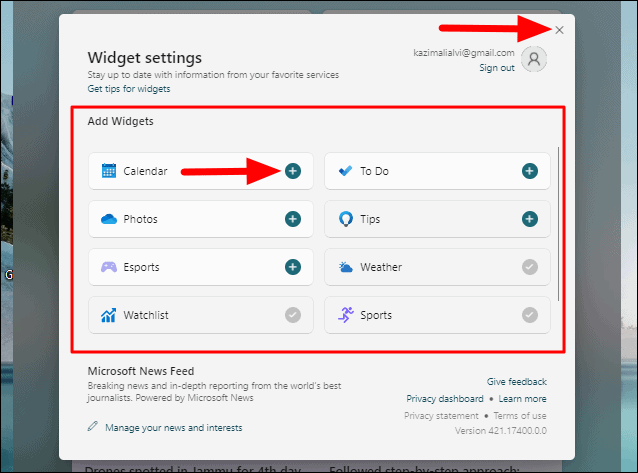
Now the “Widget Settings” window will open and all the available widgets will be listed. Those that are already added will have a check mark next to them while the rest will have a plus sign. Click the plus sign next to a widget to add it.
Remove a widget in Windows 11
Many of you may have added a lot of widgets out of excitement and would like to remove them. Also, it is recommended that you only keep the relevant widgets and keep the space clean for clarity.
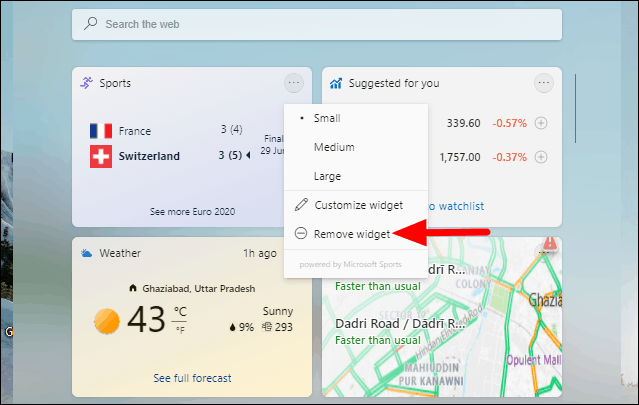
To remove a widget, click the ellipsis in the upper right corner of the one you want to remove.
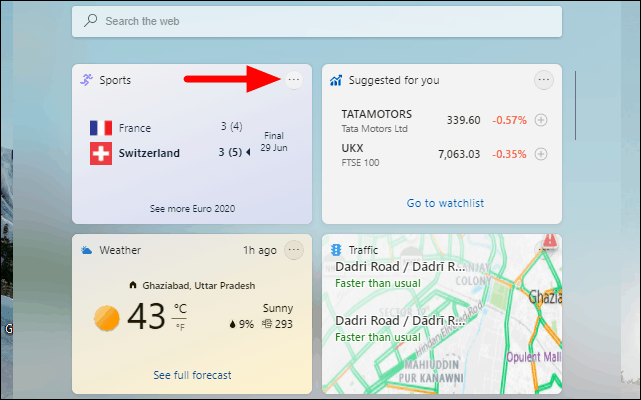
Then select “Remove Widget” from the drop-down menu.
Customize widgets in Windows 11
Widgets on Windows 11 can be customized according to your needs and display what you want to see. Let’s see how you can customize a widget. We will take a few examples to help you familiarize yourself with the concept.
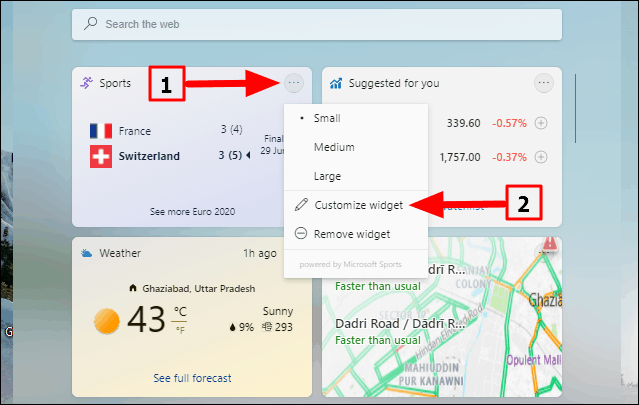
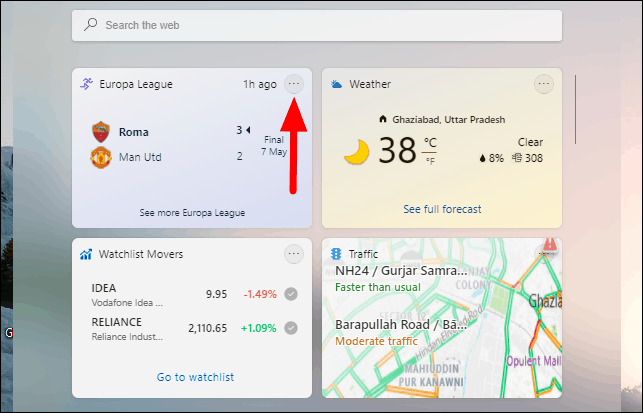
To customize a widget, click the ellipsis in the upper right corner of the widget and select “Customize Widget” from the drop-down menu.
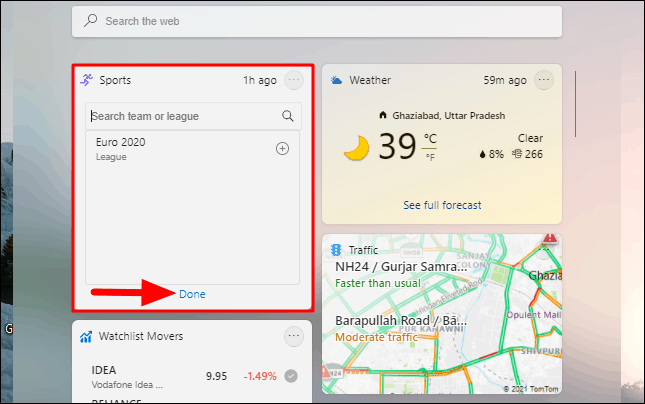
When you customize the sports widget, it asks you to search for a team or a league to track the score. Look for it in the “search box”, select it, then click “Done” at the bottom to save the changes.
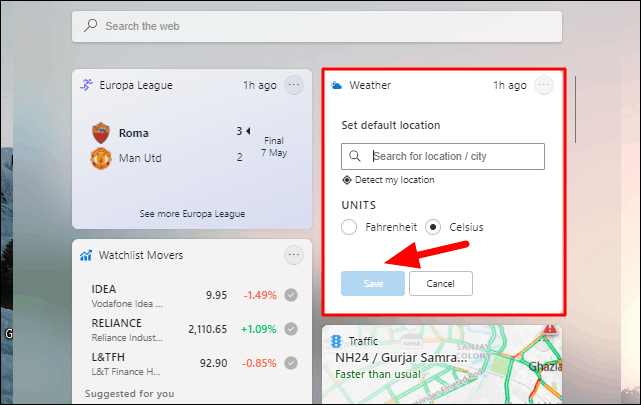
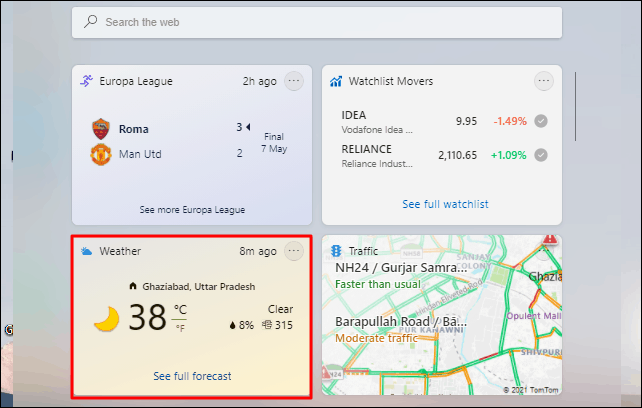
When you customize the Weather widget, you are prompted to search for a place / city or have Windows automatically detect it and select “units” for the temperature. When done, click “Save” at the bottom.
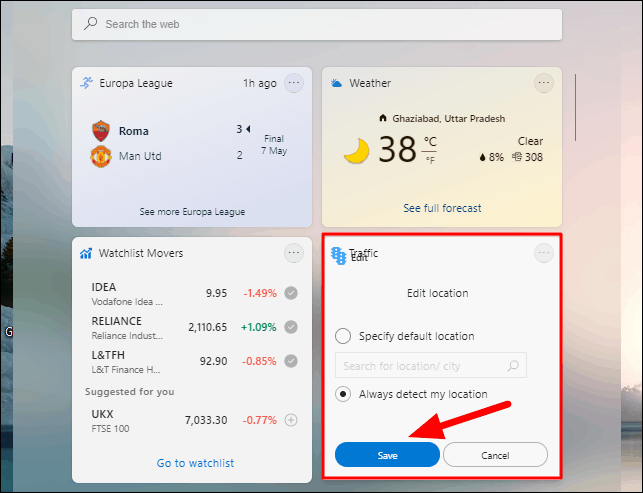
When you customize the Traffic widget, you have the option of automatically detecting your location and specifying one. If you check the box next to “Specify the default location, find and add one, then click” Save “at the bottom.
The other widgets also offer customizations according to the name of the widget. Try them once and you will get used to them.
Resize widgets in Windows 11
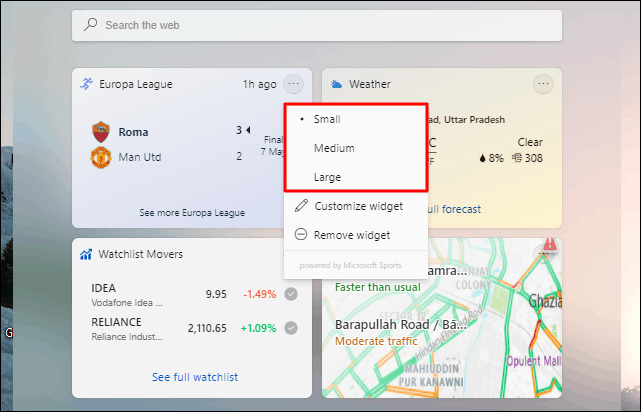
When it comes to resizing, Windows 11 gives you three size options, Small, Medium, or Large. However, changing the size only affects the length of the widget’s thumbnail and not its width. This can be interpreted as a disadvantage by many.
To resize the widget, first click on the ellipsis in its upper right corner.
The first three menu options are to customize the size of the widget, select the desired option. The current size will have a point before.
Rearrange widgets in Windows 11
You can easily rearrange the widgets and place the ones you use frequently on top or however you want.
To rearrange widgets, place the cursor on top of any widget and the cursor will turn into an open white hand. Now hold and drag the widget to the required position. As you drag, the cursor turns into a closed white hand.
After moving the widget to the required position, release the mouse button. The other widgets will also be rearranged accordingly.
You are now well acquainted with the concept of Widgets on Windows 11 and the different options and customizations available. Explore them all and get the most out of the functionality. It will surely improve your Windows experience.