It’s been a few days since Microsoft released Windows 11 RTM. Windows 11 is a free update for Windows 10 users who have a PC that supports the minimum hardware requirements of Windows 11.
Although users can upgrade from Windows 10 to Windows 11 through the Windows Update service, Microsoft is rolling out Windows 11 gradually, and for this reason, not everyone can upgrade to Windows 11 right away. That said, if you can’t wait to upgrade to Windows 11, you can use other options.
You can use the official Windows 11 Setup Wizard tool to upgrade your existing Windows 10 installation to Windows 11 without losing data. Here’s how to upgrade from Windows 10 to Windows 11.
Upgrade from Windows 10 to Windows 11 without losing files
NOTE: You do not need a product key to upgrade from an activated Windows 10 installation to Windows 11.
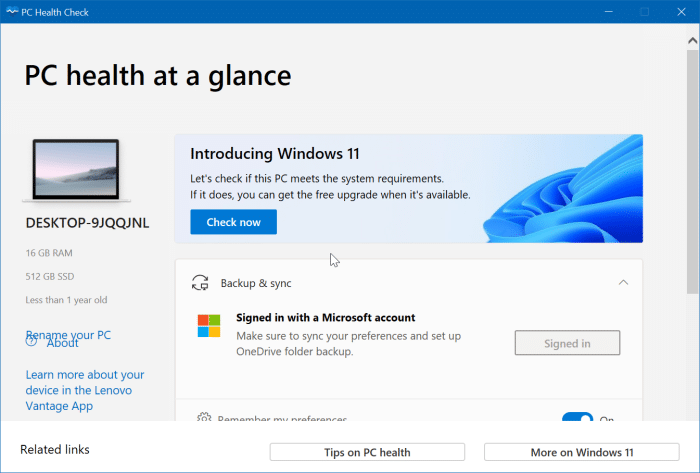
Step 1: The first step is to make sure your computer is compatible with Windows 11. The easiest way to do this is to download, install and run the official PC Health Check application.
After running, click the Check it now to check if your PC can run Windows 11.
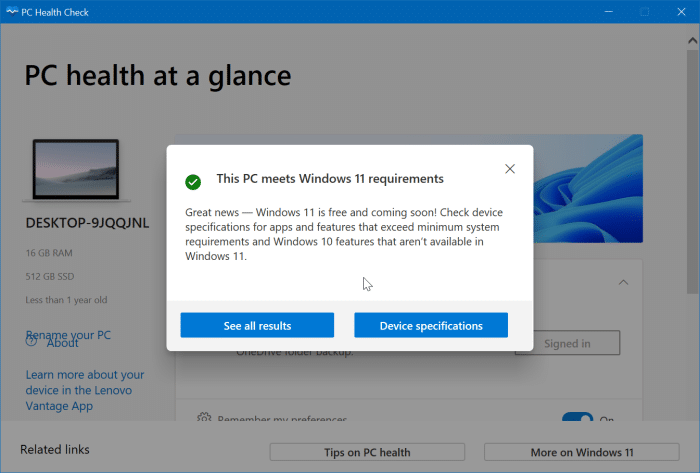
Step 2: If your PC supports Windows 11, get the official Windows 11 Installation Wizard from this page.
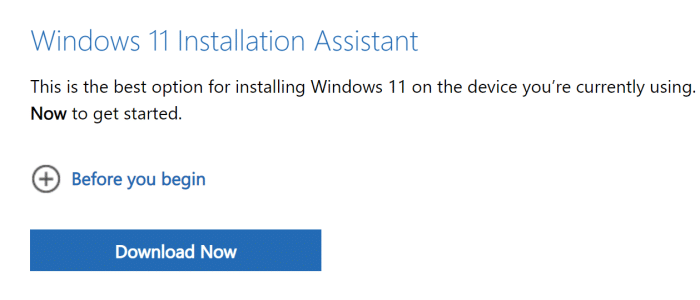
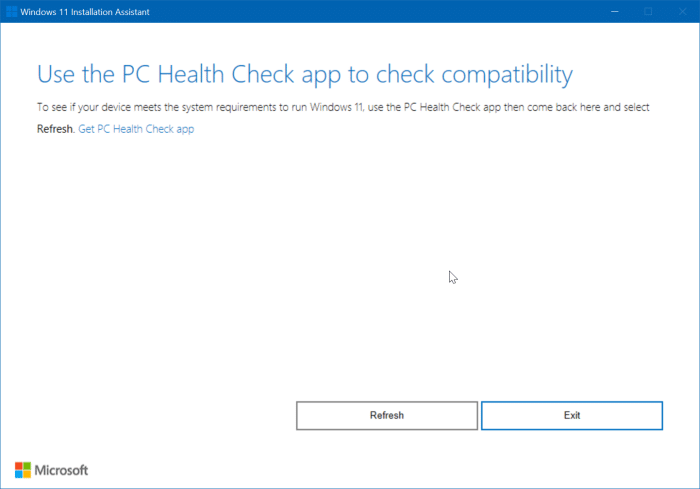
Step 3: Run the Windows 11 Setup Wizard tool. If the following screen appears “Use the PC Health Check app to check compatibilityInstead, run the PC Health Check application again and click the Check it now (see Step 1 for instructions) to make sure your PC is compatible with Windows 11.
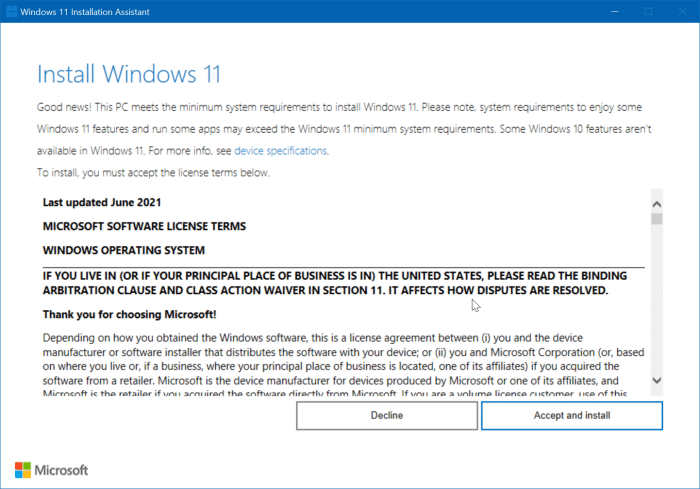
Step 4: Now that you have run the PC Health Check application again, in the Windows 11 Setup Wizard tool, click the To update to view the license agreement screen. Click on the Accept and install button to continue.

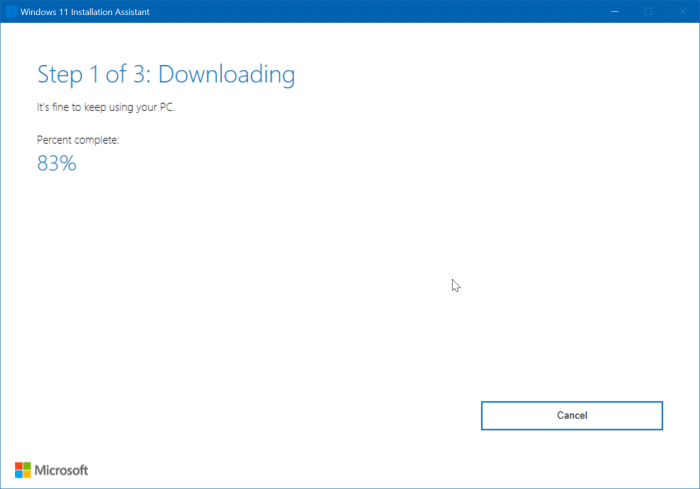
Step 5: The Windows 11 Setup Wizard software will begin downloading the Windows 11 setup files from Microsoft’s servers. Depending on the speed of your internet connection, the download process can take from a few minutes to hours.
Step 6: Once the required files are downloaded to your PC, the Installation Wizard will start installing Windows 11 automatically.
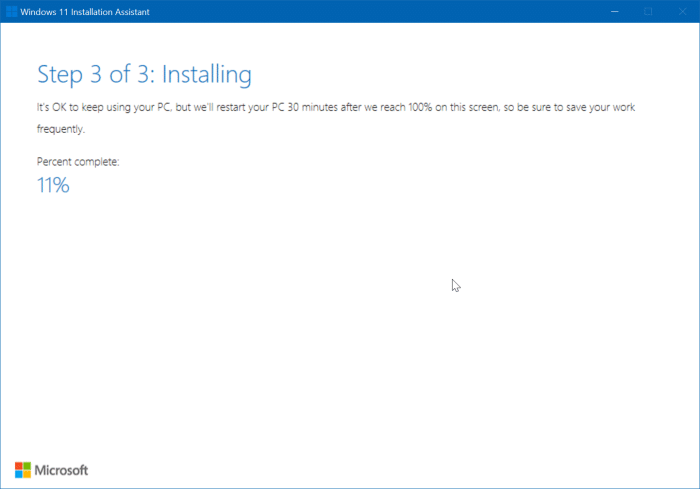
Here, it can take tens of minutes to complete the installation.
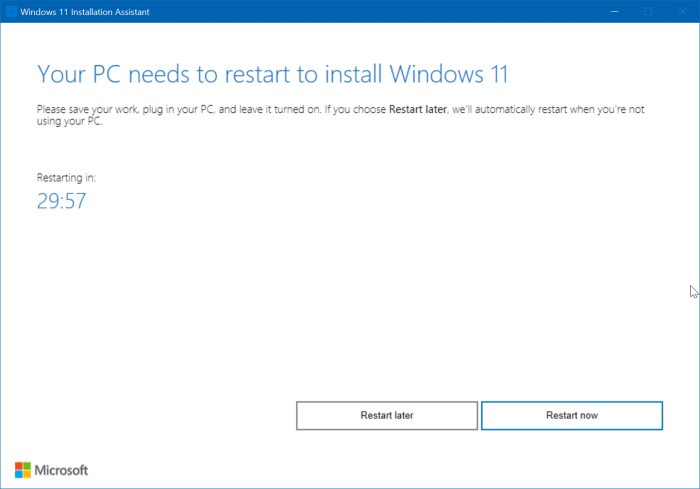
Step 7: Then once the installation reaches 100%, you will see the following screen. Click on the Restart now to restart your PC.
Step 8: When you restart your computer, this screen will appear with “Working on updates. Please keep your computer on ”.
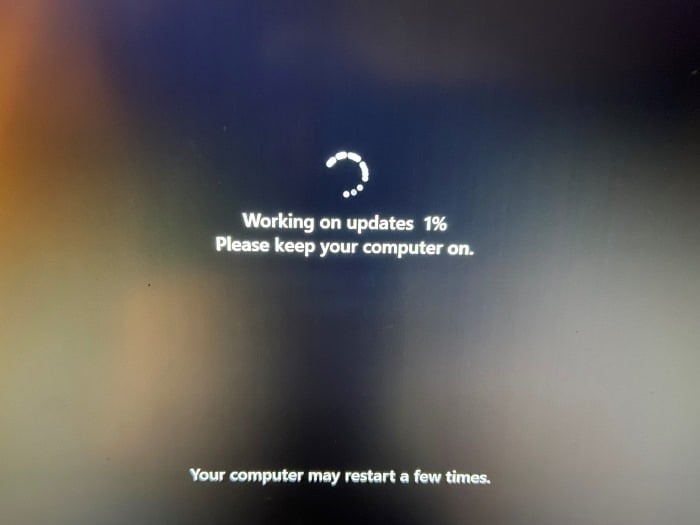
Your PC will automatically restart a few times. Don’t panic. Again, you may see this screen for several minutes.
Step 9: Finally, your PC will restart again and show you the Windows 11 lock screen. Log in to your PC to see the message “Hello. This may take a few minutes” on the screen.
Step 10: Once the setup is complete, you will see the Windows 11 desktop. You can start using your computer. Enjoy Windows 11!

We suggest you check the activation status of Windows 11.
If for any reason you want to downgrade, you must downgrade within 10 days of upgrading to Windows 11. Post that, you will have to do a clean install of Windows 10.