If you are finding that some fonts are not working properly on your computer, or you don’t want them to be difficult to read or taking up space on your PC or laptop, then you’ve come to the right place. work properly. In this guide, we’ll show you in a few steps how to delete or remove fonts on a Windows 11 PC or laptop using the Settings app.
Fonts
A font is a collection of characters with similar designs. These characters include uppercase and lowercase letters, numbers, punctuation marks, and symbols.
Changing the font can change the appearance of the text block. Some fonts are designed to be simple and easy to read, while others give the text a unique style. For example, Arial has a sleek and modern look, while Palatino has an older and traditional look.
How to remove fonts on Windows 11
If you’ve got incredulous fonts installed and are finding it difficult to read the myriad of different styles you’ve downloaded, or just want to free up valuable space, then uninstalling those fonts will help. Here’s how you can do this:
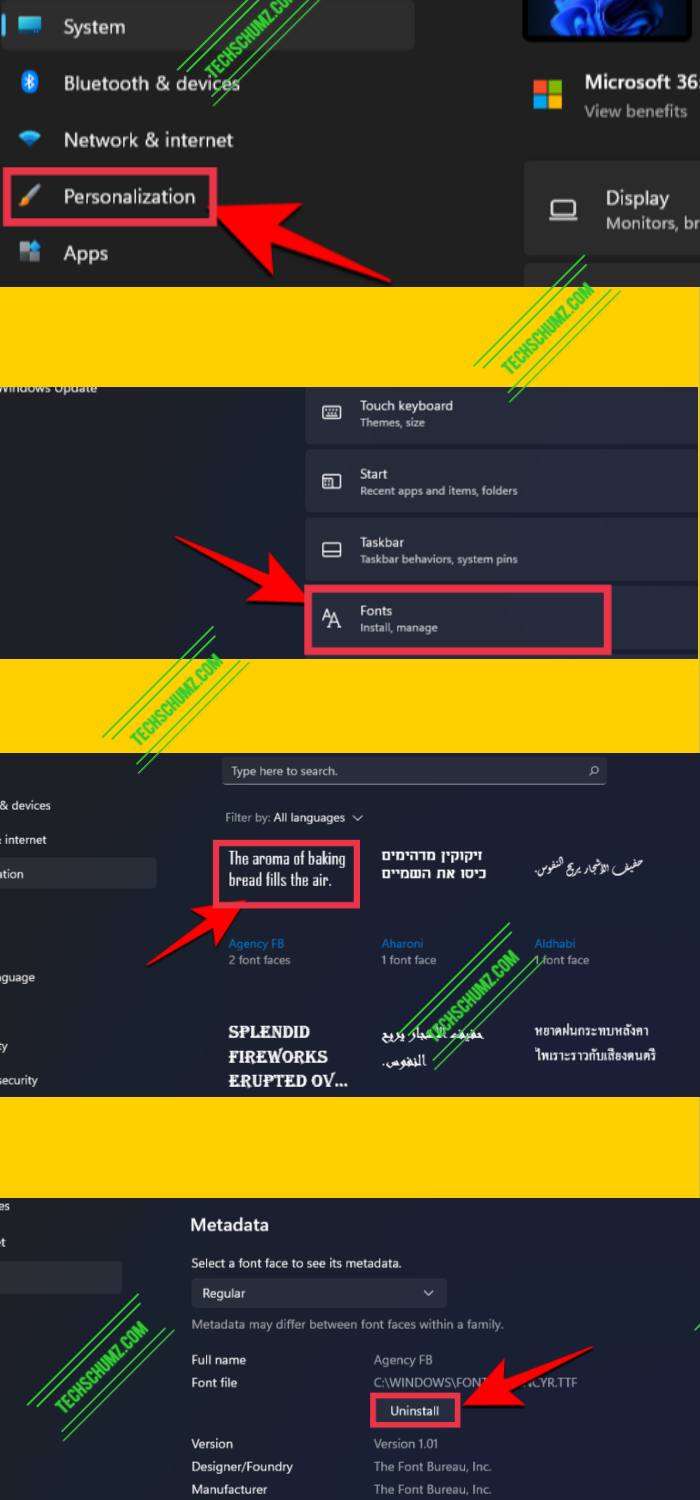
- To uninstall a font on Windows 11, you need to open the settings by opening the Win + I Keyboard shortcuts.
- Then tap the personalization Tab in the left pane.
- Then choose Fonts from the right.
- Now select the font that you want to uninstall or delete from your PC or laptop (you can also search for it by entering its name under “Available Fonts”).
- When you’re finished, just click Uninstall Button to remove the selected font from your computer.
Writers know how subtle changes to their workflow can spark the imagination and keep fingers moving. And changing the fonts on Windows 11 is one way to do it. Finally, when you are wondering how to install a font on your Windows 11 computer, click here.