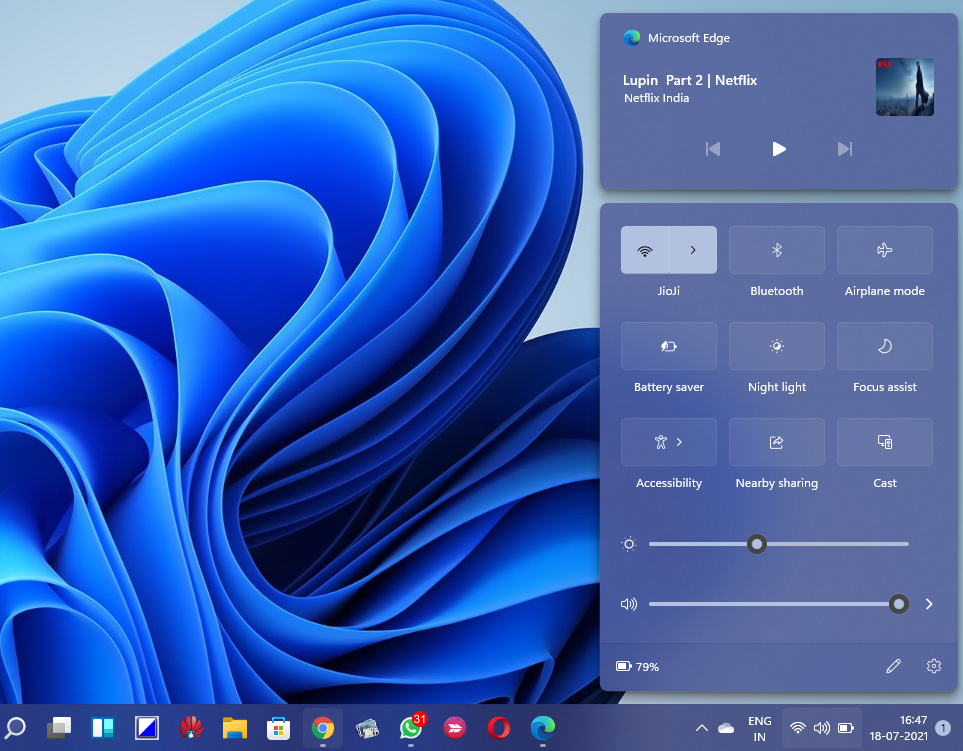
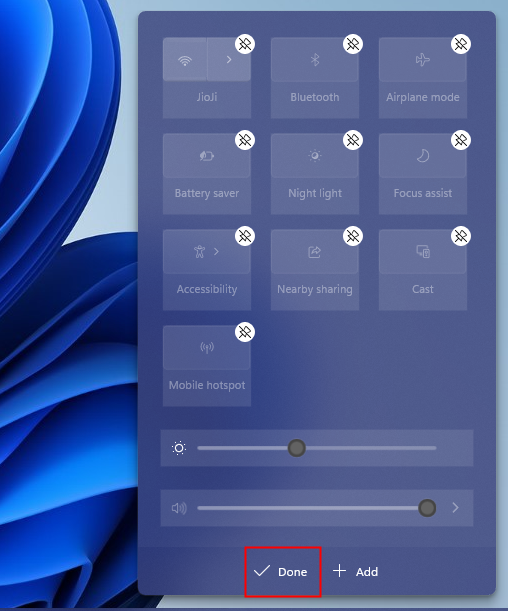
Similar to the quick action feature of Windows 10, Windows 11 comes with the quick settings feature. Windows 11’s quick settings are now part of the new Action Center experience, which splits the user interface into two flyouts (quick settings and notification center). The “Quick Settings” menu contains the most common settings, such as:
- Wireless (WLAN),
- Bluetooth,
- Airplane mode,
- Power saving mode,
- Night light,
- Focus assistant,
- Accessibility,
- Shop nearby,
- Throw,
- Brightness,
- Volume etc.
When you play audio or video with the Microsoft Edge browser, a new media control appears in the quick settings above the flyout. From here you can play / pause or open the next / previous audio / video in the list.
You can use
Topics covered
How do I add buttons in Windows 11 quick settings?
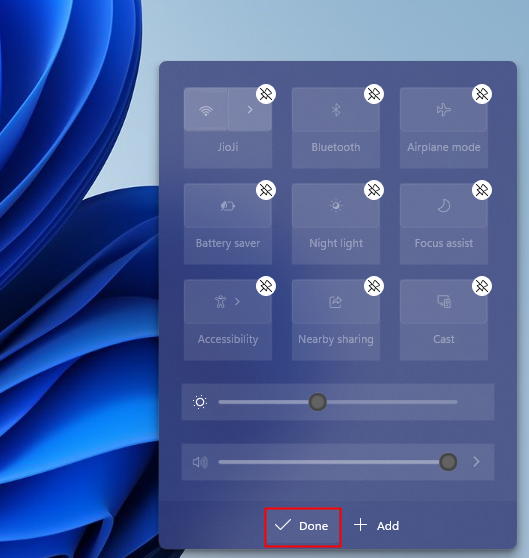
Step 1. Bring up Quick settings by pressing
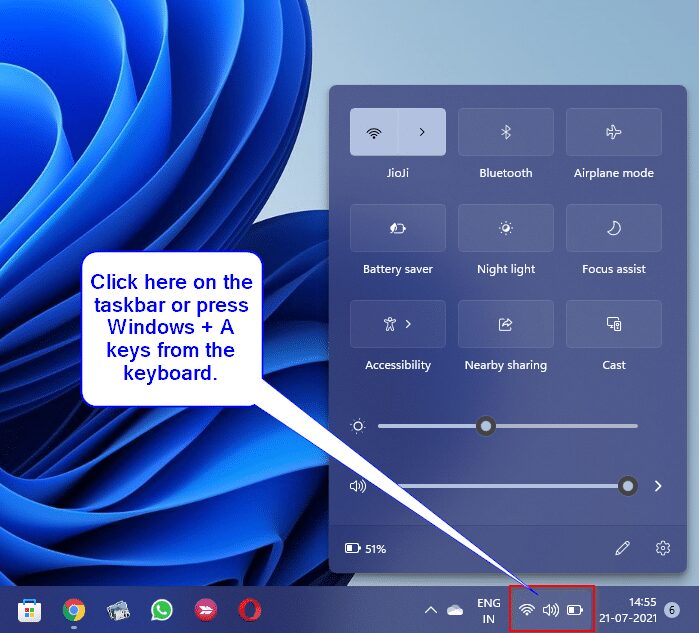
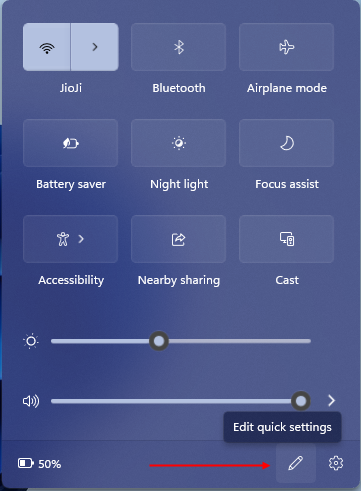
Step 2. On the Quick settings Flyout, click that Pencil icon (edit quick settings button).
Step 3. In the next dialog, click the
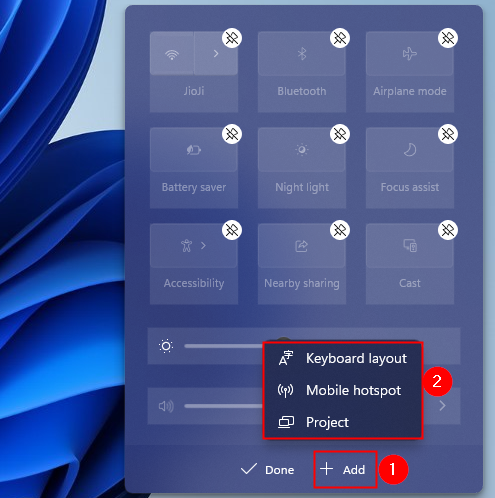
Step 4. Finally, click the
Repeat the above steps if you want to add more buttons to the Quick Sets flyout.
How to remove buttons from Windows 11 quick settings?
Step 1. Bring up Quick settings by pressing
Step 2. On the Quick settings Flyout, click that Pencil icon (edit quick settings button).
Step 3. In the next dialog, click the
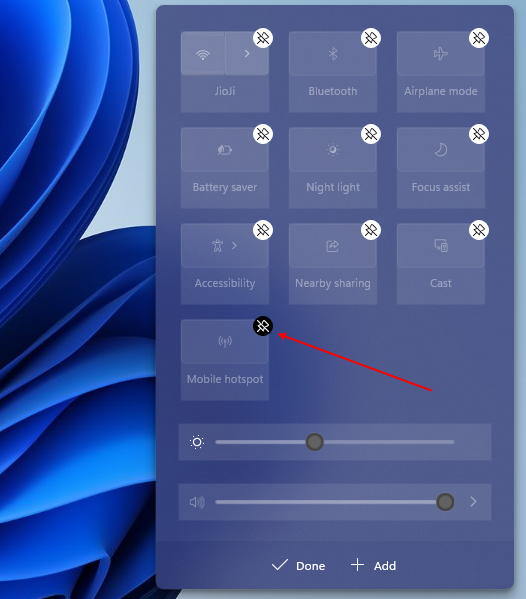
Step 4. Finally, click the
You’ll need to repeat the above steps if you want to remove any more buttons from the Quick Settings flyout.
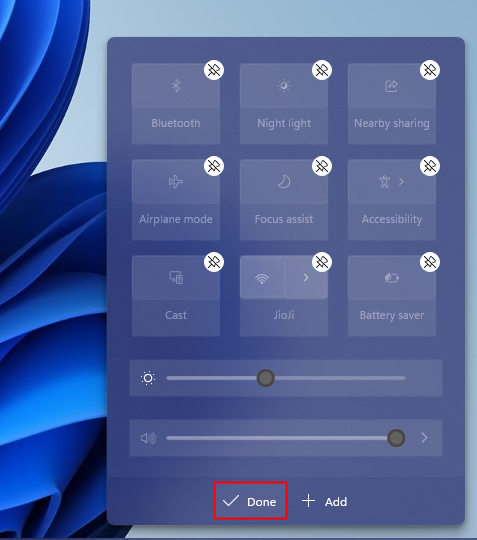
How do I arrange the quick setting buttons in Windows 11?
Step 1. Access Quick settings by pressing
Step 2. On the Quick settings Flyout, click that Pencil icon (edit quick settings button).
Step 3. In the next dialog box, drag and drop the quick set items to the desired location to rearrange them. Finally, click on that
That’s all.