How do I turn off mouse acceleration in Windows 11? So you notice that your mouse pointer is racing across the screen faster than you move the mouse? It is high time to disable or turn off mouse acceleration in Windows 11. There’s nothing wrong with your mouse. it is related to mouse acceleration, also known as pointer precision. From Windows XP this function is continued up to Windows 11. By default, this feature (mouse acceleration) is enabled on your Windows 11 PC.
Microsoft has implemented the feature for those Windows users who work slowly or move their mouse slowly. By implementing this feature, users feel that the mouse is under their control as it travels more distances and speeds that the cursor moves across the screen on a surface in response to the speed of the physical mouse.
Those who play video games may be familiar with this feature, and most of the time they disable or disable this feature to stabilize the cursor movements on their screen. Once this feature is disabled, the cursor will move a fixed distance based only on the physical activity of your mouse.
Turning off mouse acceleration is relatively easy, even if you are new to Windows 11. You can deactivate this function quickly and easily on your Windows 11 PC with the “Settings” app. If you are new to Windows 11, you should know that it is not third-party software. It’s a built-in feature of Windows 11 that was first introduced on Windows 10.
The Settings app is pretty impressive and allows you to do multiple tasks in Windows 11, including AutoPlay settings, rearranging quick settings, resetting apps, adding or removing printers, and more.
If the Mouse acceleration Windows 11’s feature causing unsolicited problems, Microsoft has provided an option to enable or disable this feature. This means that with the “Settings” app you can activate or deactivate the mouse acceleration function in Windows 11 as you wish. This Gearupwindows article will tell you how to enable or disable the mouse acceleration feature on Windows 11.
How do I enable or disable mouse acceleration in Windows 11?
As mentioned above, the mouse acceleration feature remains enabled with the default Windows 11 configuration. However, you can enable or disable this feature as needed. If the mouse acceleration function causes unsolicited problems, you can disable this function. However, when mouse pointers take up less space, this feature can be turned on: your PC, your choices, and your needs. Nobody can stop you. Just continue with other steps.
Step 1. Open the Settings app by pressing the Windows + I keys on the keyboard at the same time.
If you’re new to Windows 11, check out our full guide to opening the Settings app. If you want, you can remember one method of opening the Settings app. The Settings app on Windows 11 is pretty impressive and lets you do multiple tasks on your PC.
Step 2. As soon as the Settings app opens, click on the
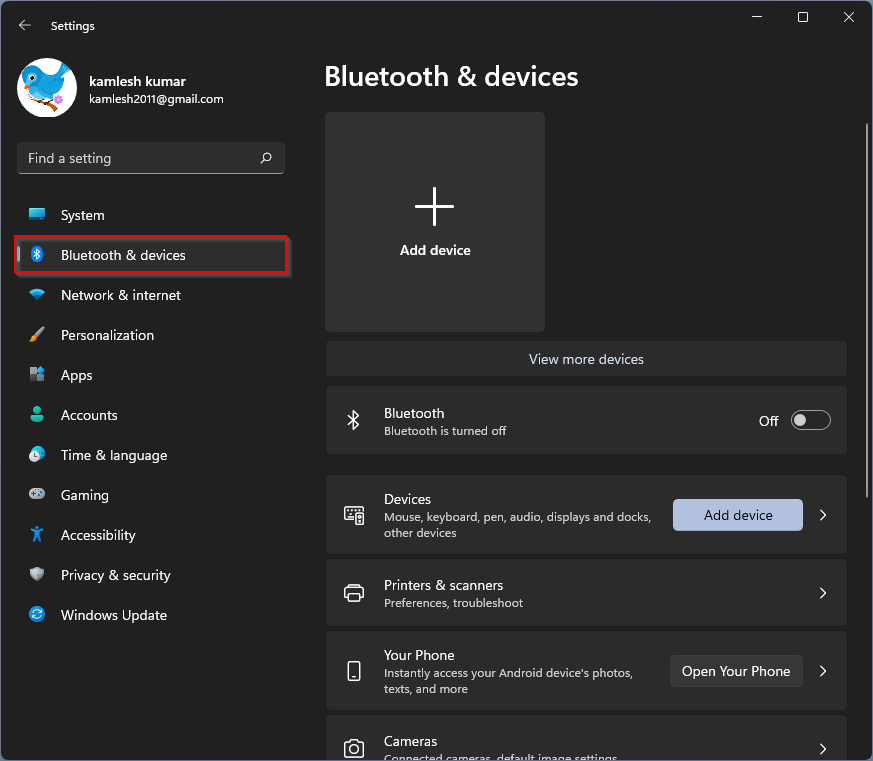
Step 3. Now in the right pane of Bluetooth and devices, click on the
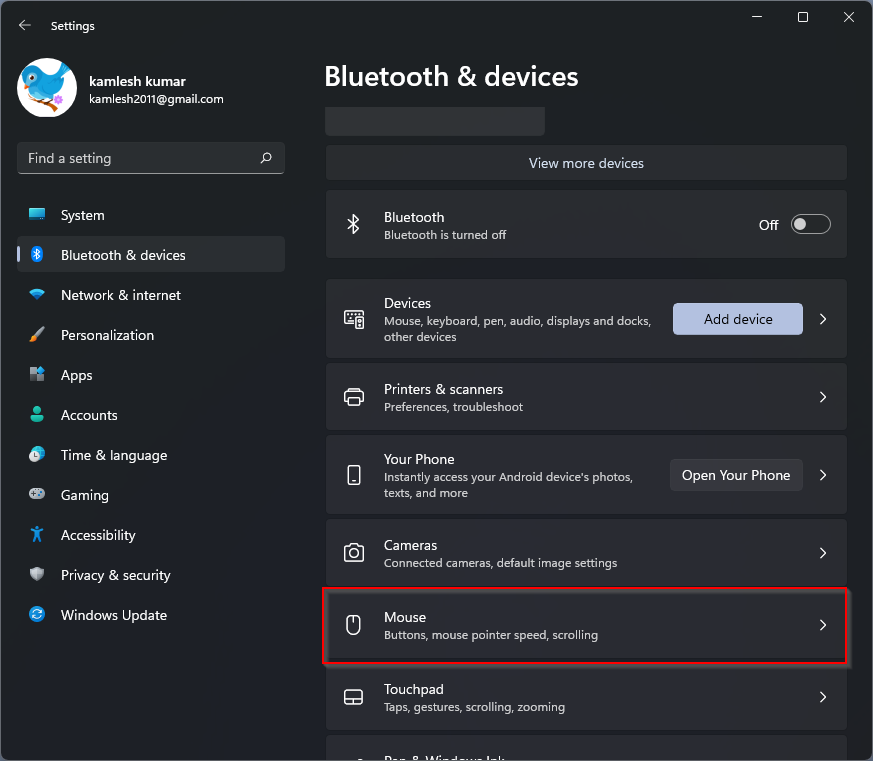
If you don’t see that mouse Option you have to scroll down in the right side window. Fewer options may be displayed depending on the screen size of the monitor.
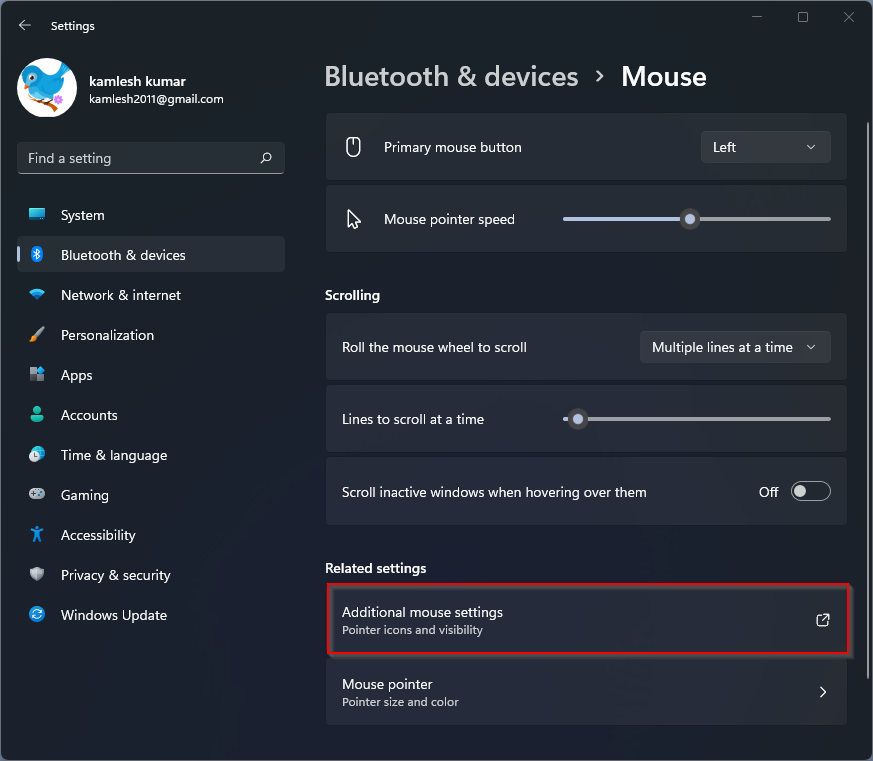
Step 4. Under the Associated settings Section, click the
Step 5. Well that cursor Window will open.
Choose
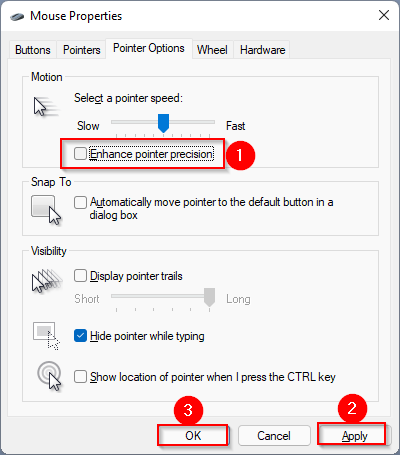
Step 6. Finally, click the
That’s it. Now you have successfully disabled or disabled mouse acceleration in Windows 11. If you’d like to re-enable this feature on your Windows 11 PC, repeat the steps above and check the box labeled in step 5