Windows 11 comes with a brand new file explorer and new design menus. Windows 11’s modern and elegant file explorer works on traditional and touch-based computers or laptops. On the other hand, you need to learn where to find new items and commands in Windows 11. Accessing hidden files and folders is easy on Windows 10, but not on Windows 11.
There could be several reasons to show hidden files / folders on Windows 11. You may find that a folder is larger than its contents and you want to know why? If your Windows is infected with virus, there are several files / folders you need to check while troubleshooting. There can be many reasons for those who want to unhide the folders / files on your Windows 11 computer or laptop.

Let it be any reason; If you want to show or hide files / folders on your PC, this Gearupwindows article will help you. Before proceeding with the steps, however, make sure that you can only show and hide files / folders for your current user account. That means, if you have two user accounts on your PC, you have to show files / folders in the file explorer for both user profiles. If you show files / folders in a user profile, they remain hidden in another user profile account on your PC.
Topics covered
How do you show hidden files and folders in Windows 11 using “Layout and View Options”?
This is the easiest way to unhide hidden files and folders in Windows 11. You need to do the following:
Step 1. Open File Explorer by pressing
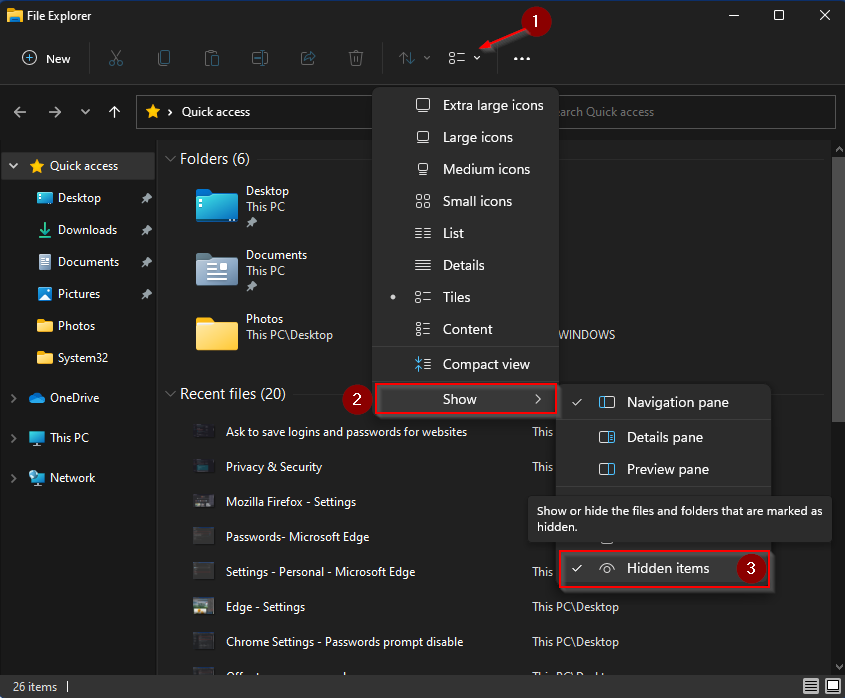
Step 2. Click the
That’s all. Once you have completed the above steps, all the hidden files and folders will be visible and saved on your PC. You will find that files / folders previously hidden are slightly transparent while the others are normal.
If you want to hide the files / folders that you previously hidden, repeat the steps above to uncheck the Hidden Items option. Now all hidden files / folders will be invisible again.
How to show hidden files and folders in Windows 11 using folder options?
You can also use the folder options to view the hidden files and folders in Windows 11. This is the traditional method and applies to all versions of Windows including Win 10, 8 / 8.1 / 7 / Vista. Proceed as follows to show files / folders:
Step 1. Open File Explorer by pressing
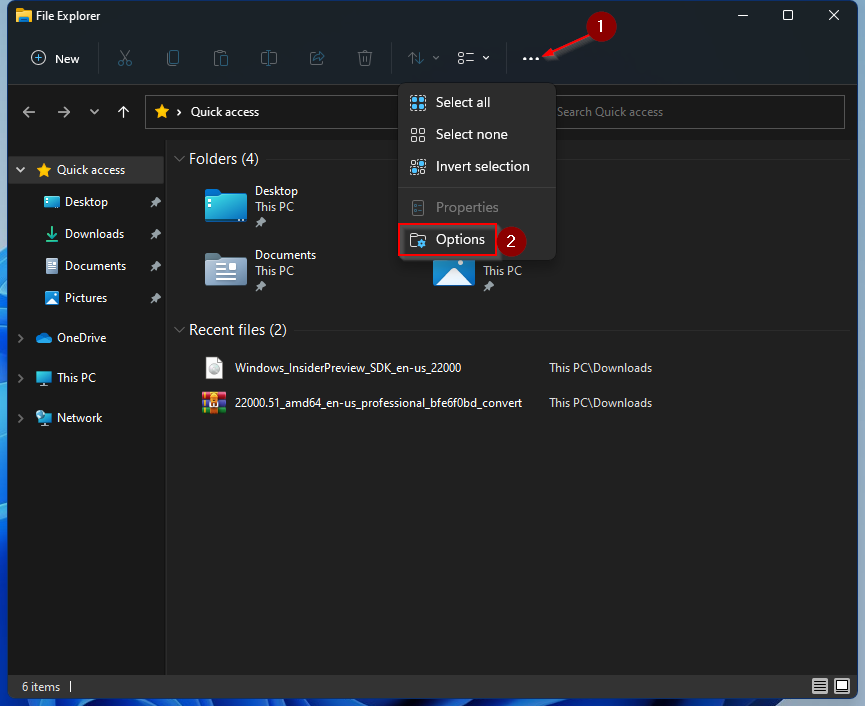
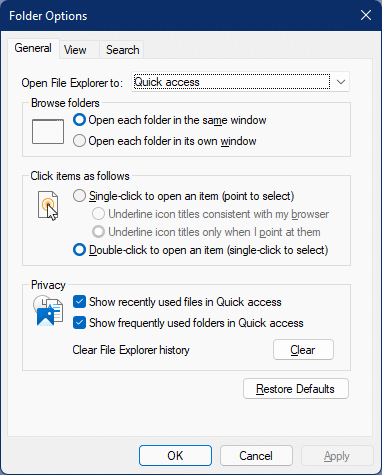
Step 2. The above action will open the Folder Options dialog box on your PC.
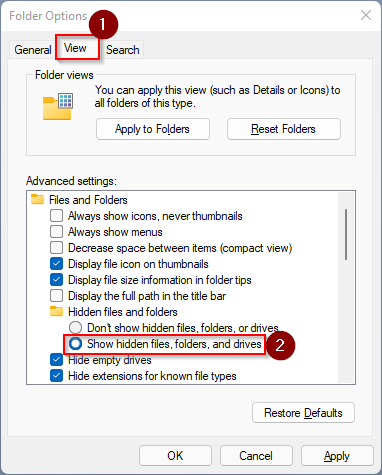
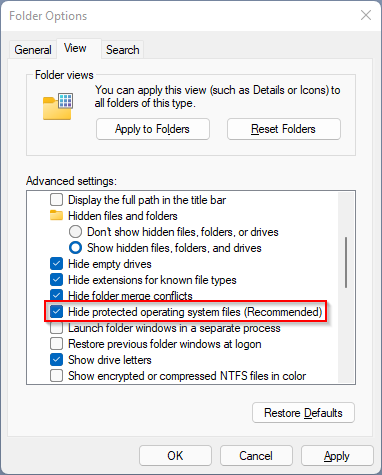
Step 3. In the Folder Options window, click the view Tab. Select the radio button “Show hidden files, folders and drivers”.
Step 4. If you want to see the protected operating system files as well, scroll down under the view Tab and uncheck the option “Hide protected operating system files (Recommended).”
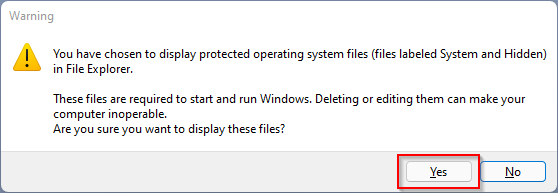
Step 5. A warning window will now appear with the message “You have chosen to display protected operating system files (files named System and Hidden) in the file explorer.” Click on the Yes , to continue.
Step 6. Finally, click the Apply and then OK Button in Folder options window
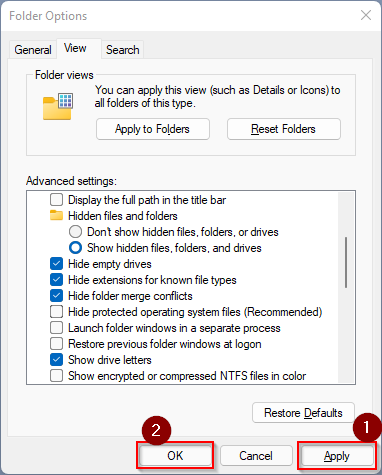
After following the steps above, you will see all the hidden files / folders on your PC. To restore the default settings, click the Restore Defaults button in the Folder Options window.