Not satisfied with the current name of your PC and want to rename your computer to Windows 11? It’s always better to give your computer a meaningful name. If you didn’t choose a proper name or a random name when you installed Windows 11 and now want to change the name, you can do so on a Windows 11 PC.
It’s difficult to find out if you used random names, especially when you have a lot of PCs over the network. Finding a computer you need is harder when you share files between PCs via Wi-Fi or some other method. You may want to rename Windows 11 PCs after setup so that you can easily identify them. For example GearUpWindows-PC, Pammi-PC etc.
In this Gearupwindows article, we are going to guide you to rename your PC name in Windows 11.
Renaming your computer name is easy, and there are several ways to do it. You can use any long name. The PC name can contain Latin letters, numbers, and hyphens. However, spaces and symbols (except hyphens) are not allowed. That means we can’t name my PC as GearUpWindows-PC-1 or GearUpWindows PC 1. When I try to rename my PC to GearUpWindows-PC-1 or GearUpWindows PC 1, Windows 11 won’t accept.
Topics covered
How do you rename your PC in Windows 11 using the Settings app?
Step 1. Launch the Settings app by pressing
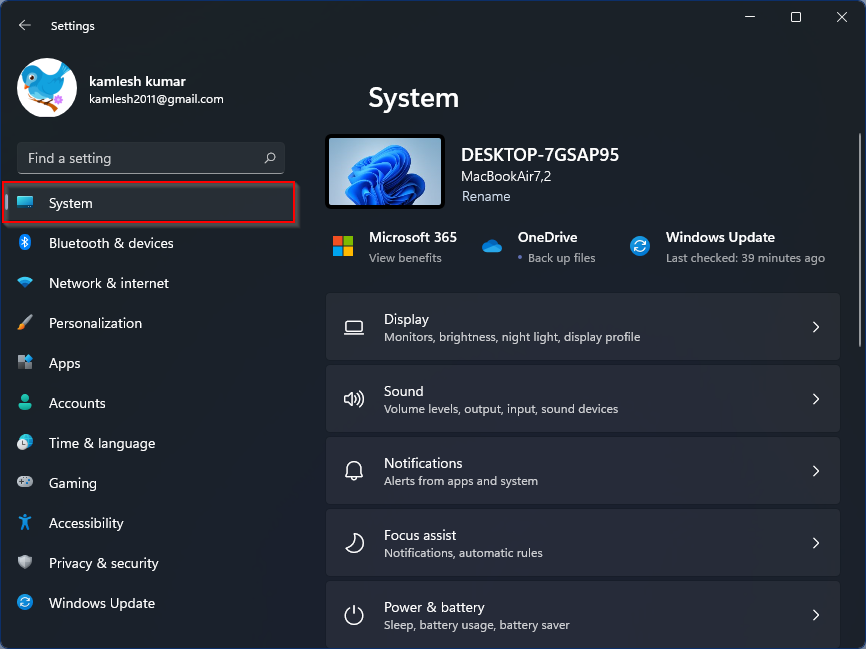
Step 2. Now scroll down in the right area of. downward system and then click on
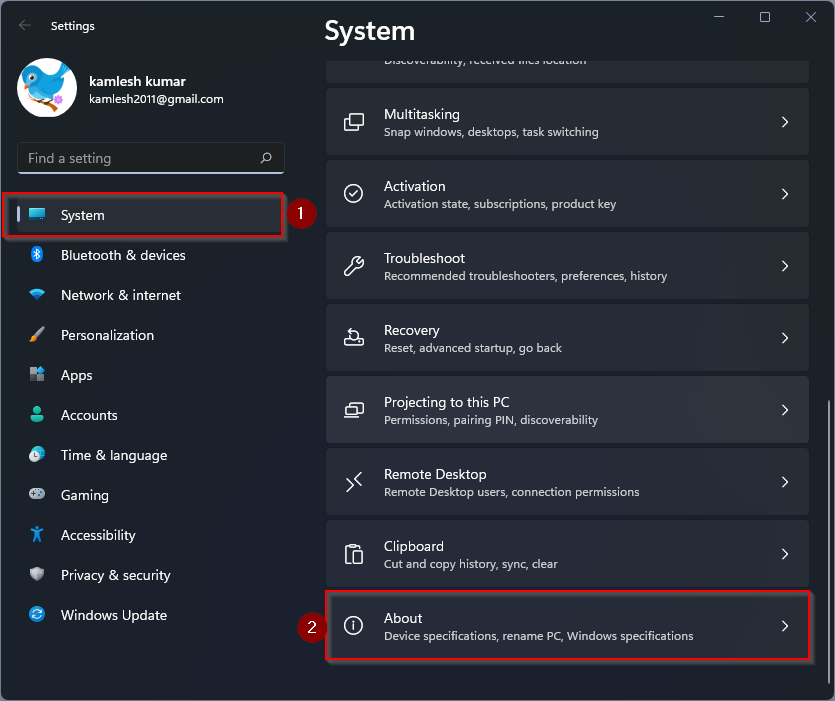
Step 3. Click
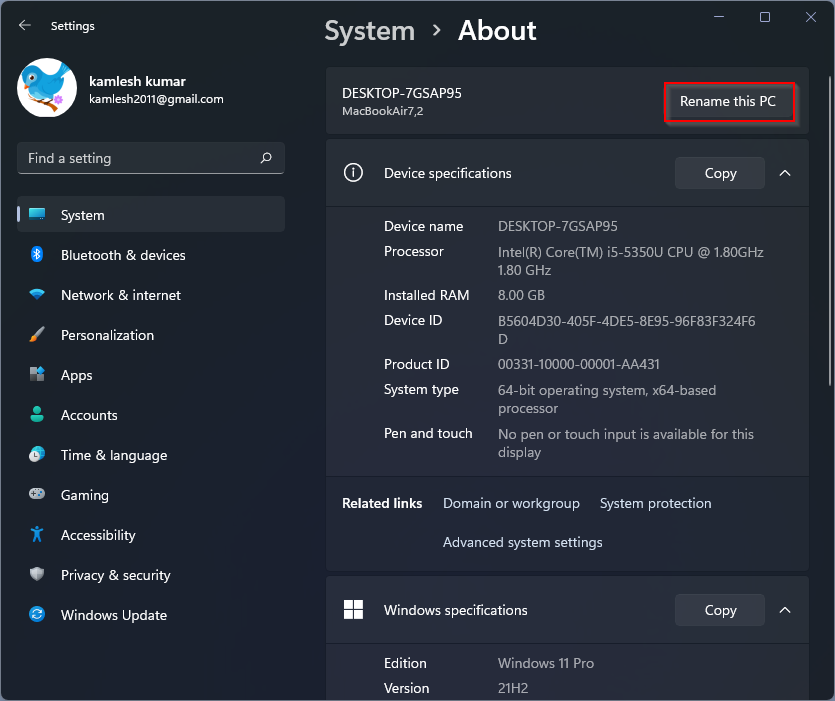
Step 4. In the “Rename your PC” pop-up window, enter the new name of your PC in the text box, then click
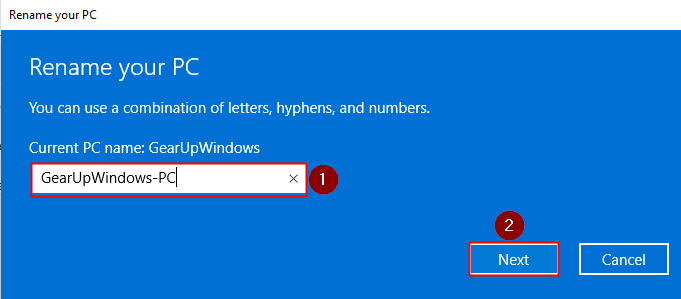
Step 5. When prompted, click the
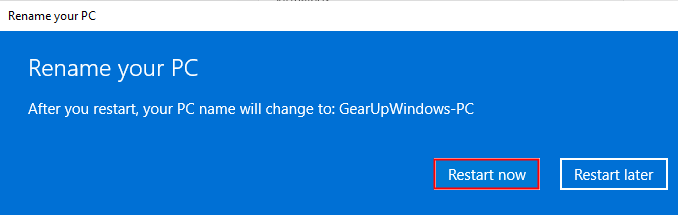
If you want to restart your computer later, click the
How do you rename your PC in Windows 11 via Control Panel?
Control Panel is still part of Windows 11, and you can use it to rename your PC.
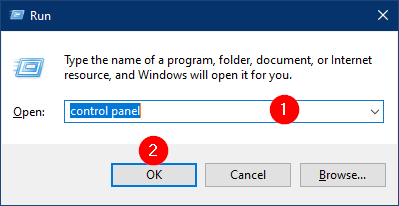
Step 1. Open the Control Panel.
To start the Control Panel, go to the Run Dialog box by pressing
Step 2. Im Switchboard Window, put “Show by” on category, and then click
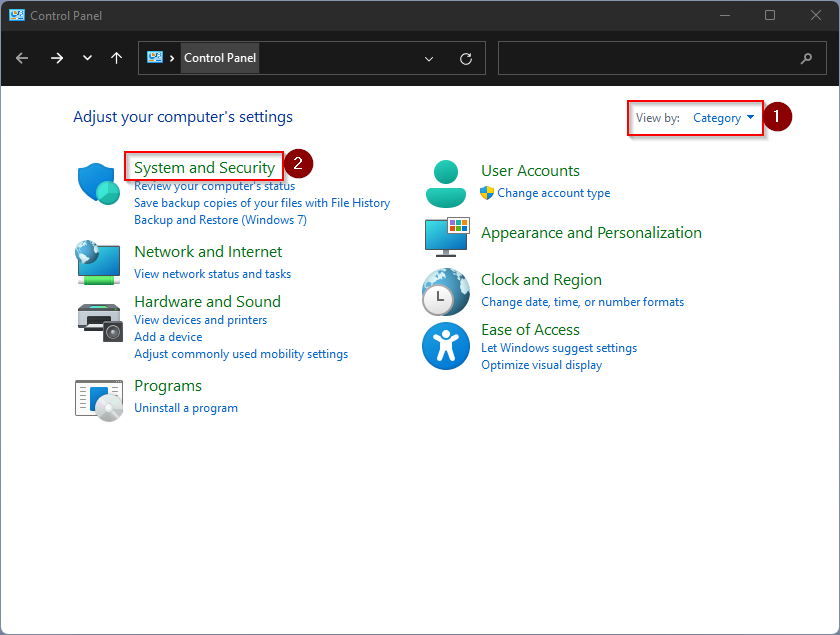
Step 3. On the system and safety In the window click on the link marked with
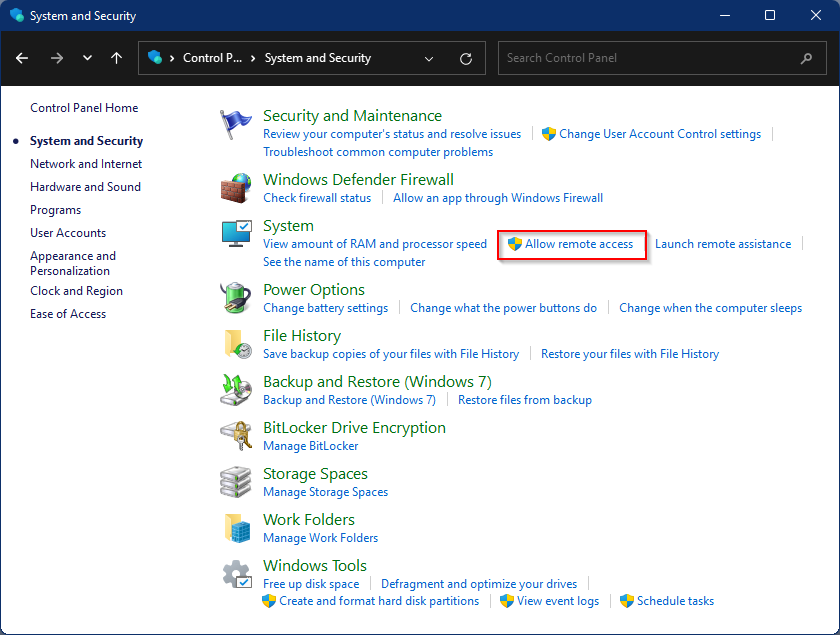
Step 4. The “System Properties” window will now open. Choose “Computer name”Tab and then on that
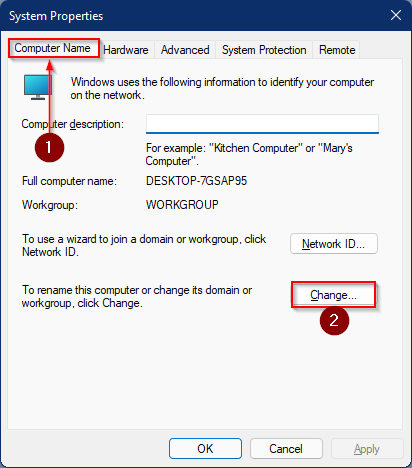
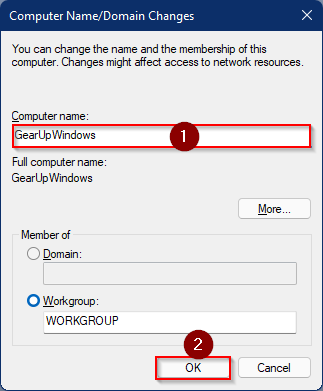
Step 5. In the new pop-up “Computer name / domain changes“Write your new PC name under the”Computer name“Box. When you’re done, click that OK Button.
Finally, restart your computer for the changes to take effect.