While installing Windows 11 on a computer, Microsoft insists that you associate your PC with a Microsoft account. To install Windows 11 Home Edition, you will also need to sign in with a Microsoft account to complete the setup. Most Windows users don’t want to sign in to their PC with a Microsoft account and then remove it from their computer after completing Windows 11 setup.
Signing in to a Windows PC with a Microsoft account has its own advantages. When you sign in to your Windows PC with a Microsoft account, you get additional features such as OneDrive, Microsoft Store and the availability of the synchronization service. All of these functions are handy; However, it is also possible to remove the microsft account from Windows 11.
If you remove the Microsoft account from your PC, your Windows PC will not sync your PC with the cloud. Many Windows users store sensitive information on their PC and do not want to upload their personal information online. If you also have a privacy issue and don’t want to sync your PC with the Microsoft account, you can remove that account from your computer.
All you have to do is add a local account to your computer and then log into your PC with that account. Then you can easily remove the Microsoft account from your computer. Otherwise, the option to remove the Microsoft account will be grayed out. Because your computer needs at least an administrator account to log into your PC.
A local administrator account is required to remove the Microsoft account from your PC. Therefore, in this Gearupwindows article, we will add an administrator account first and then show the process of removing Microsoft account from your PC.
Topics covered
How do I create a local administrator account on Windows 11?
Step 1. Open the Settings app, then click the
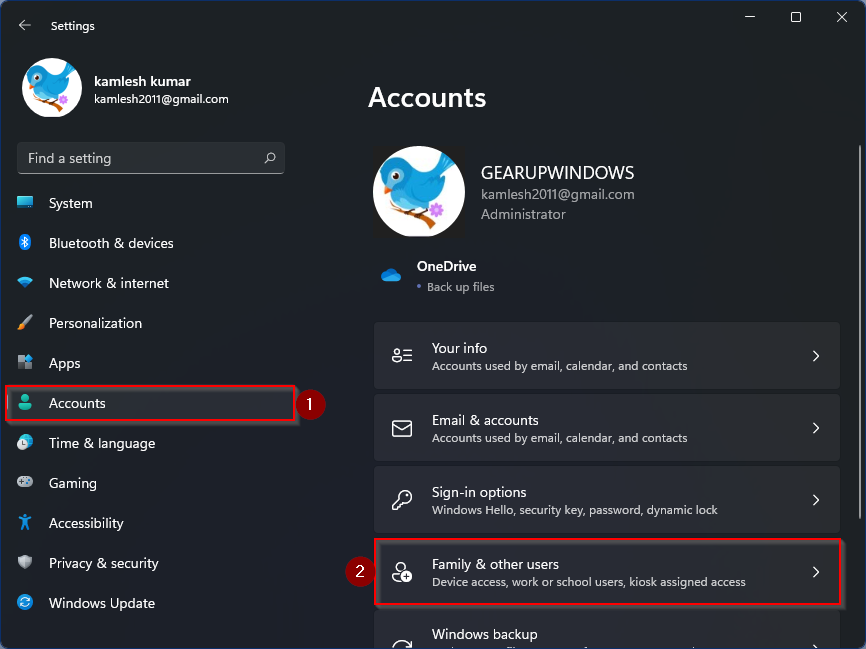
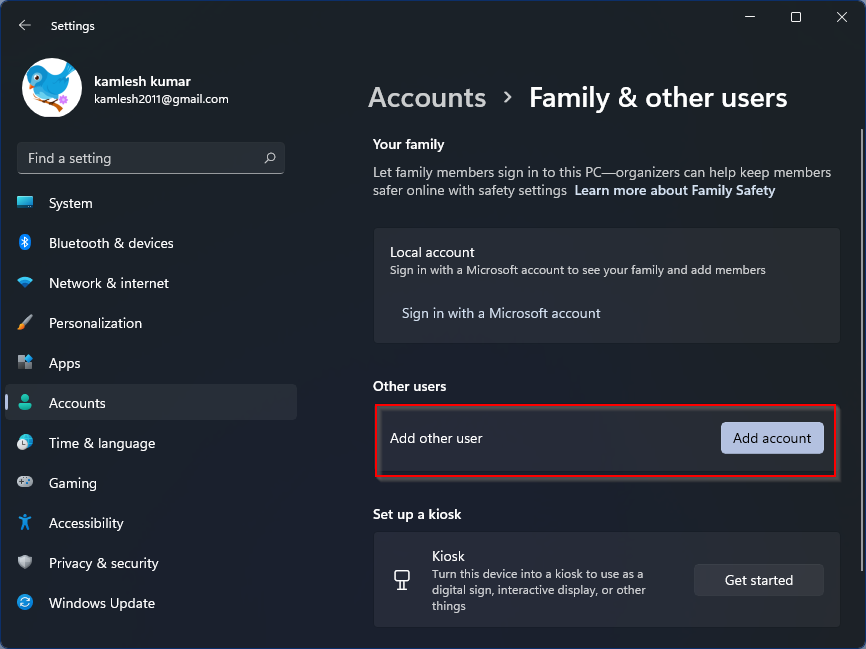
Step 2. Now click on that
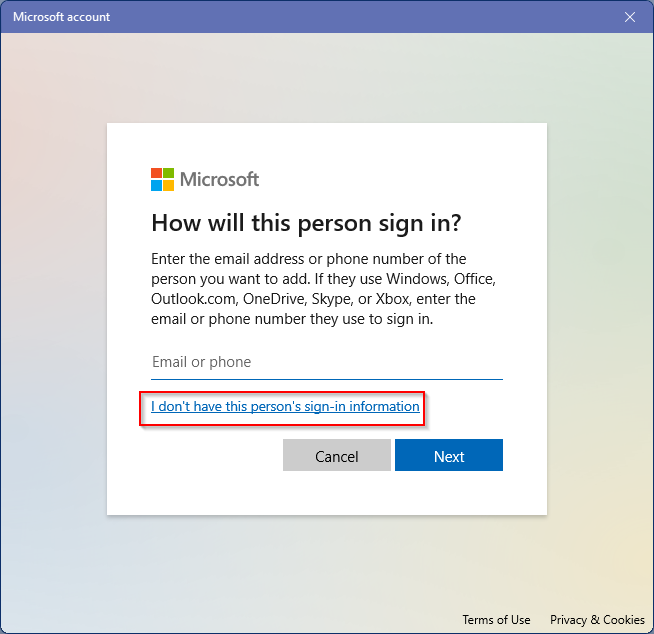
Step 3. In the pop-up window that appears, click the link marked with
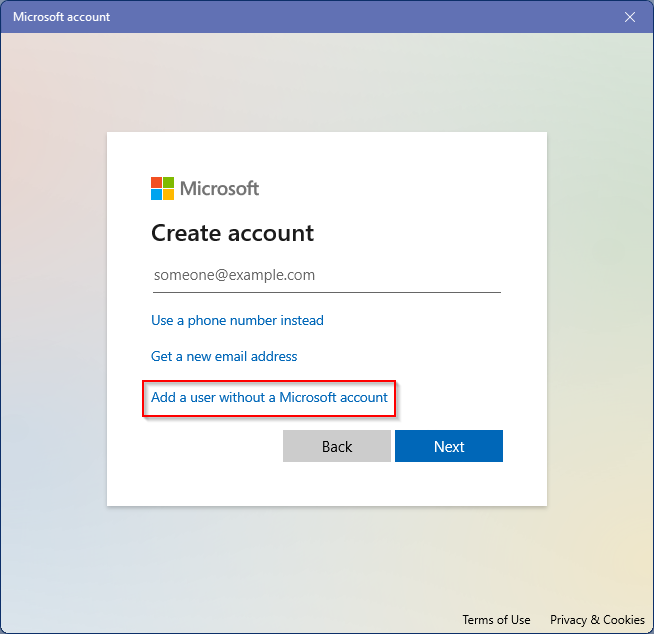
Step 4. In the next window, click the link
Step 5. Now enter an account name into the
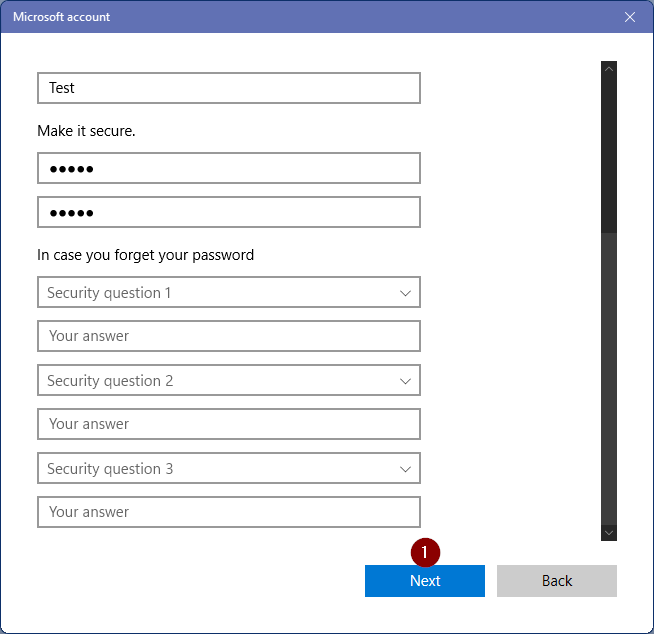
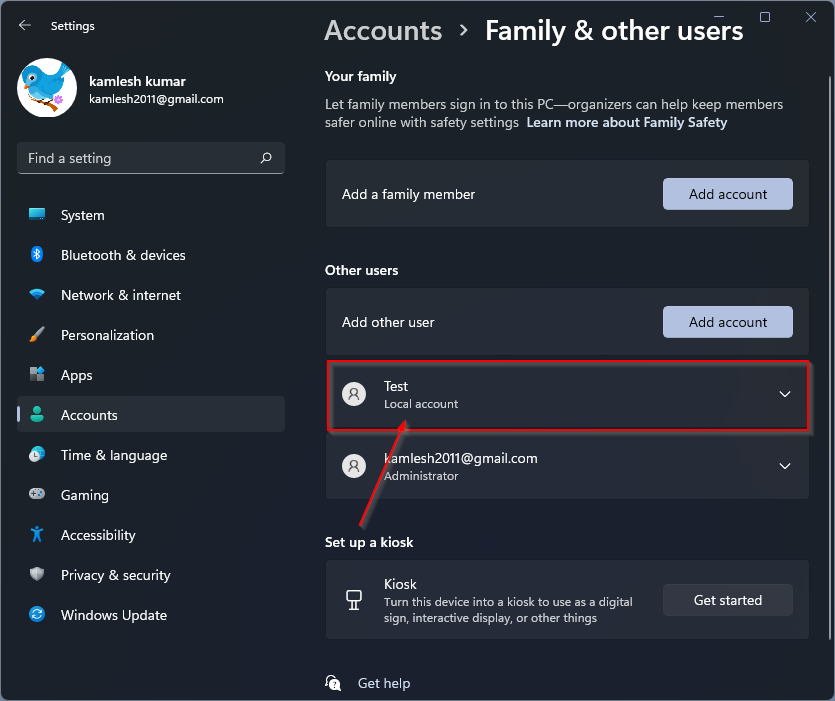
Step 6. Finally, you should see the newly created account in the “Other Users” section.
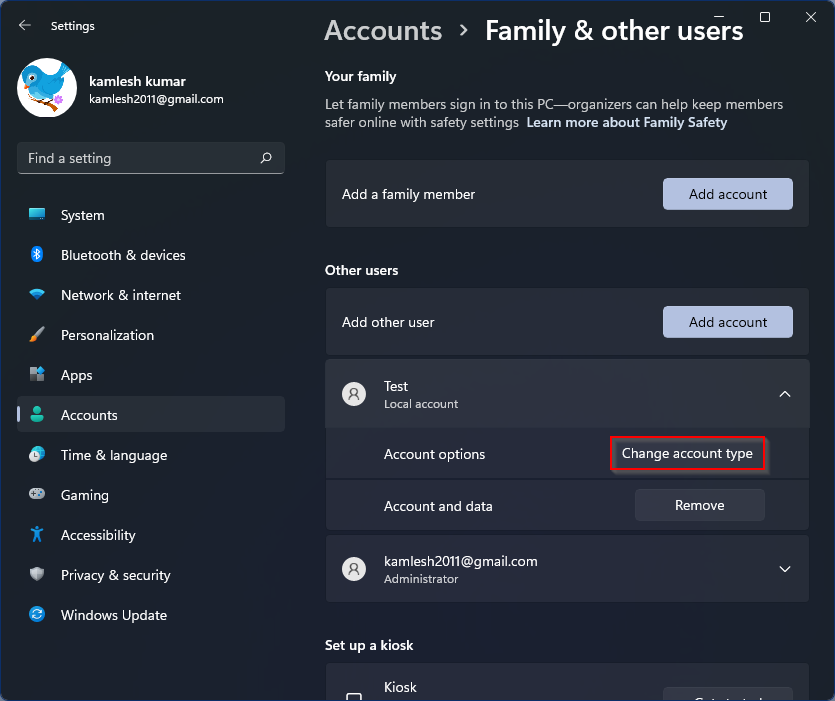
Step 7. Even though you’ve created a local account on your PC, it has limited rights, which means it doesn’t have administrator rights. To remove your Microsoft account from your computer, you need an administrator account. Therefore, we need to grant administrator rights to the newly created account in Windows 11. To do this, click anywhere on the newly created user account to expand it, and then click
Step 8. A new “Change account type” pop-up window will now open. From the drop-down menu of “Account type,” choose
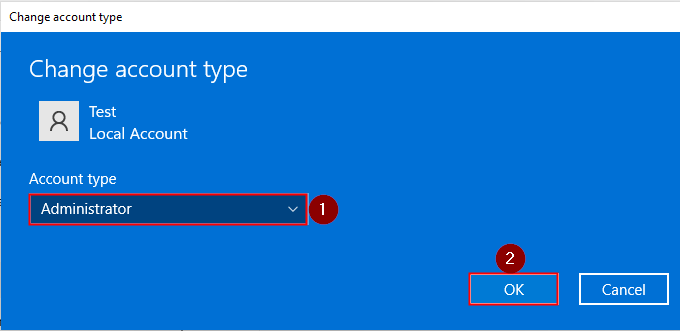
You now have a local user account with administrator rights on your Windows 11 PC. You can delete any user account from both your PC and your cloud account.
How to remove Microsoft account from Windows 11
Step 1. Sign in to your Windows 11 computer with your local administrator account.
Step 2. Open the Settings app by clicking. to press
Step 3. All of your accounts will be listed here, including the Microsoft account that you added during the Windows 11 installation. Click anywhere on the cloud account to expand it, and then click
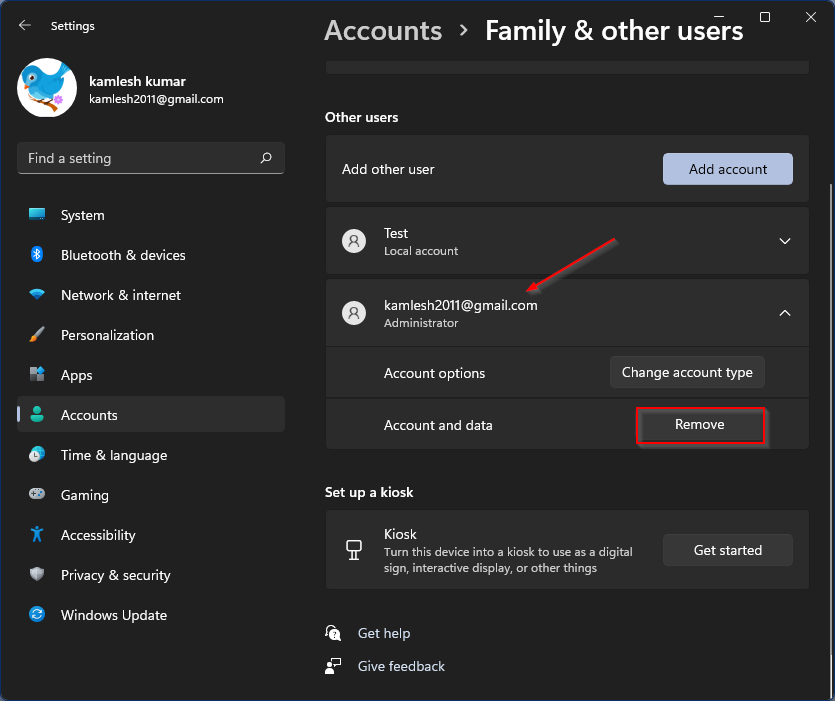
Step 4. Next, click
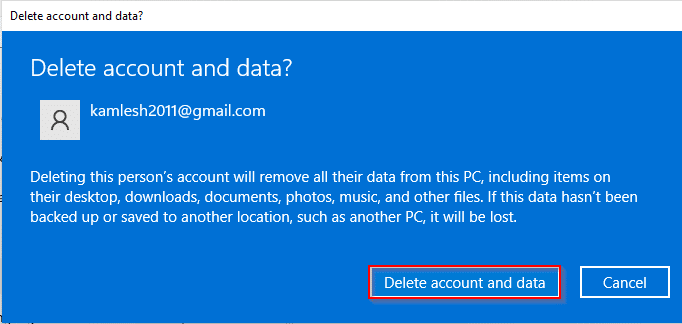
Once you’ve followed the steps above, the Microsoft account and associated profile data will be deleted from your PC.