Windows 11 has a built-in printer, Microsoft Print to PDF. Microsft also allows you to delete an unnecessary printer. Even you can delete this built-in Microsoft Print to PDF printer. It’s a good feature that allows you to print any document in a PDF file. This is a useful feature for many of us. You can quickly print out any document as a PDF and save it on your PC for future reference or share with someone.
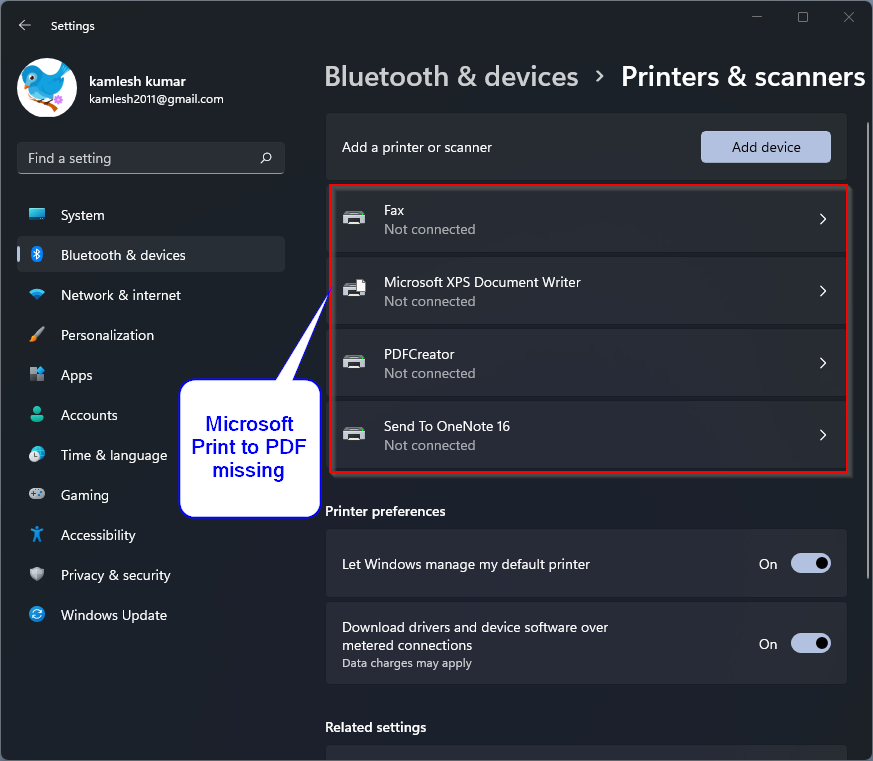
However, if you deleted it accidentally or for whatever reason, Microsoft Print to PDF printer is missing from Windows 11, you can recover it by running commands. With a few commands, you can simply reinstall it on your computer or laptop.
How do I reinstall Microsoft Print to PDF printer in Windows 11?
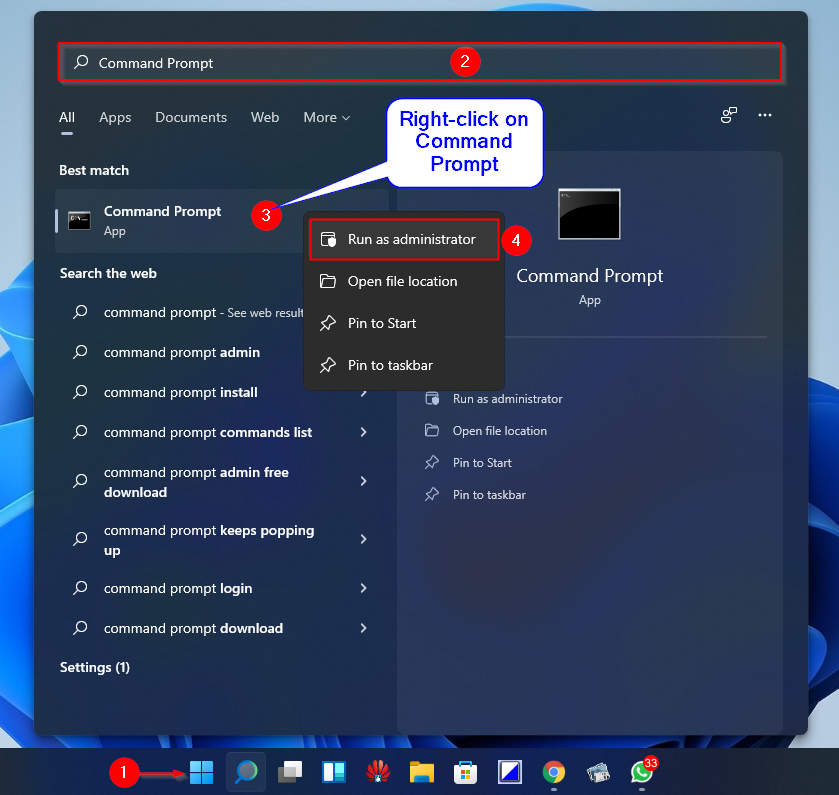
Step 1. Open the command prompt with administrator rights.
To do this, click on the begin Button on the taskbar, and then enter
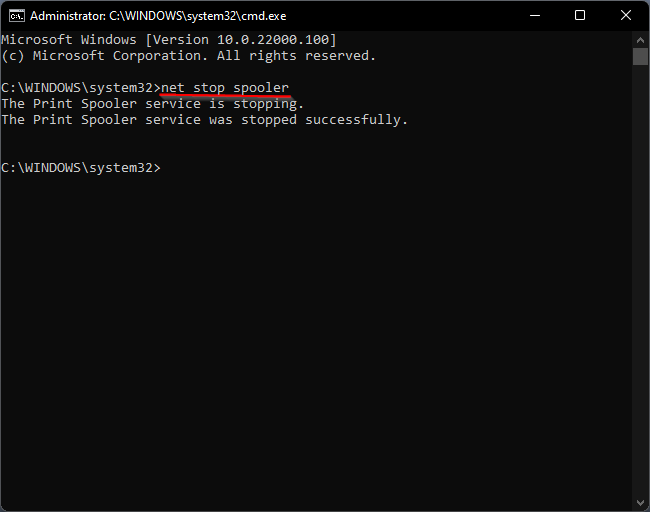
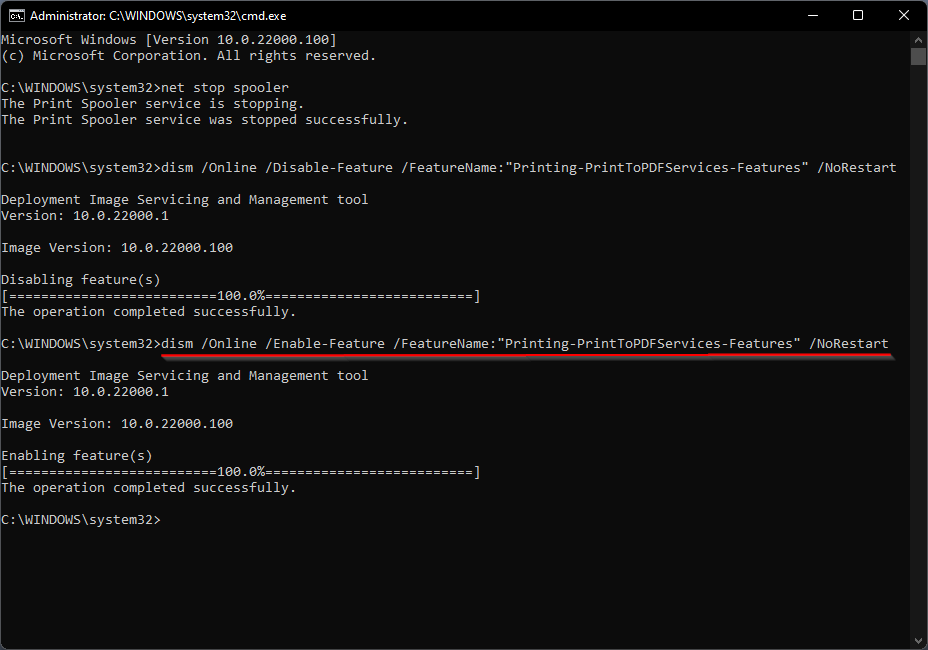
Step 2. In the elevated Command Prompt window, type the following and press Enter on the keyboard to stop the print spooler service:
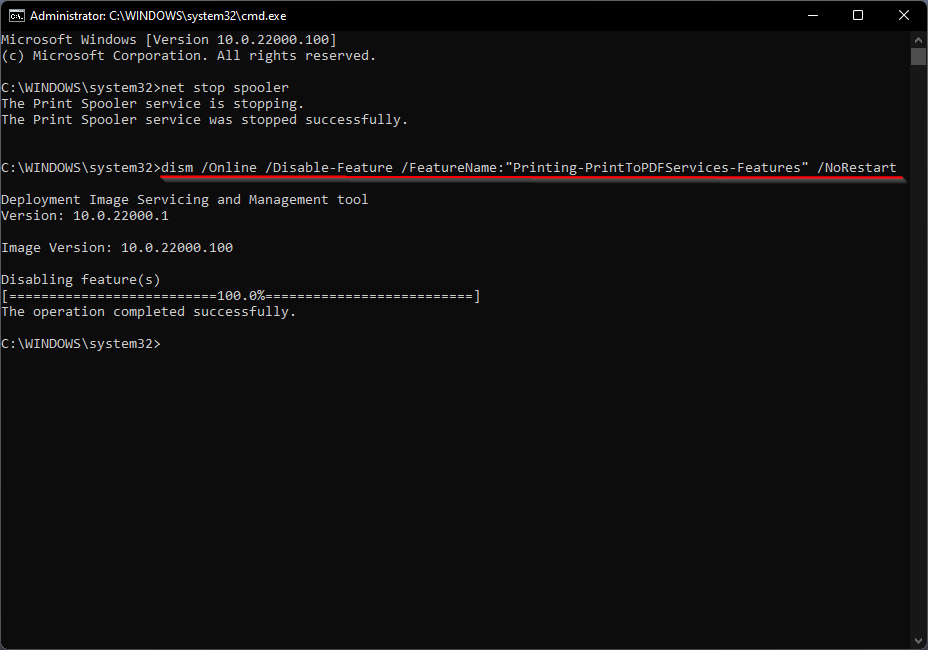
net stop spooler
Step 3.Now run the following command to uninstall or disable the PDF printer feature:
dism /Online /Disable-Feature /FeatureName:"Printing-PrintToPDFServices-Features" /NoRestart
Step 4. The above command removes that Microsoft Print to PDF from your Windows 11 PC. To reinstall it on your PC, copy and paste the text below into the Command Prompt window and press
dism /Online /Enable-Feature /FeatureName:"Printing-PrintToPDFServices-Features" /NoRestart
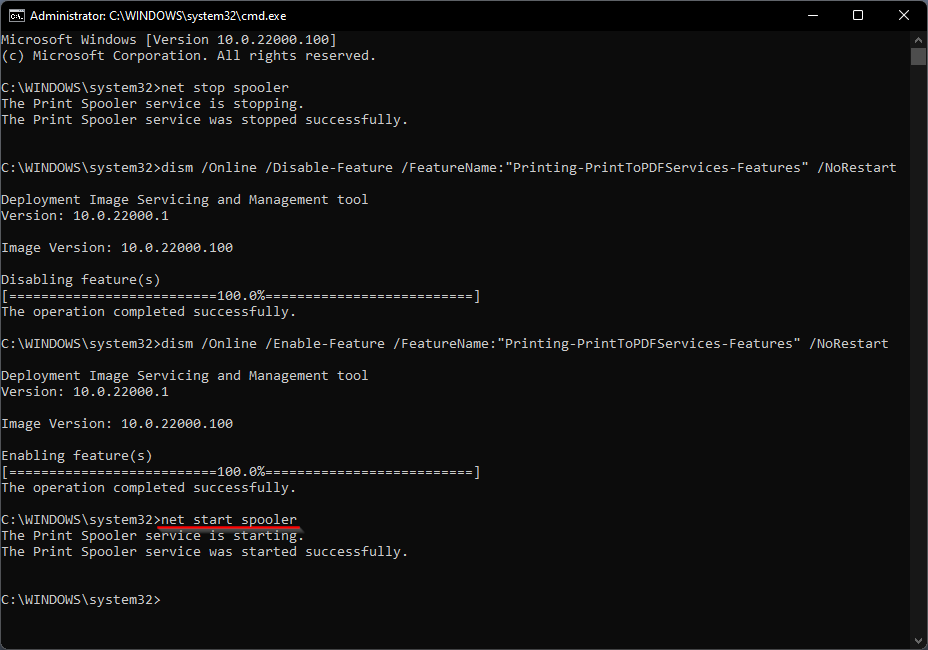
Step 5. That’s all. You have now reinstalled the Microsoft Print to PDF printer on your PC. Now is the time to start the print spooler service. Without this service, you cannot print a document virtually or physically. To do this, copy and paste the following texts and then press Enter on the keyboard to execute the command:
net start spooler
That’s all. The Microsoft Print to PDF printer will now appear in your printer list. With this printer you can print any documents as PDF. Just press Ctrl + P Select on the keyboard Microsoft Print to PDF Printer from the list, and then click the Save on computer Button to receive the desired document as a PDF file.
also read: Fix “Microsoft Print to PDF” is missing in the printer selection