
Windows 11 has extensive renovations and a host of new features, and it has a whole new look. You can see it in the new Start menu with rounded corners and the ability to add and delete widgets. This new operating system also offers a host of productivity improvements, such as Snap Layouts that let you run multiple apps at once, and Windows 11 also makes it easy to enable or disable network adapters through the Settings app so that you no longer have to need to use the control panel. In this guide you will learn How to activate and deactivate WiFi or Ethernet in Windows 11 quickly and easily via the Settings app.
Enable and disable WiFi or Ethernet in Windows 11 in the settings
Although Control Panel is still available in Windows 11, you no longer need to use it to disable or enable Wi-Fi or Ethernet network adapters as this option is now built into the Settings application. This comes in handy when you encounter network connection problems. If you have multiple adapters and you want to disable the adapters you don’t need, disabling them and then re-enabling them will fix the problem.
Now the Windows 11 Settings app contains the settings on the Advanced Network and Internet Settings page. Here’s a quick way to enable or disable network adapters in Windows 11.
Activate the Ethernet or WiFi adapter using the settings in Windows 11
Follow the steps below to enable and add a WiFi or Ethernet adapter in Windows 11:
- Go to the settings app on your Windows 11 PC or laptop.
- Then tap the Network & Internet Option from the list.
- Then tap that Advanced network settings Tab on the right.
- Now you can use the Activate Button for the WLAN or Ethernet adapter that you want to activate.
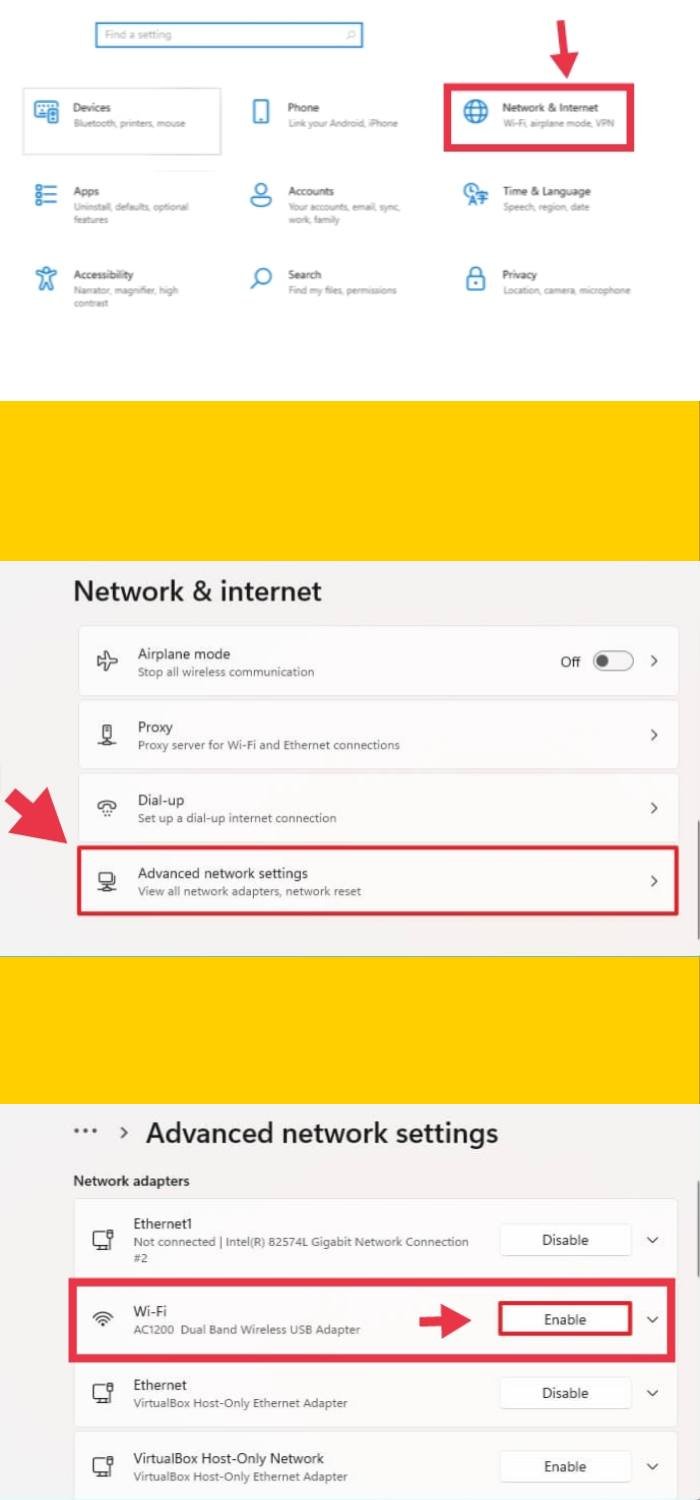
After following these steps, you can have the wired or wireless network adapter start accepting connections in Windows 11.
Disable the WiFi or Ethernet adapter using the settings in Windows 11
To disable or delete a WiFi or Ethernet adapter using the Windows 11 Settings app, do the following:
- Go to the settings on your Windows 11 computer.
- Then tap the Network & Internet Option from the list.
- Then choose the Advanced network settings Tab on the right.
- Now you can use the Deactivate Button for the WLAN or Ethernet adapter that you want to deactivate.
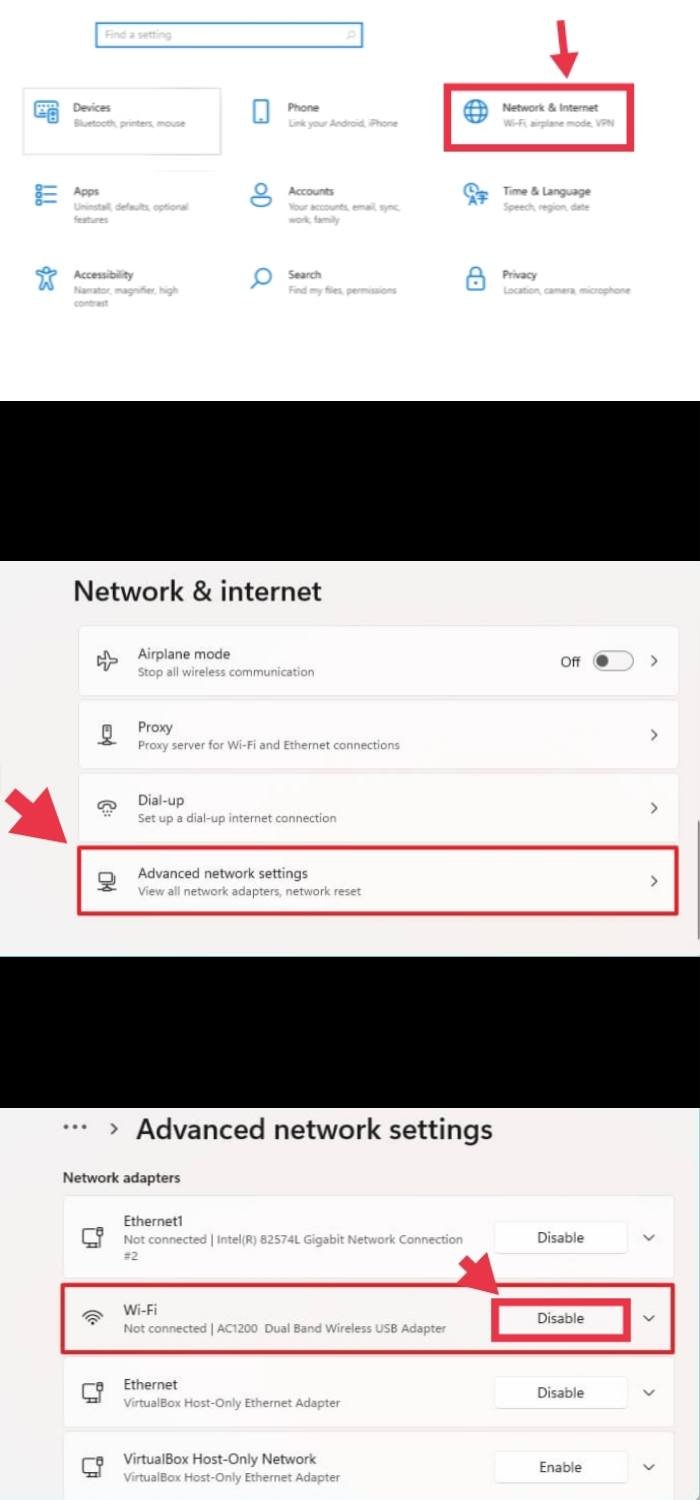
Once you complete the steps, the network adapter will be disabled and connections will not be allowed. If you resolve a connection problem, you can use the following steps to turn it back on.
That’s all! Enjoy Windows 11!
Also read:
- How to turn off automatic Windows updates in Windows 11
- How to fix Windows 11 and Linux showing different times when dual booting