Most Windows users love Windows 11 and have started installing it on their PC even though Secure Boot and TPM 2.0 are not supported. Some users are testing Windows 11 on a virtual machine because the final version has not yet arrived. Windows 11 offers several new features and tools to increase your productivity. According to Microsoft, Windows 10 will automatically upgrade to Windows 11 if your computer meets the Windows 11 minimum hardware requirements.
If you are not sure whether your PC is compatible with Windows 11, you can use one of the following tools:
- Windows 11 Compatibility Checker
- WhyNot11
- Check it
- PC health check
But what if I don’t want to upgrade to Windows 11? In other words, what is the solution if my computer is compatible with Windows 11 but I still don’t want to update my Windows operating system? Is there any way to stop Windows 11 from installing on my PC? No more Windows 11!
If for some reason you don’t want to migrate to Windows 11, Microsoft has a built-in way to block installation on your Windows 10 computer. You can prevent Windows 11 from installing on your computer by changing registry or group policy settings.
If you’re running Windows 10, tell Microsoft to keep Windows 11 off as I’m not ready to learn. In this Gearupwindows article, we are going to walk you through the steps to restrict the installation of Windows 11 on your PC.
Topics covered
How to block Windows 11 from installing on your computer using Local Group Policy Editor?
You can use the Group Policy Editor to prevent Windows 11 from being installed on your PC. Before proceeding with the steps, however, keep in mind that this option is only available to users with the Pro, Enterprise, and Education editions of Windows 10. That said, if you are using Windows 10 Home Edition you will not be able to use this method to exit Windows 11. However, the next method, Registry Editor, will help all editions of Windows 10 users.
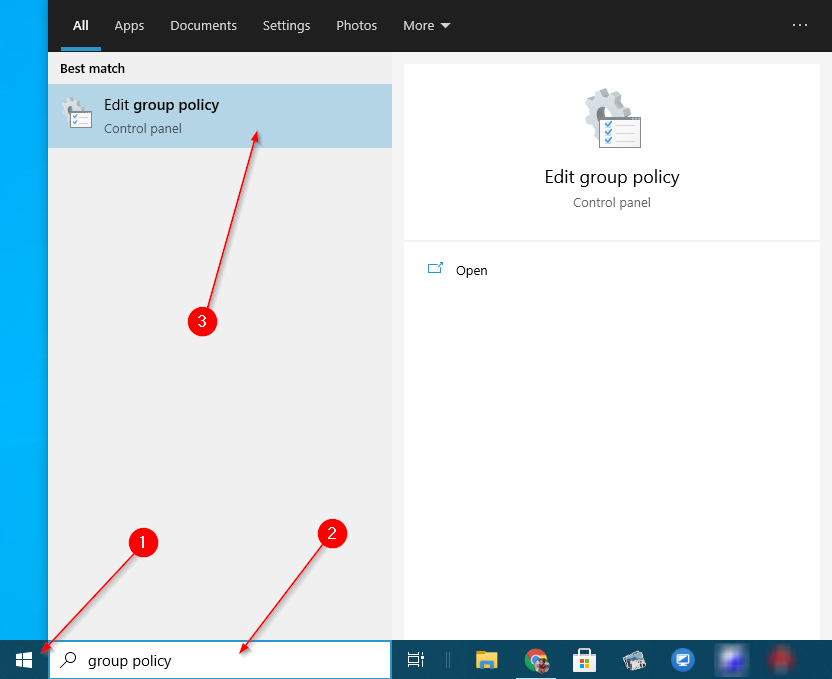
Step 1. Open the Local Group Policy Editor.
To do this, click on the
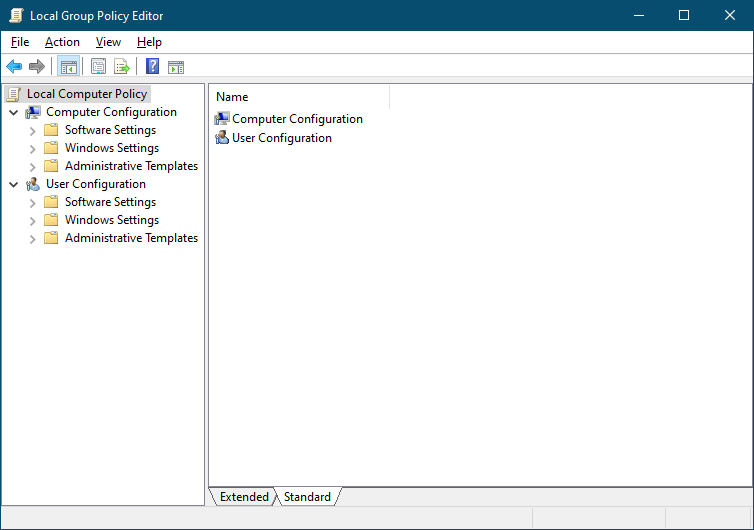
Step 2. Im Local group policy editor, navigate to the following path in the left side panel: –
Local Computer Policy > Computer Configuration > Administrative Templates > Windows Components > Windows Update > Windows Update for Business
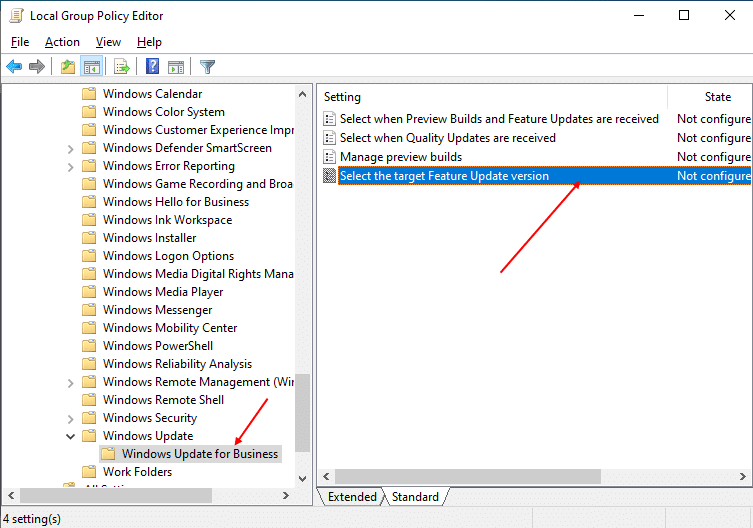
Step 3. On the opposite side of the “Windows Update for Business“Folder, double-click the policy name,”Select the desired feature update version,“To open its settings. Choose
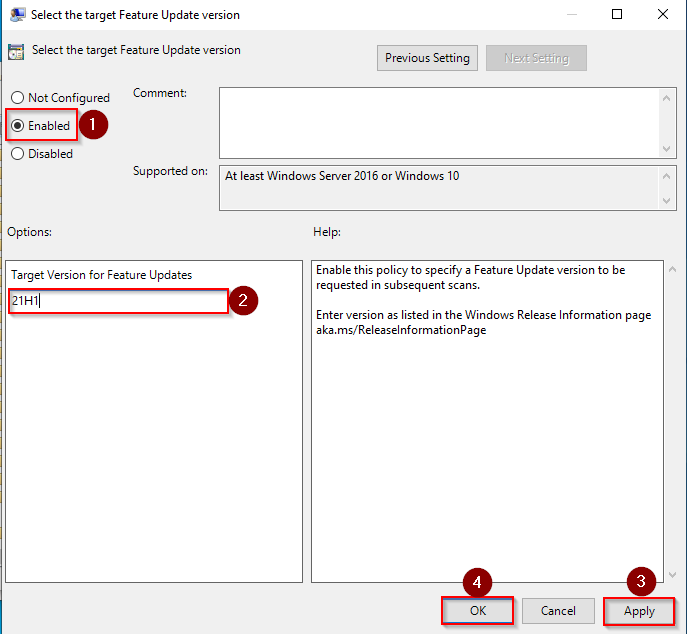
After following the steps above, your PC will not install Windows 11. Once you are ready to install Windows 11, repeat the above steps and select the radio button in step 3
How to prevent Windows 11 from installing on your computer using Registry Editor?
This method applies to all editions of Windows 10. If for some reason you cannot open Gpedit.msc on your PC, you can use this registry editor method.
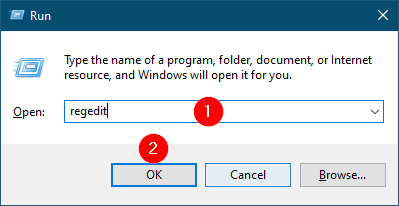
Step 1. Open the registry editor.
To do this, press

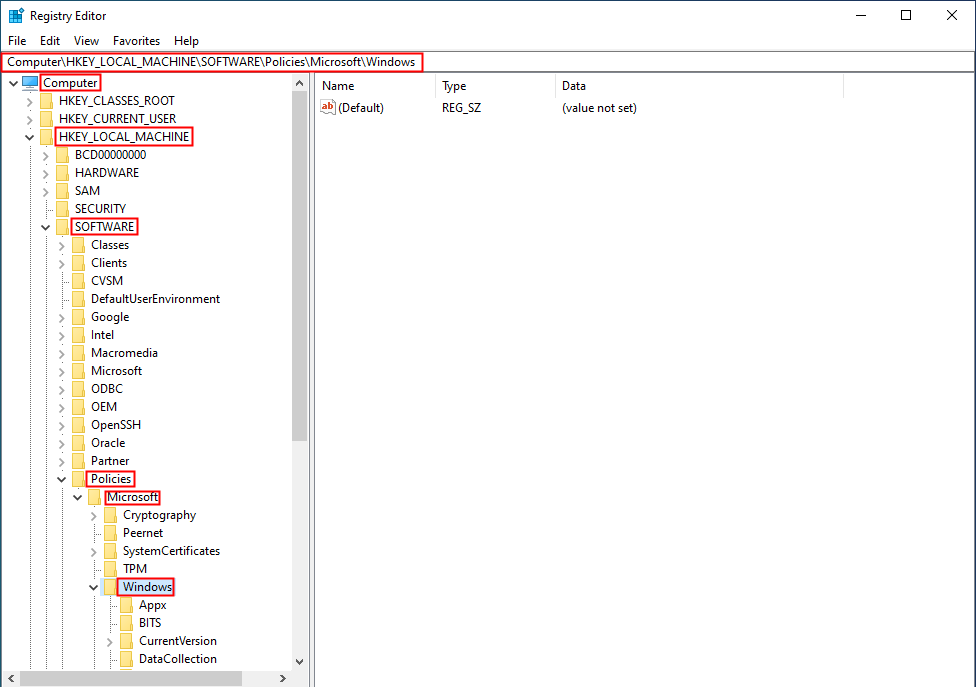
Step 2. In the Registry Editor window, navigate to the following registry key in the left side panel:
ComputerHKEY_LOCAL_MACHINESOFTWAREPoliciesMicrosoftWindows
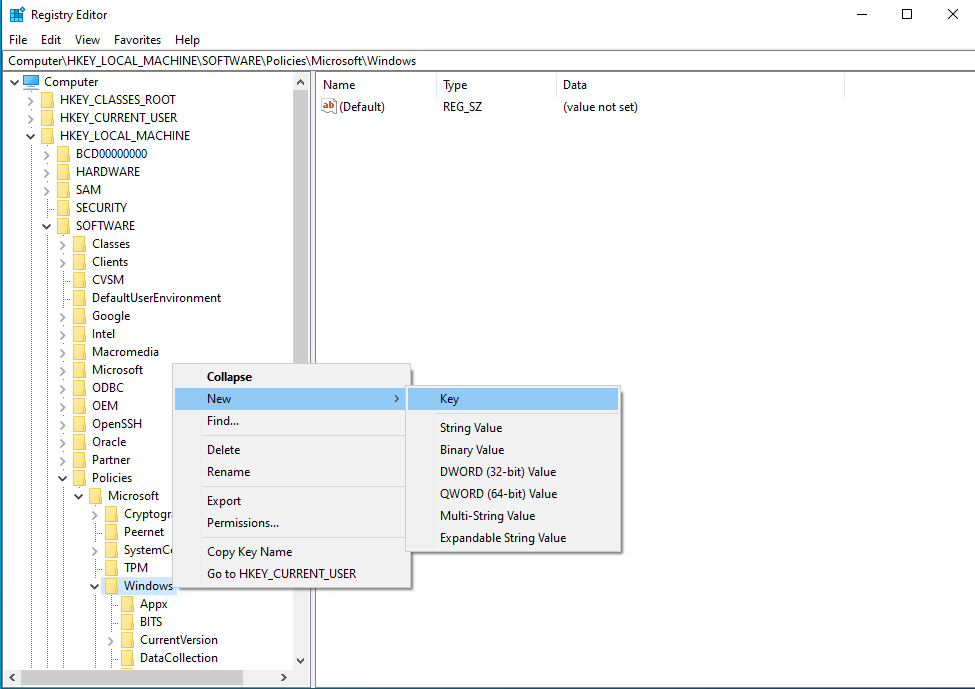
Step 3. Right click on the window Folder, select the
Step 4. Now select the Windows Update Folder and then right click on it. Choose
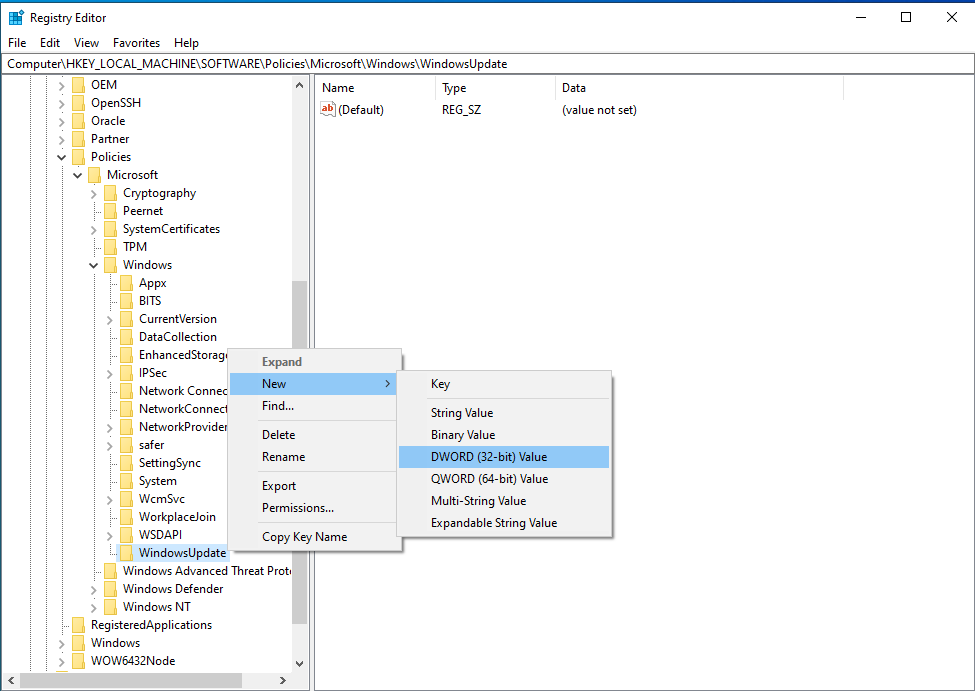
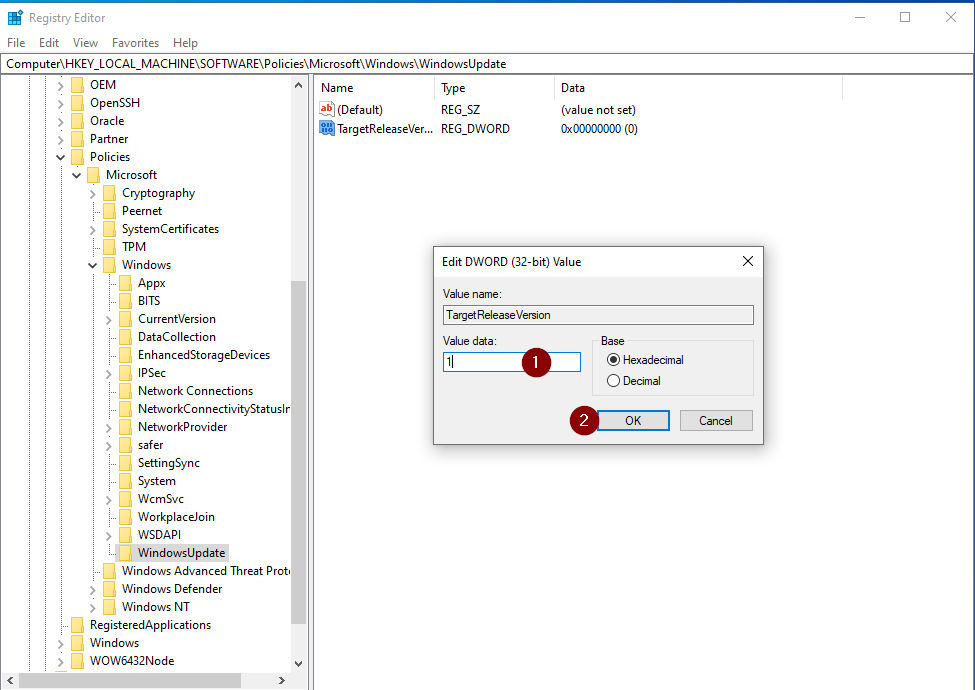
Step 5. On the opposite side of the Windows Update Folder, double click that TargetReleaseVersion DWORD (32-bit) value. Change value data to 1 and then click on OK Button.
That’s all. Close the Registry Editor window and say goodbye to Windows 11. If you want to install Windows 11 on your PC, navigate to the following registry key:
HKEY_LOCAL_MACHINESOFTWAREPoliciesMicrosoftWindowsWindowsUpdate
Double click on that TargetReleaseVersion DWORD (32-bit) value and set its value data on 0.
Good luck.