Like all operating systems, Windows 11 has its standard applications, and while people may not like it, some of them are more or less used. In other words, “Microsoft Edge” is an application that is seldom more popular than the competition.
However, Microsoft Edge is not for everyone. If you’re happy with Chrome or Firefox, you may not be in a hurry to switch to a different Microsoft browser. In this guide we will show you How to permanently remove or disable Microsoft Edge on a Windows 11 PC or laptop using the PowerShell app.
Microsoft Edge on Windows 11
Edge is the latest internet browser from Microsoft. It is part of the Windows 11 operating system and can also be used on iPhone and Android devices, as well as Apple Mac and Linux.
Debuting under the code name Project Spartan in 2015, Edge has seen countless changes, the most important of which is the move to the open source Chromium platform in 2020, which is also based on Google Chrome (known as Edge’s Anaheim version).
The previous Edge used its own Microsoft technology internally, but Microsoft decided to increase compatibility with the number of web pages it was based on.
Edge is currently the third most popular browser in the world after Google Chrome and Apple Safari. This is Mozilla Firefox’s head-to-head race, and it accounts for just over 3% of the browser market. However, if you want to permanently uninstall Edge from your Windows 11 computer and you are not satisfied with it, you can simply remove it using PowerShell.
Permanently uninstall or disable Microsoft Edge on Windows 11
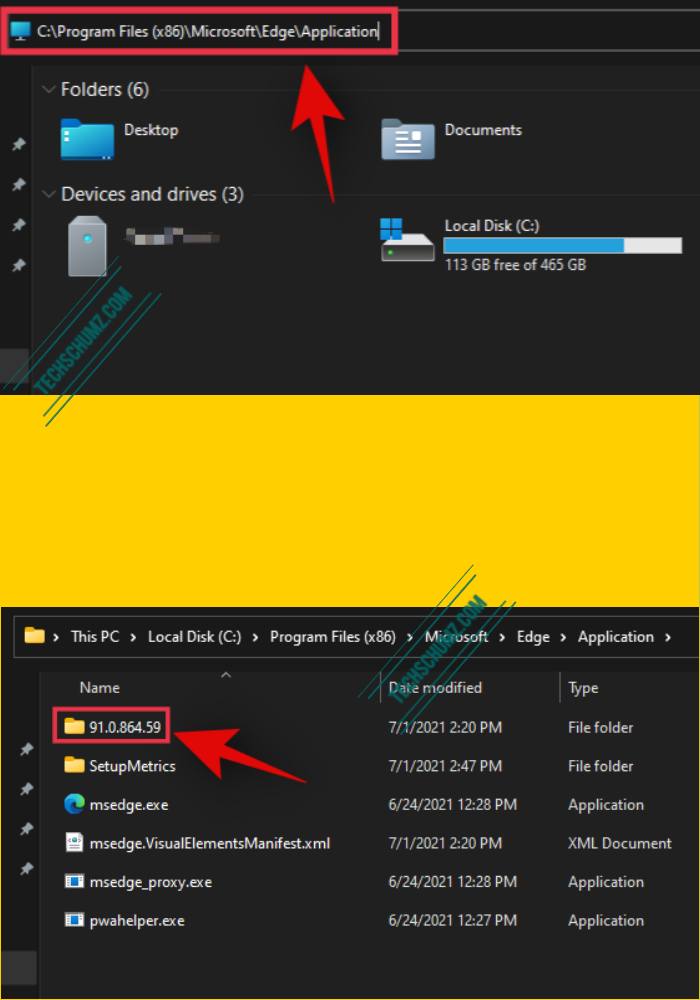
- To remove Microsoft Edge from Windows 11, open File manager and go to the address below.
- C: Program Files (x86) Microsoft Edge Application
- Next, find the folder with the numeric value that represents the version number of ‘Edge’ that is installed on your system.
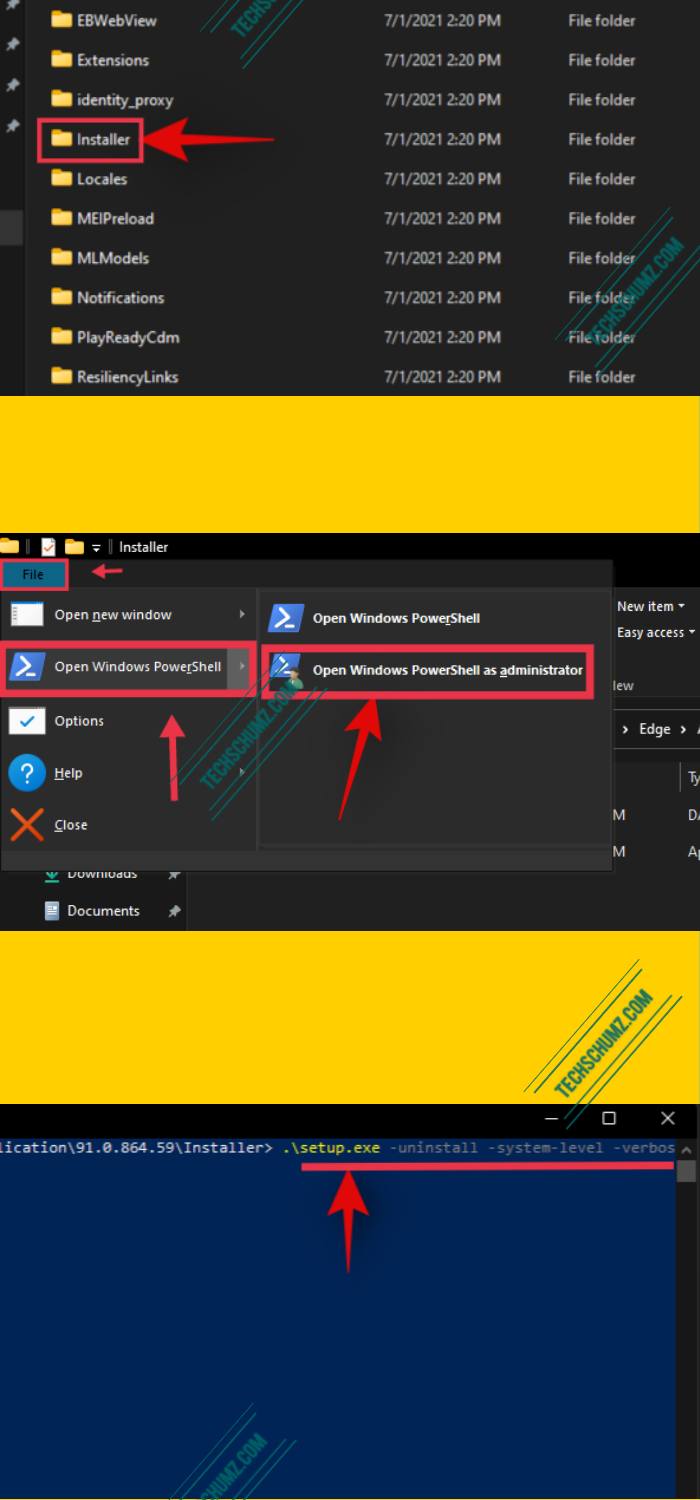
- Then double click and open the ‘Plumber’ Folder.
- Now go to the ‘file‘Tab and tap the’Open Windows PowerShell‘ Opportunity.
- Tap on ‘Open Windows PowerShell as administrator’ to open it with administrator rights.
- After a PowerShell window opens on your screen, enter the following command and click ‘Enter‘Key on your keyboard.
- . setup.exe -uninstall -system-level -verbose-logging -force-uninstall
- Powershell is finally here Run the command and Microsoft Edge will be removed from your system. Now restart your computer for the changes to take effect.
That’s it. That’s all you need to permanently disable or remove Microsoft Edge from Windows 11 using Powershell. If you have any questions about the post, please let us know in the comments section below. Good luck!
Also read:
- How to remove a Microsoft account from Windows 11
- How to create a local user account on Windows 11