Would you like to share the Internet access of your Windows laptop with your other devices via WiFi? Starting with Windows 10, Microsoft includes a hidden built-in tool that you can use to turn your computer into a Wi-Fi hotspot. This built-in feature is still available on Windows 11, that is, without a third-party tool; You can turn your laptop into a WiFi hotspot. Isn’t it a cool feature?
This hotspot function can be useful in various situations. For example, let’s say you’re using an Ethernet connection to access the Internet, or you’re limited to signing in to a Wi-Fi network. This means that you will not be able to connect to your tablets, smartphones and other WiFi-enabled devices using this Ethernet or WiFi network. Of course, you will have to activate more internet connections for each device, but you will have to pay extra money. But why not turn your PC into a hotspot to save money? Yes, it is possible under Windows 10 and Windows 11, both PCs. If your computer or laptop has a WiFi adapter, you can easily turn it into a hotspot without adding a router or modem. That means, with a single internet connection, you can use the internet on all Wi-Fi enabled devices.
How do you turn a Windows 11 PC into a mobile hotspot?
Some freeware and paid applications are available on the internet to turn your PC into a hotspot. However, if you’re using Windows 11, you don’t need to install any software to enable the WiFi hotspot feature. Proceed as follows to enable the WiFi hotspot function on your Windows 11 PC / laptop:
Step 1. Open the Settings app by pressing
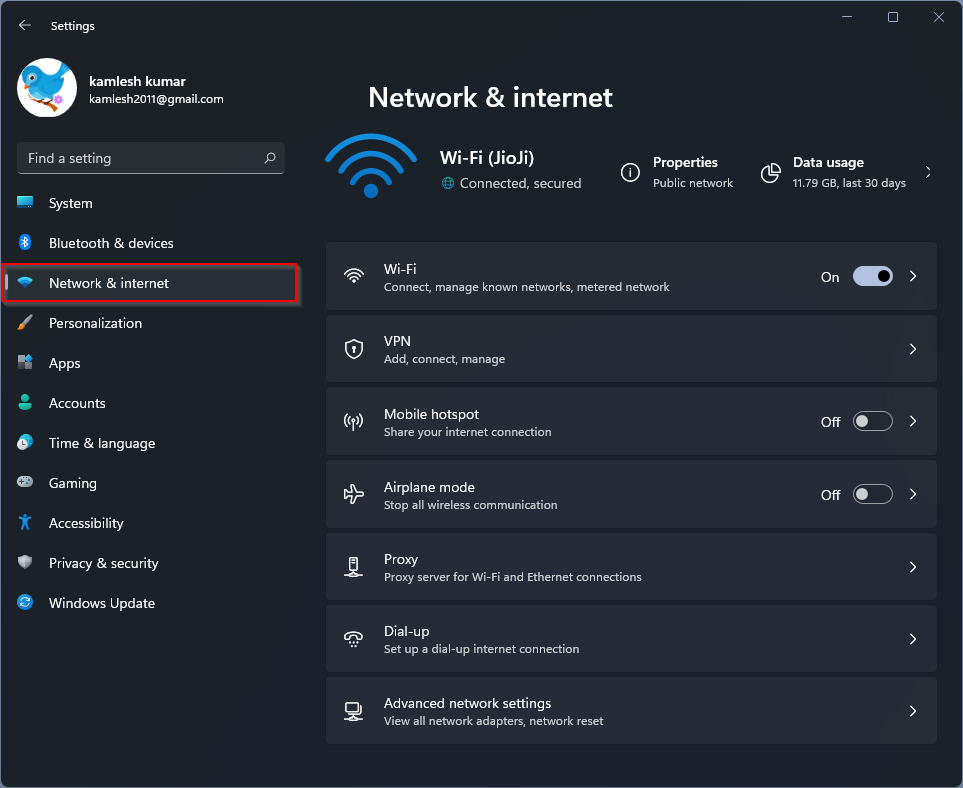
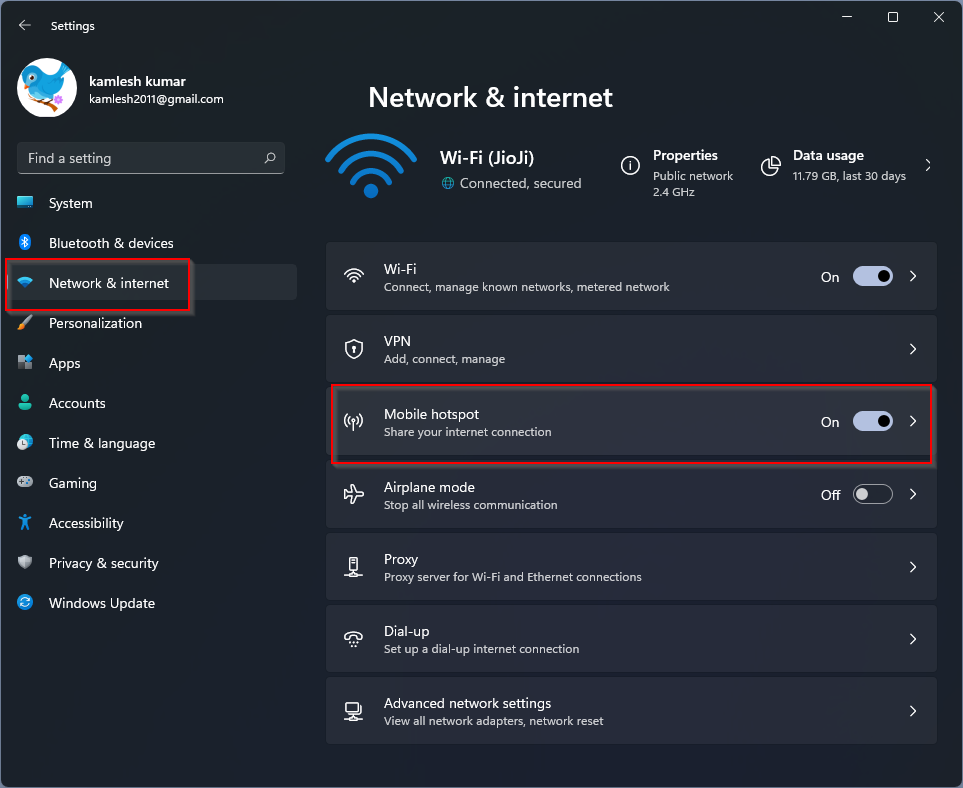
Step 2. On the opposite side of the “Network & Internet” category, turn the toggle switch to On Position next to the
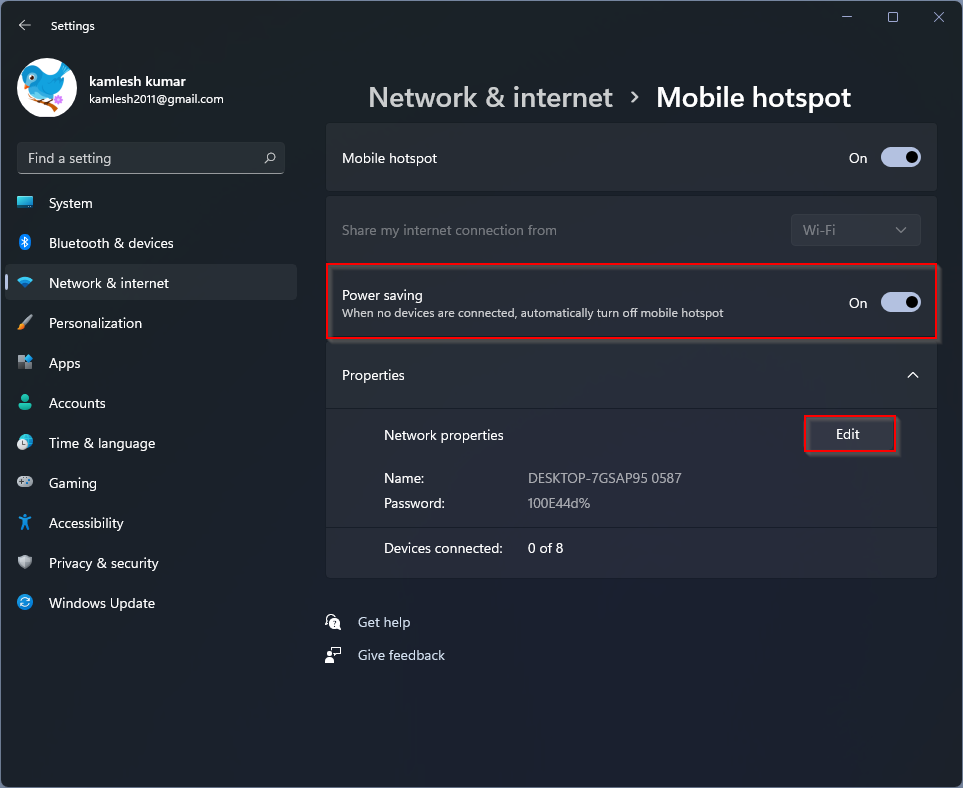
Step 3. Here, turn on the toggle switch next to the option “Energy saving”. As soon as you activate the energy-saving function when no devices are connected to the hotspot, the mobile hotspot on your PC is automatically switched off. If you want to continue broadcasting the SSID, you should deactivate the “Energy saving” function. It’s an optional feature, which means you can turn it on or off as needed.
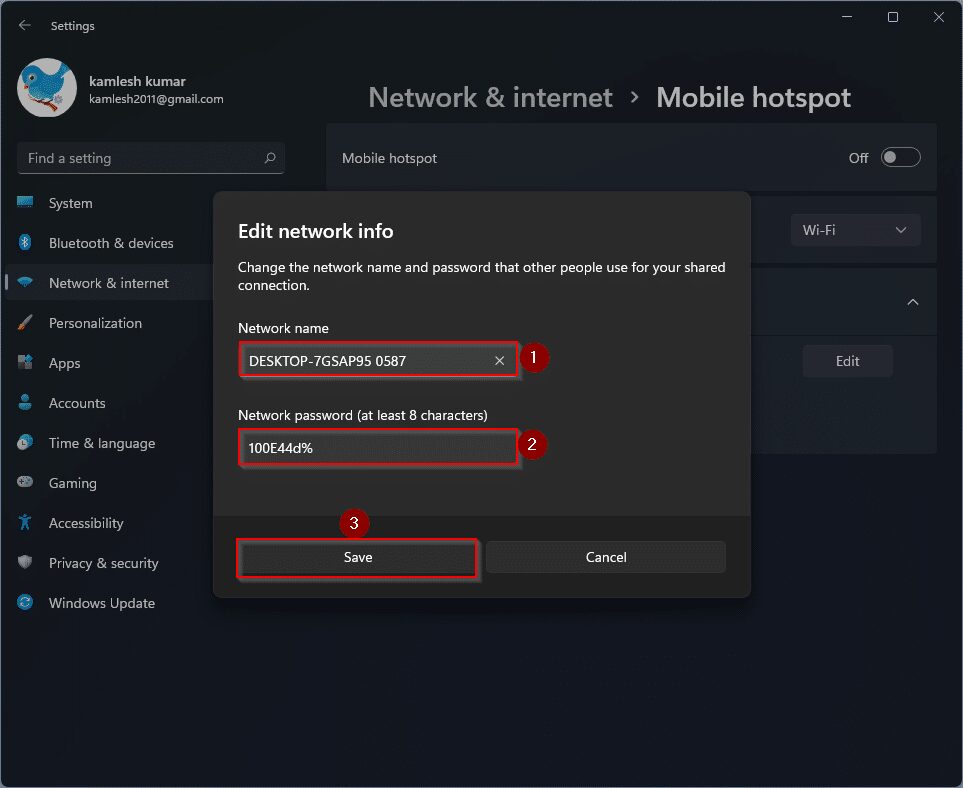
Next, the important setting that you should configure is the Network name and password. To do this, click on the
Step 4. In the “Edit Network Info” pop-up window, change the “Network Name” as you wish. Your PC uses this network name to broadcast the WLAN SSID. Now put a strong one
All settings are now configured and you can share the Internet connection with any other WLAN-enabled device. Switch on the WLAN on your WLAN-enabled device on which you want to surf the Internet. In the list, click the SSID name that you configured on your PC. Enter the password and enjoy the internet.