According to Microsoft, TPM (Trusted Platform Module) is a dedicated hardware chip that is mandatory to install Windows 11 on any PC. It is a physical device that is used to protect and store security keys and sensitive user data. However, there is a way to bypass TPM and install Windows 11 on a computer. You can even install Windows 11 on a virtual machine by bypassing TMP 2.0.
For some reason, manufacturers ship motherboards with the TPM disabled by default. That said, if you bought your PC after 2015, your computer may have shipped with the TMP module, but when you check Windows 11 compatibility with any tool you may still see that TMP is not available.
You have to enter the BIOS / UEFI and turn it on manually to install Windows 11 on your computer. Now Windows 11 comes with a new app, TPM Diagnostics. It gets the information from your PC through the TPM module.
This Gearupwindows article will walk you through installing and uninstalling the TPM Diagnostic App on your Windows 11 PC.
Topics covered
How do I install the TPM diagnostic tool in Windows 11?
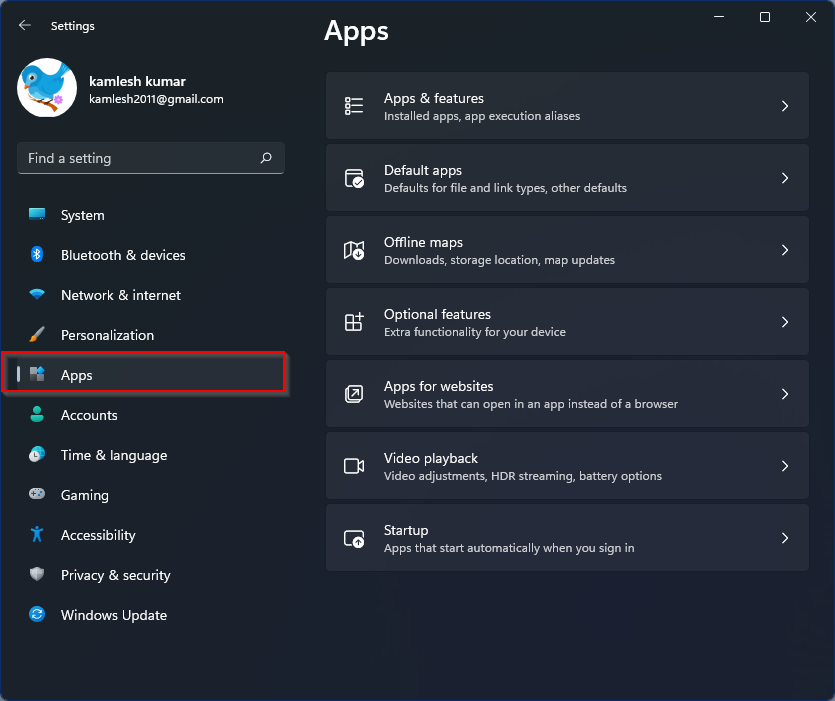
Step 1. Open the Settings app, then click the
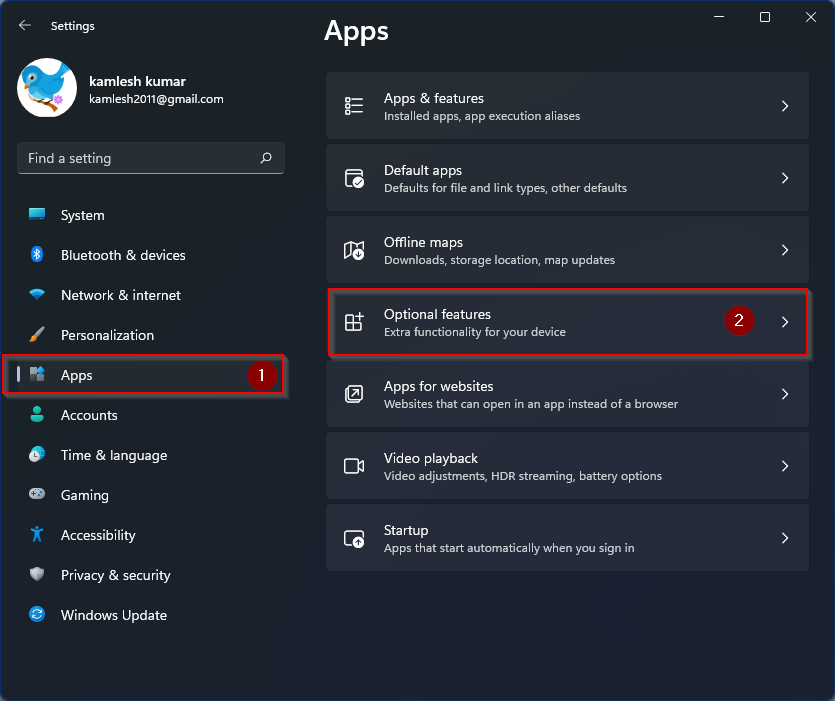
Step 2. On the right side window of Apps, Click on that
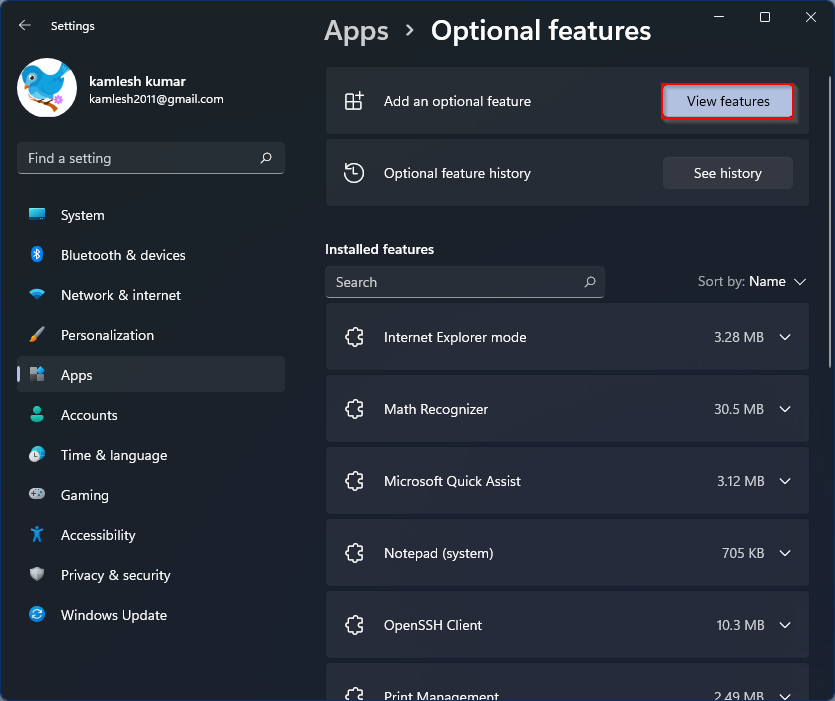
Step 3. Click
Step 4. Enter in the pop-up window
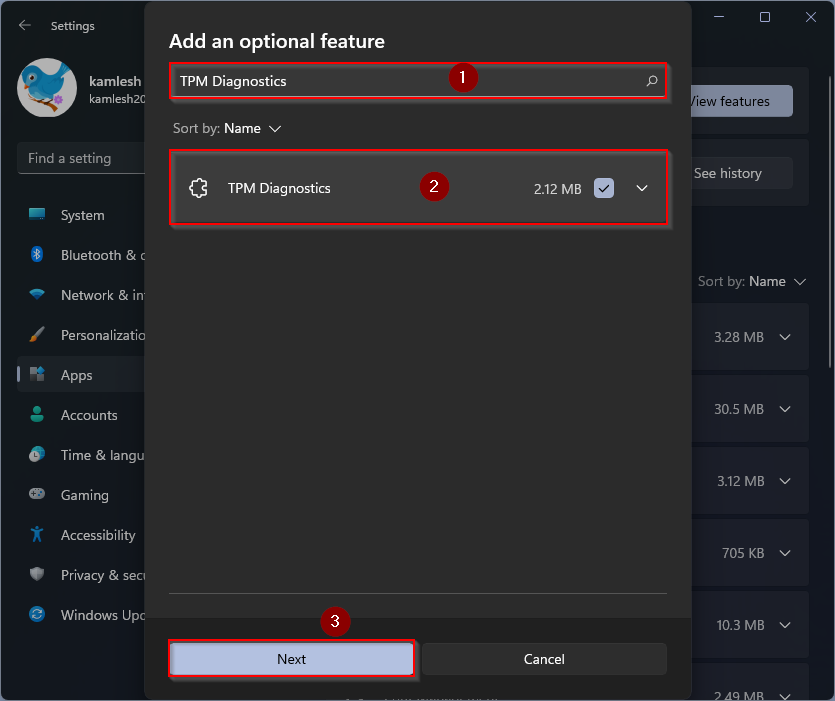
Step 5. In the next window, click the

Once you have completed the above steps, the TPM diagnostic tool will download and install on your PC.
That’s it. Get it now C: Windows system32 tpmdiagnostics.exe to retrieve the diagnostic data from the Trusted Platform Module. To learn more about this tool, run the tpmdiagnostics.exe /? Command from the command prompt or PowerShell.
How do I uninstall the TPM diagnostic tool in Windows 11?
Step 1. Open the Settings app by pressing. to press
Step 2. On the right side window of Apps, Click on that
Step 3. Under Optional functions, please scroll down to the entry of. to see TPM diagnosis and then click on it.
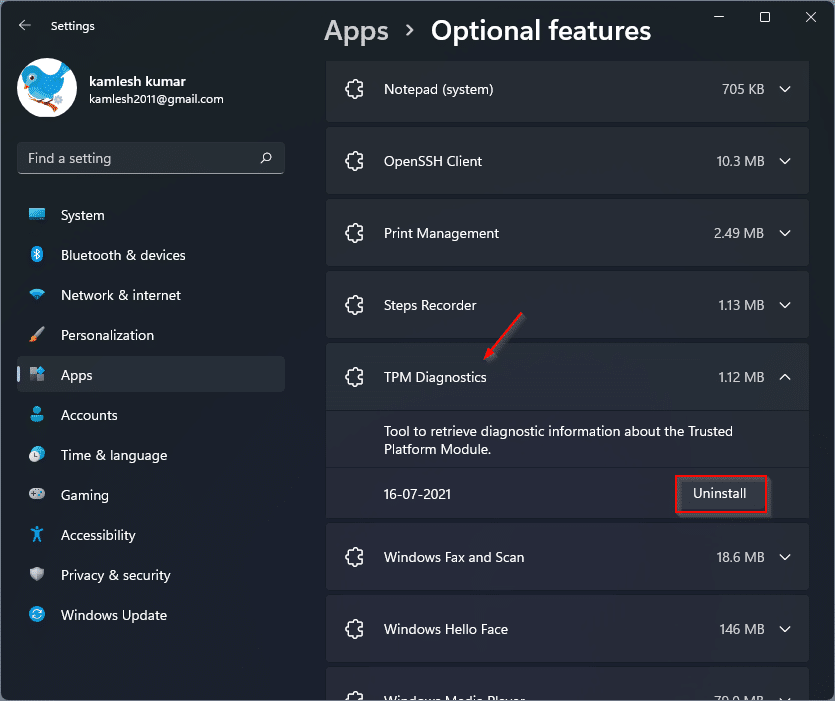
Step 4. Click the Uninstall Button.
That’s all. TPM Diagnostics will now be uninstalled from your computer. No further action is required.