All recent versions of the Windows operating system ship with an image viewer. So is Windows 11. Windows 11 uses the built-in Photos application as the default image viewer.
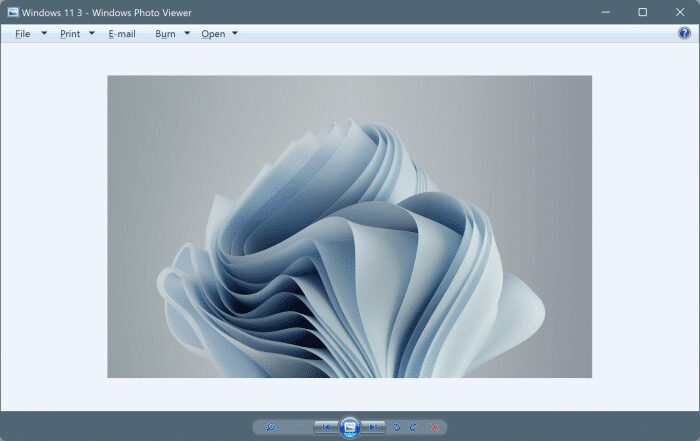
The Photos app in Windows 11 is pretty good. While there is nothing wrong with the Photos app, it is no longer a simple image viewer. It includes image enhancement tools that most users never use.
There are PC users who still love the classic Windows Photo Viewer program. However, as you may have already discovered, Windows Photo Viewer is replaced with the Photos app (this was the case in Windows 10 as well). Fortunately, Windows Photo Viewer is still part of Windows 11, but the program has been disabled to promote the Photos app.
Users who want to enable and use Windows Photo Viewer in Windows 11 need to make a small change to the Windows Registry. Since most users are not comfortable editing the Registry, we have provided a ready-made Registry file that you need to open and apply to enable the Photo Viewer. Here’s how to do it.
Enable Hidden Windows Photo Viewer in Windows 11
Step 1: Click this link to download the PhotoViewer.Zip file from our website.
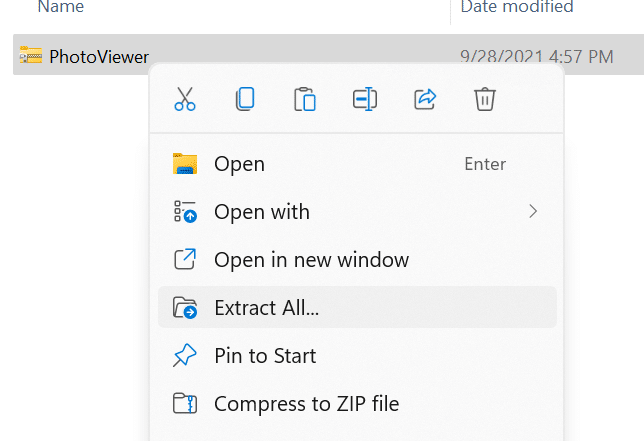
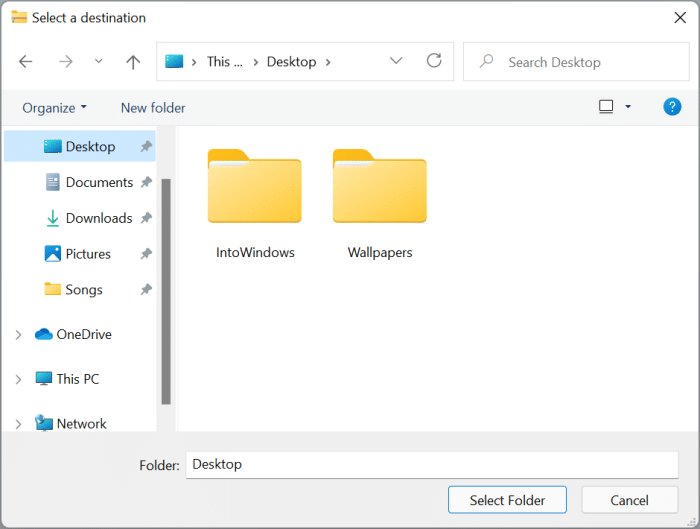
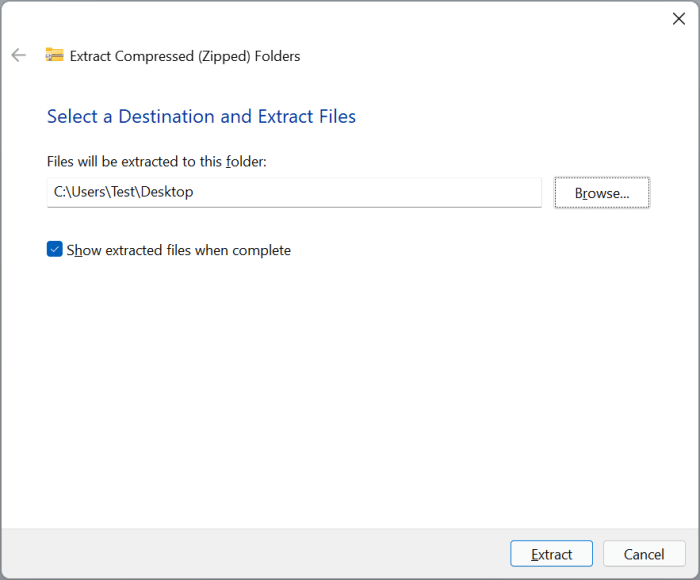
Step 2: The right button of the mouse in the downloaded ZIP file, click Extract files, select a location to save the extracted log file, and click the Extract button.
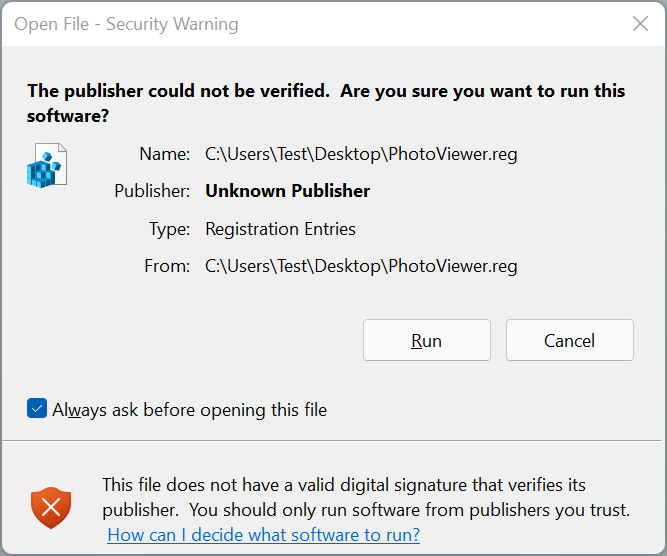
Step 3: Now, double click in the extracted PhotoViewer.reg file.
Step 4: If you receive the following security warning, click the To run button.
Step 5: You will then see the User Account Control message. Click on the Yes to continue.
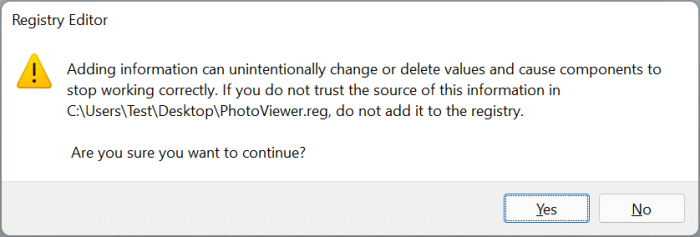
Step 6: Now, you will get the following message from Registry Editor. Once again, click on the Yes button.
Step 7: Finally, click on the okay button. Now you have successfully enabled Windows Photo Viewer in Windows 11.

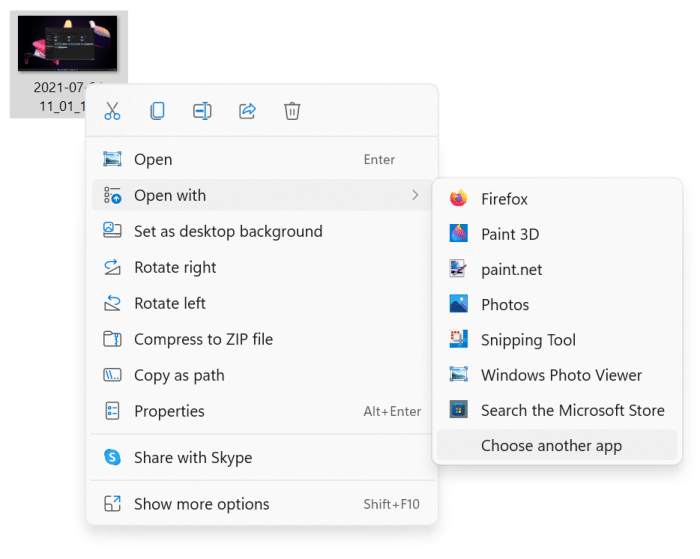
You can now right-click an image file, click Open With, and then select Windows Photo Viewer from the list to open the selected image file with Photo Viewer.
Follow the steps below if you want to set it as the default for your favorite image types.
Set Windows Photo Viewer as Default in Windows 11
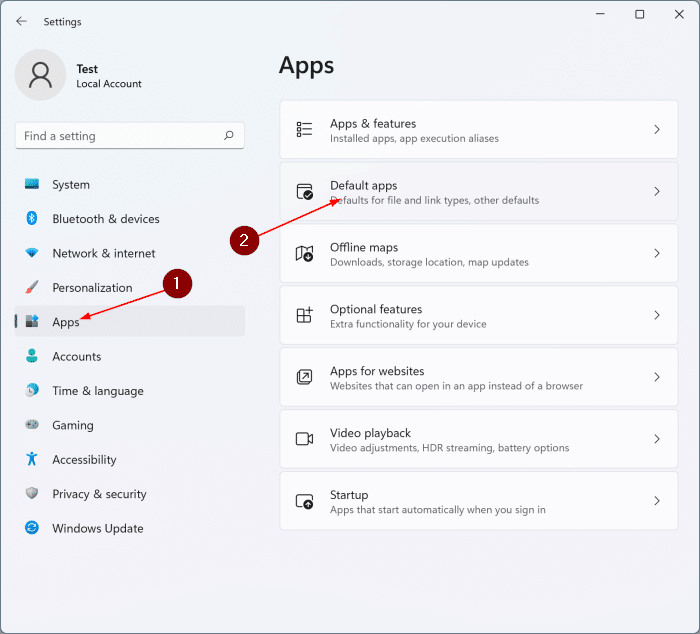
Step 1: Open Windows Settings 11. In the left pane, click Applications. On the right side, click Default apps.
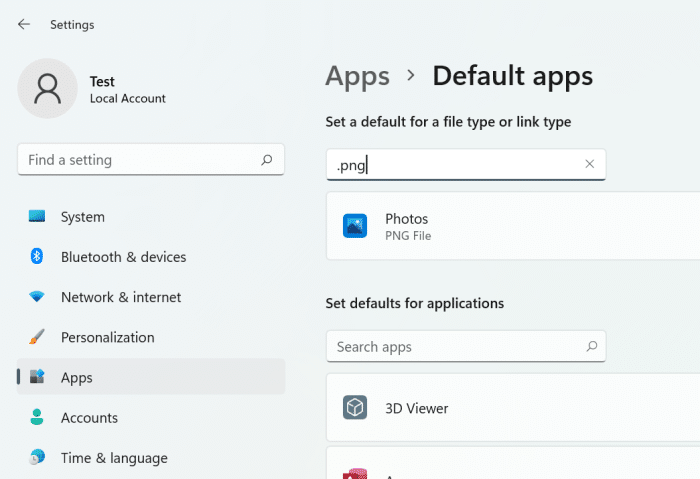
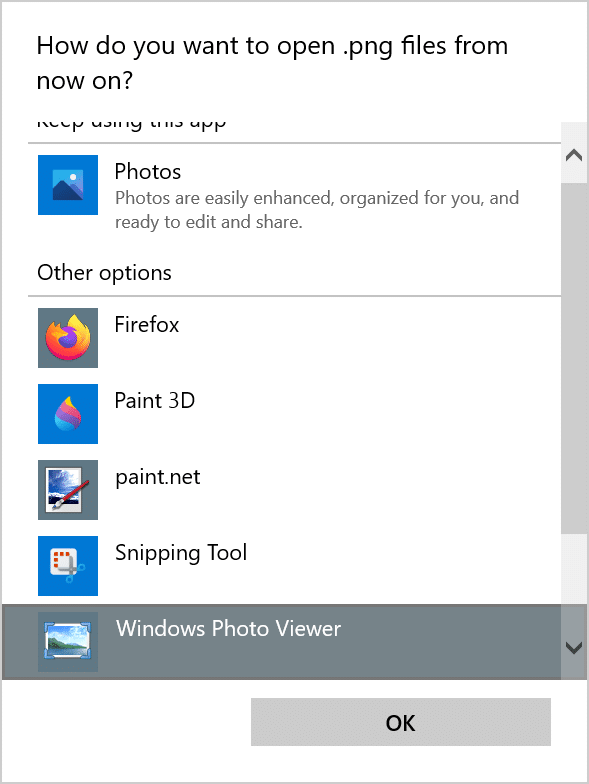
Step 2: On the Apps> Default apps page, find. JPEG, .PNG, .BMP, .JPG, one by one, and then Windows Photo Viewer as default.
To do that, search for an image file type (.PNG, for example) to see its entry just below the search box, click on it, and then select Windows Photo Viewer from the list.
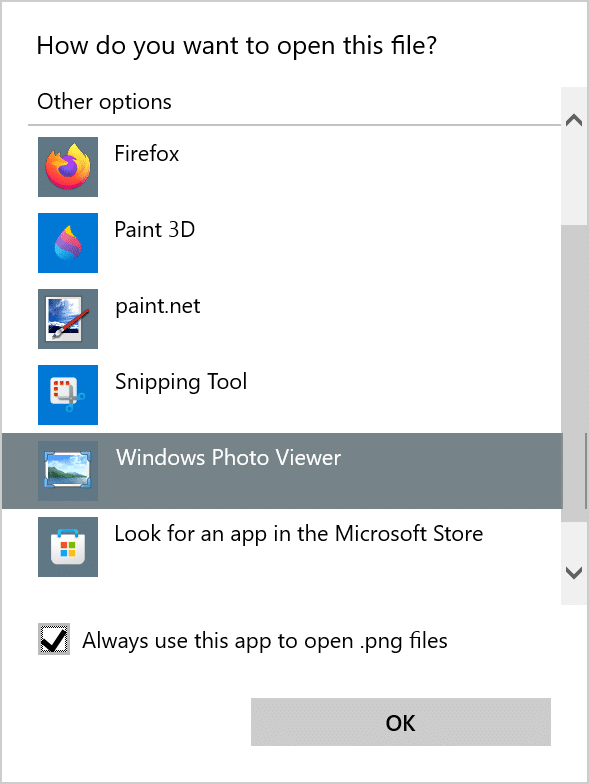
Alternatively, to set Windows Photo Viewer as the default for an image file type, right-click it, click Open with, click Choose another application, select Windows Photo Viewer, check Always use this application for open this file type option. Note that you need to repeat this for all types of image files that you want the photo viewer to be the default.
ImageGlass is an excellent alternative to the Windows photo viewer
If you want to enable Windows Photo Viewer just because the default Photos app isn’t as fast and simple as the classic Windows Photo Viewer, you might like the free ImageGlass program.
ImageGlass is intuitive, fast, and is updated regularly. Here at IntoWindows we have been using ImageGlass for years and we can say that it is the best photo viewing program for most users. So we suggest you give it a try right now.
How to get desktop gadgets in Windows 11 guide may also interest you.