How do I turn transparency effects on or off in Windows 11? Windows 11 has a lot of features. One can reset Windows 11 without deleting personal data and even convert JPG or PNG images to PDF.
Windows 11 now includes a new transparency effects feature that makes some window backgrounds, taskbars, and menus slightly transparent. All Windows users may not prefer transparency effects; So Microsoft has provided an option to turn it off and on. That said, if you don’t like this functionality, you can simply turn off clear UI elements in Windows 11 with a toggle switch. However, this feature remains enabled by default.
With the powerful Settings app, you can easily enable or disable transparency effects on Windows 11. Let’s see how
How do I enable or disable transparency effects in Windows 11?
To turn the transparency effects feature on or off in Windows 11, follow these recommended steps:
Step 1. Open the Settings app by pressing
Alternatively, click the begin in the system tray or press the
![]()
Step 2. Select in Settings
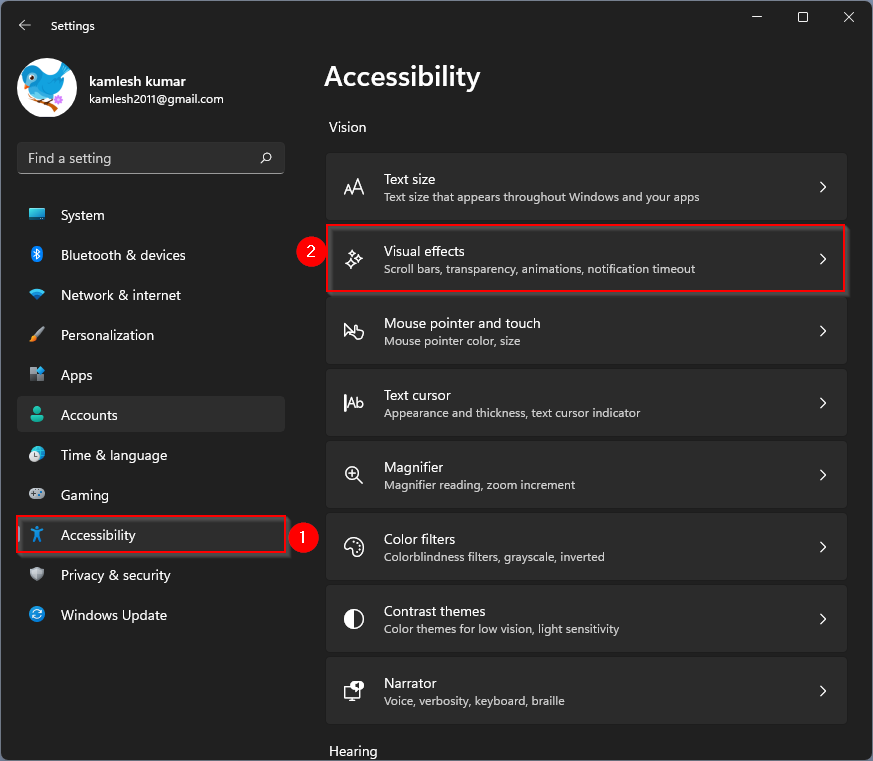
Step 3. In Visual effects Settings, toggle the toggle switch next to off or on
![]()
The changes are instant, meaning as soon as you turn the toggle switch to the on or off position, you’ll see the visual changes in the open Settings app. To compare the transparency, let’s append the above image again when the Transparency effects is switched off.
![]()
As soon as you switch off Transparency effects, Windows 11 changes all transparent windows to opaque. After making the changes you want, you can close the Settings app.
Much luck.