All modern computers and laptops are equipped with Bluetooth and WLAN. Bluetooth is an old connectivity technology, but it is still part of almost all smartphones and laptops. Over the years, it has grown in popularity as Bluetooth is found on new generation computers and smartphones. Not only computers, laptops and smartphones are lashed with Bluetooth; You can also find it on speakers and headphones.
Bluetooth eliminates messy cables, and you can connect to Bluetooth-enabled devices in Windows 11 with just a few clicks of the mouse. On Windows 11, you can enable Bluetooth from either the Settings app or the Action Center. This Gearupwindows article shows you how to enable and disable Bluetooth on Windows 11 using both methods.
Topics covered
How do I turn Bluetooth on or off in the Settings app in Windows 11?
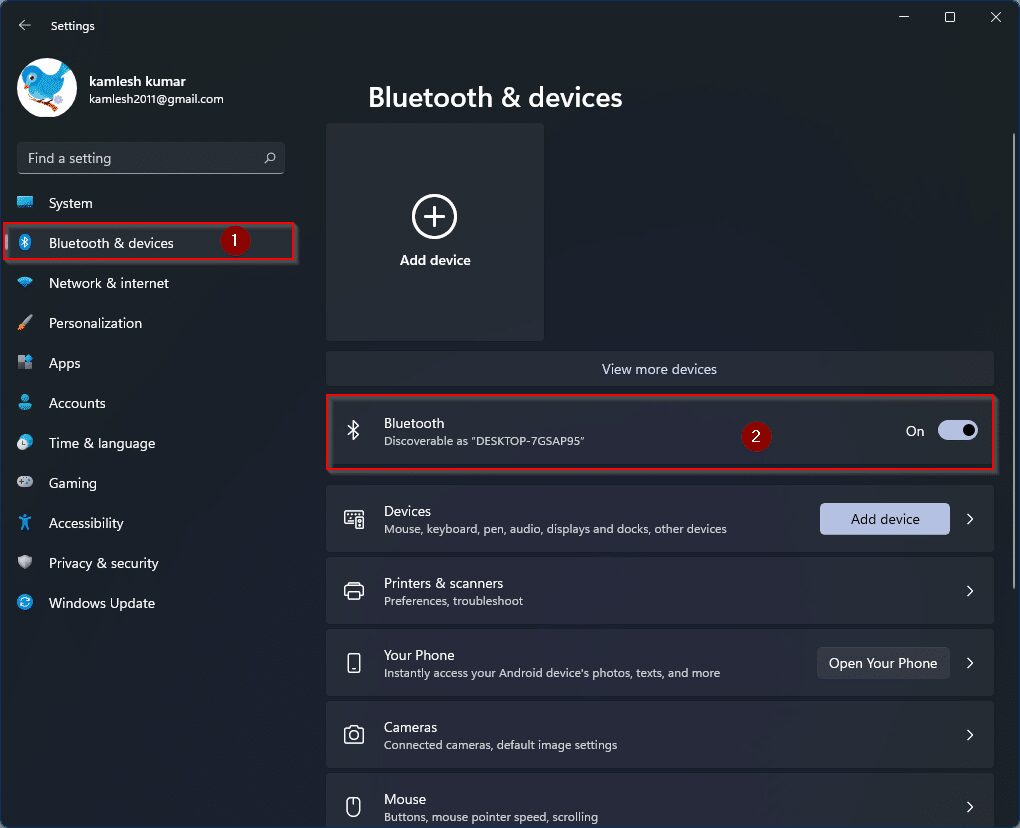
To enable or disable Bluetooth on Windows 11 using the Settings app, do the following:
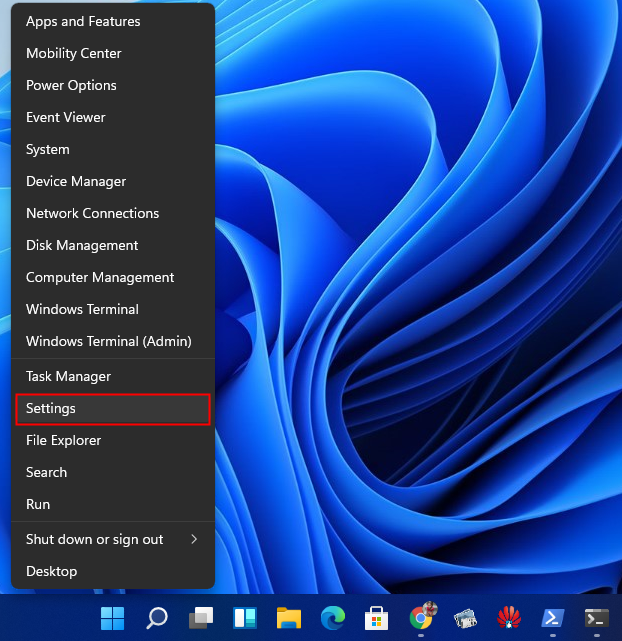
Step 1. Open the Settings app.
To start the Settings app, press
Alternatively, press
Step 2. In the Settings app, click the
How do I enable or disable Bluetooth with the Action Center in Windows 11?
You can also enable or disable Bluetooth using the Action Center on Windows 11. To turn Bluetooth on or off, do the following:
Step 1. Click anywhere on the Action Center icon on the system tray.
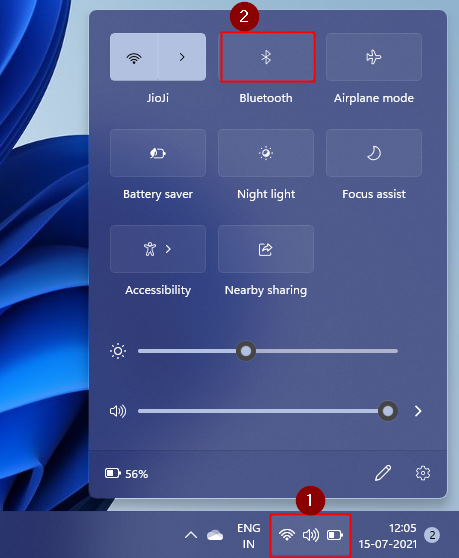
Step 2. In the Action Center, click the