With the introduction of Windows Vista, Microsoft disabled the administrator account that was integrated by default. This means that the administrator account will still be available but hidden. That means you can’t use it without activating it. If you make important changes to your PC using an administrator account, Windows will still ask you to confirm your intention to change important settings. That means you have to push that Yes Button when the User Account Control (UAC) dialog box appears. The built-in administrator account has more power than the administrator account we created. The built-in administrator account is still present in the latest Windows 11 operating system, but it is hidden and needs to be activated manually. However, when you start Windows 11 in Safe Mode, the built-in administrator account is automatically activated.
This Gearupwindows article will walk you through some simple steps to enable the default administrator account in Windows 11.
Topics covered
How do I check the status of the administrator account on Windows 11?
Step 1. Click the search Button from the system tray and enter CMD in the search field.
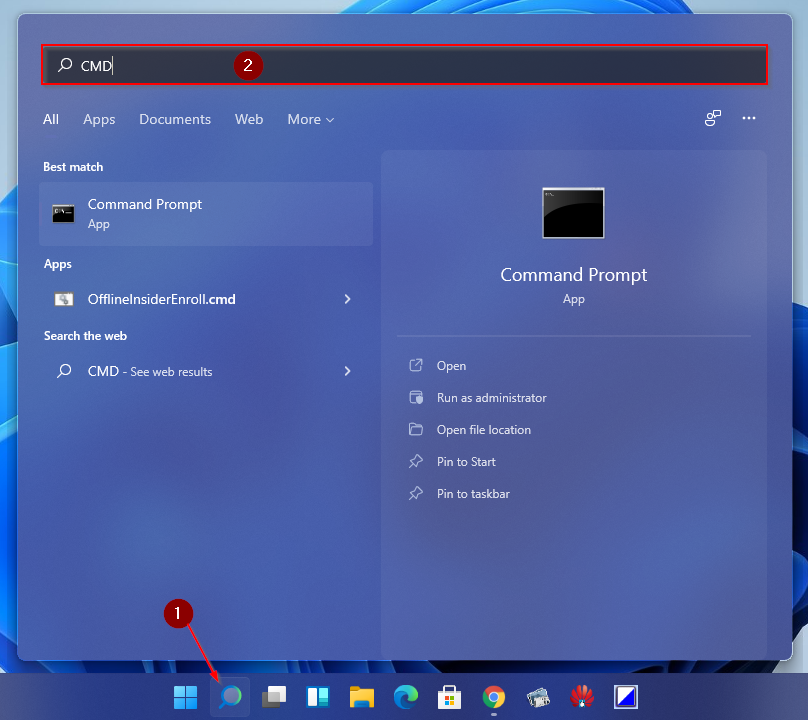
Step 2. From the available search results, click the Command Prompt to open it.
Step 3. In the Command Prompt window, type the following and press Enter using the keyboard to view the current status of the administrator account:
net user administrator
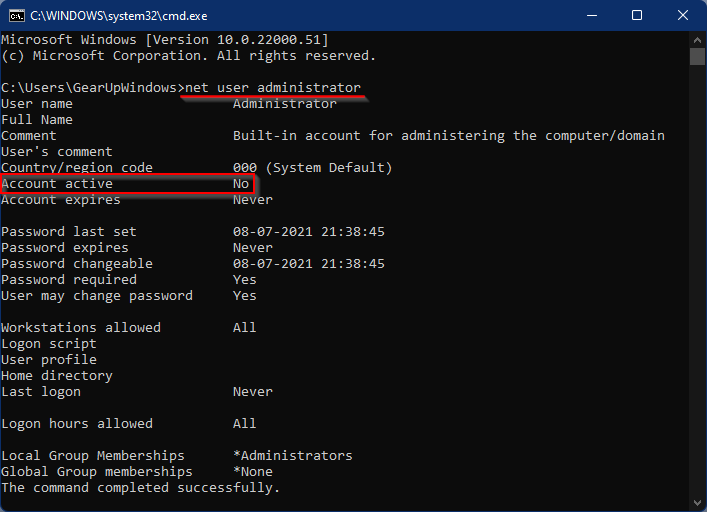
Look in the output Account active. If next to it, you see No, then the built-in administrator is disabled or inactive and you need to enable or enable it.
How do I activate the administrator account in Windows 11 via the command prompt?
Step 1. Open the command prompt with administrator rights.
To open the command prompt with administrator rights on a Windows 11 PC, press
Step 2.In the Command Prompt window, type the following and press Enter on the keyboard to enable the administrator account:
net user administrator /active:yes
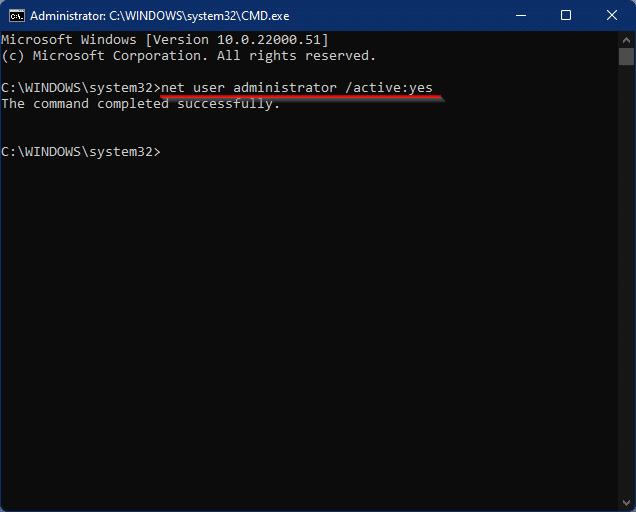
After following the steps above, you should get “The command completed successfully” output. The integrated administrator is now active on your Windows 11 and you can log in as with any other normal user account.
It is not recommended to enable the built-in administrator account, so once you have completed troubleshooting or any other specific task, disable it. To disable the built-in administrator account, run the following command in step 2 of the above steps:
net user administrator /active:no
How do I activate the administrator account in Windows 11 with local users and groups?
Step 1. Press
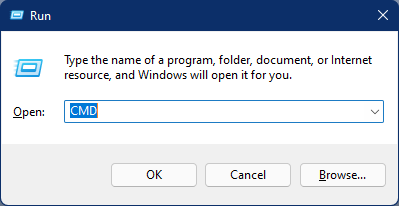
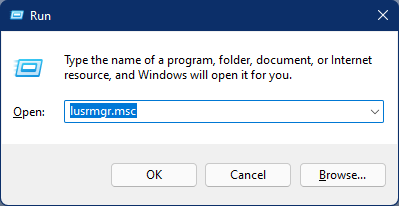
Step 2. Im Run Dialog box, enter the following and press Enter from the keyboard: –
lusrmgr.msc

Step 3. Double click on the user Folder to see those Administrator Account. When you see one Down arrow on the icon of the administrator account, it means it is disabled and you need to enable it to use it.
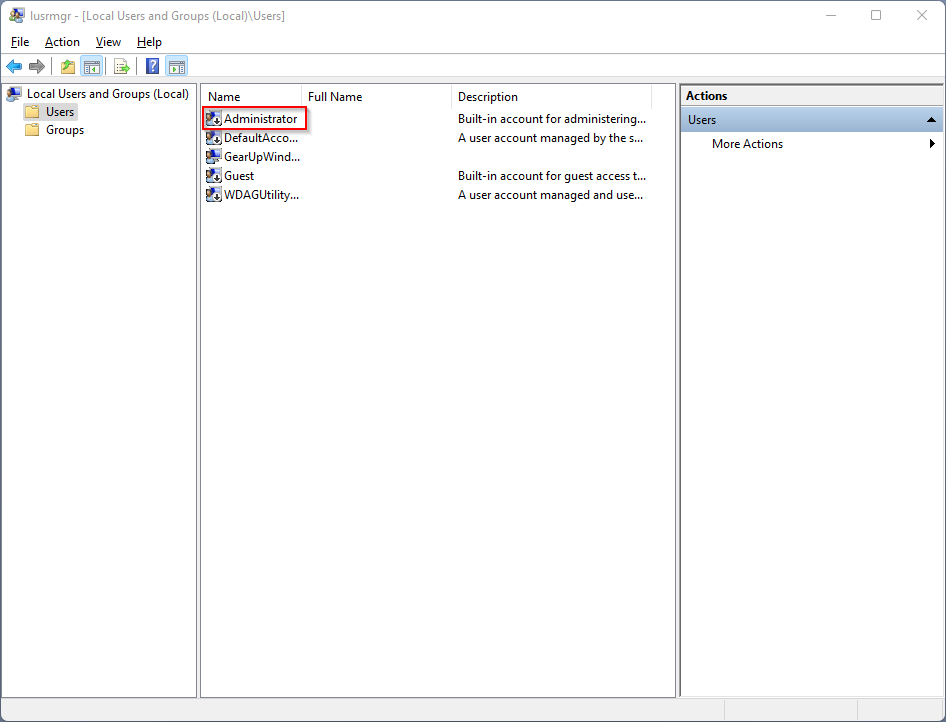
Step 4. Now right click on the administrator and select the properties Option from the drop down menu.

Step 5. Im General Tab of the “Administrator Properties” dialog box, clear the “Account is disabled” check box.
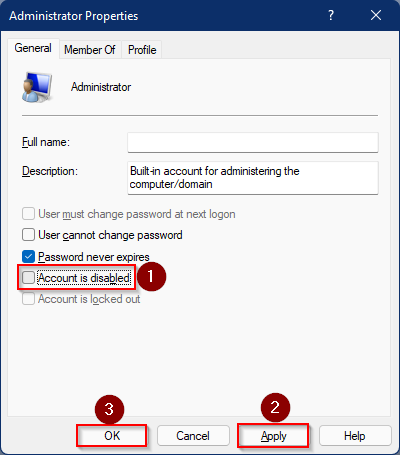
Step 6. Click Apply.
Step 7. Click OK.
If you want to disable the administrator account on your Windows 11 PC, repeat the steps above and enable the “Account is disabled” option in step 5.
Once you have completed the above steps, enable or disable the built-in administrator account.
How to enable the built-in administrator account in the Windows 11 app for local security policies (secpol.msc)
Step 1. Open the Run Dialog box by pressing Profit + r Key completely.
Step 2. In the Run box, type the following and press Enter on the keyboard:
secpol.msc
Step 3. In the left side panel, navigate to the following path Local security policy Window:-
Security Settings > Local Policies > Security Options
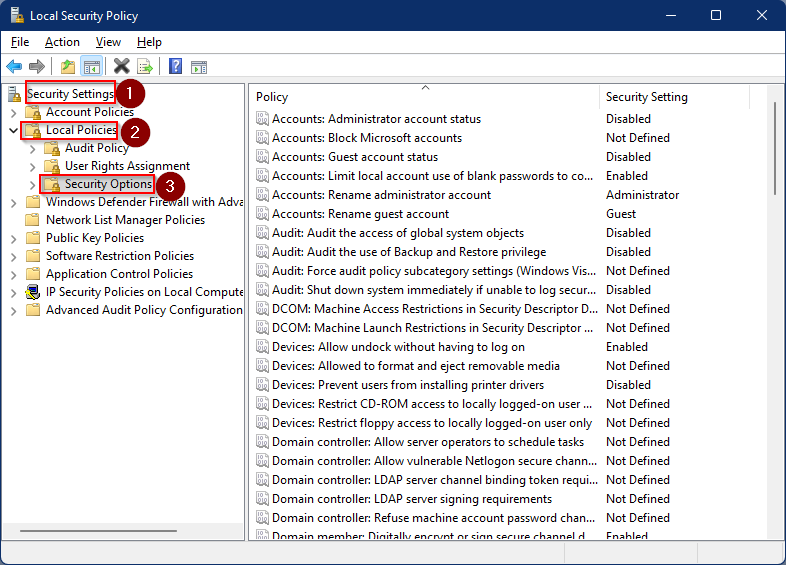
Step 4. In the right pane, find the Accounts: Administrator Account Status policy and double-click it to open it.
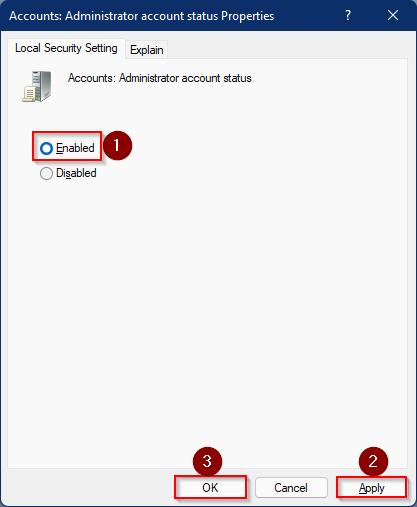
Step 5. Choose the activated Possibility.
Step 6. Click Apply.
Step 7. Click OK.
After following the steps above, the built-in administrator will be activated on your Windows 11 PC. If you change your mind and want to turn it off, repeat the steps above and select the option in step 4 Deactivated Possibility.
That’s all.