Many tasks are performed from the Windows 10 command prompt and Powershell, including managing Internet settings. In this article, I’ll show you step by step How to disable WiFi in Windows 10 using CMD or Powershell.
Windows 10 has a built-in netsh a command line utility for managing network connections and configurations. You can use it to stop, enable, connect, or disconnect Wi-Fi and Ethernet connections to get more work done. Let’s review the commands required to disable WiFi connection in Windows 10.
There is a built-in in Windows 10 netsh Tool that is a command line utility used to manage your network connections and their configurations. With him you can deactivate, activate, connect, or separate WiFi and Ethernet connections and much more. Let’s look at what command is needed to disable it the WiFi connection under Windows 10.
Connected: This is how you protect your WLAN from FragAttacks and attackers
How to disable WiFi in Windows 10 using CMD or Powershell
Here are the steps to turn off WiFi in Windows 10 using Command Prompt or Powershell:
1. Disable WiFi at the command prompt
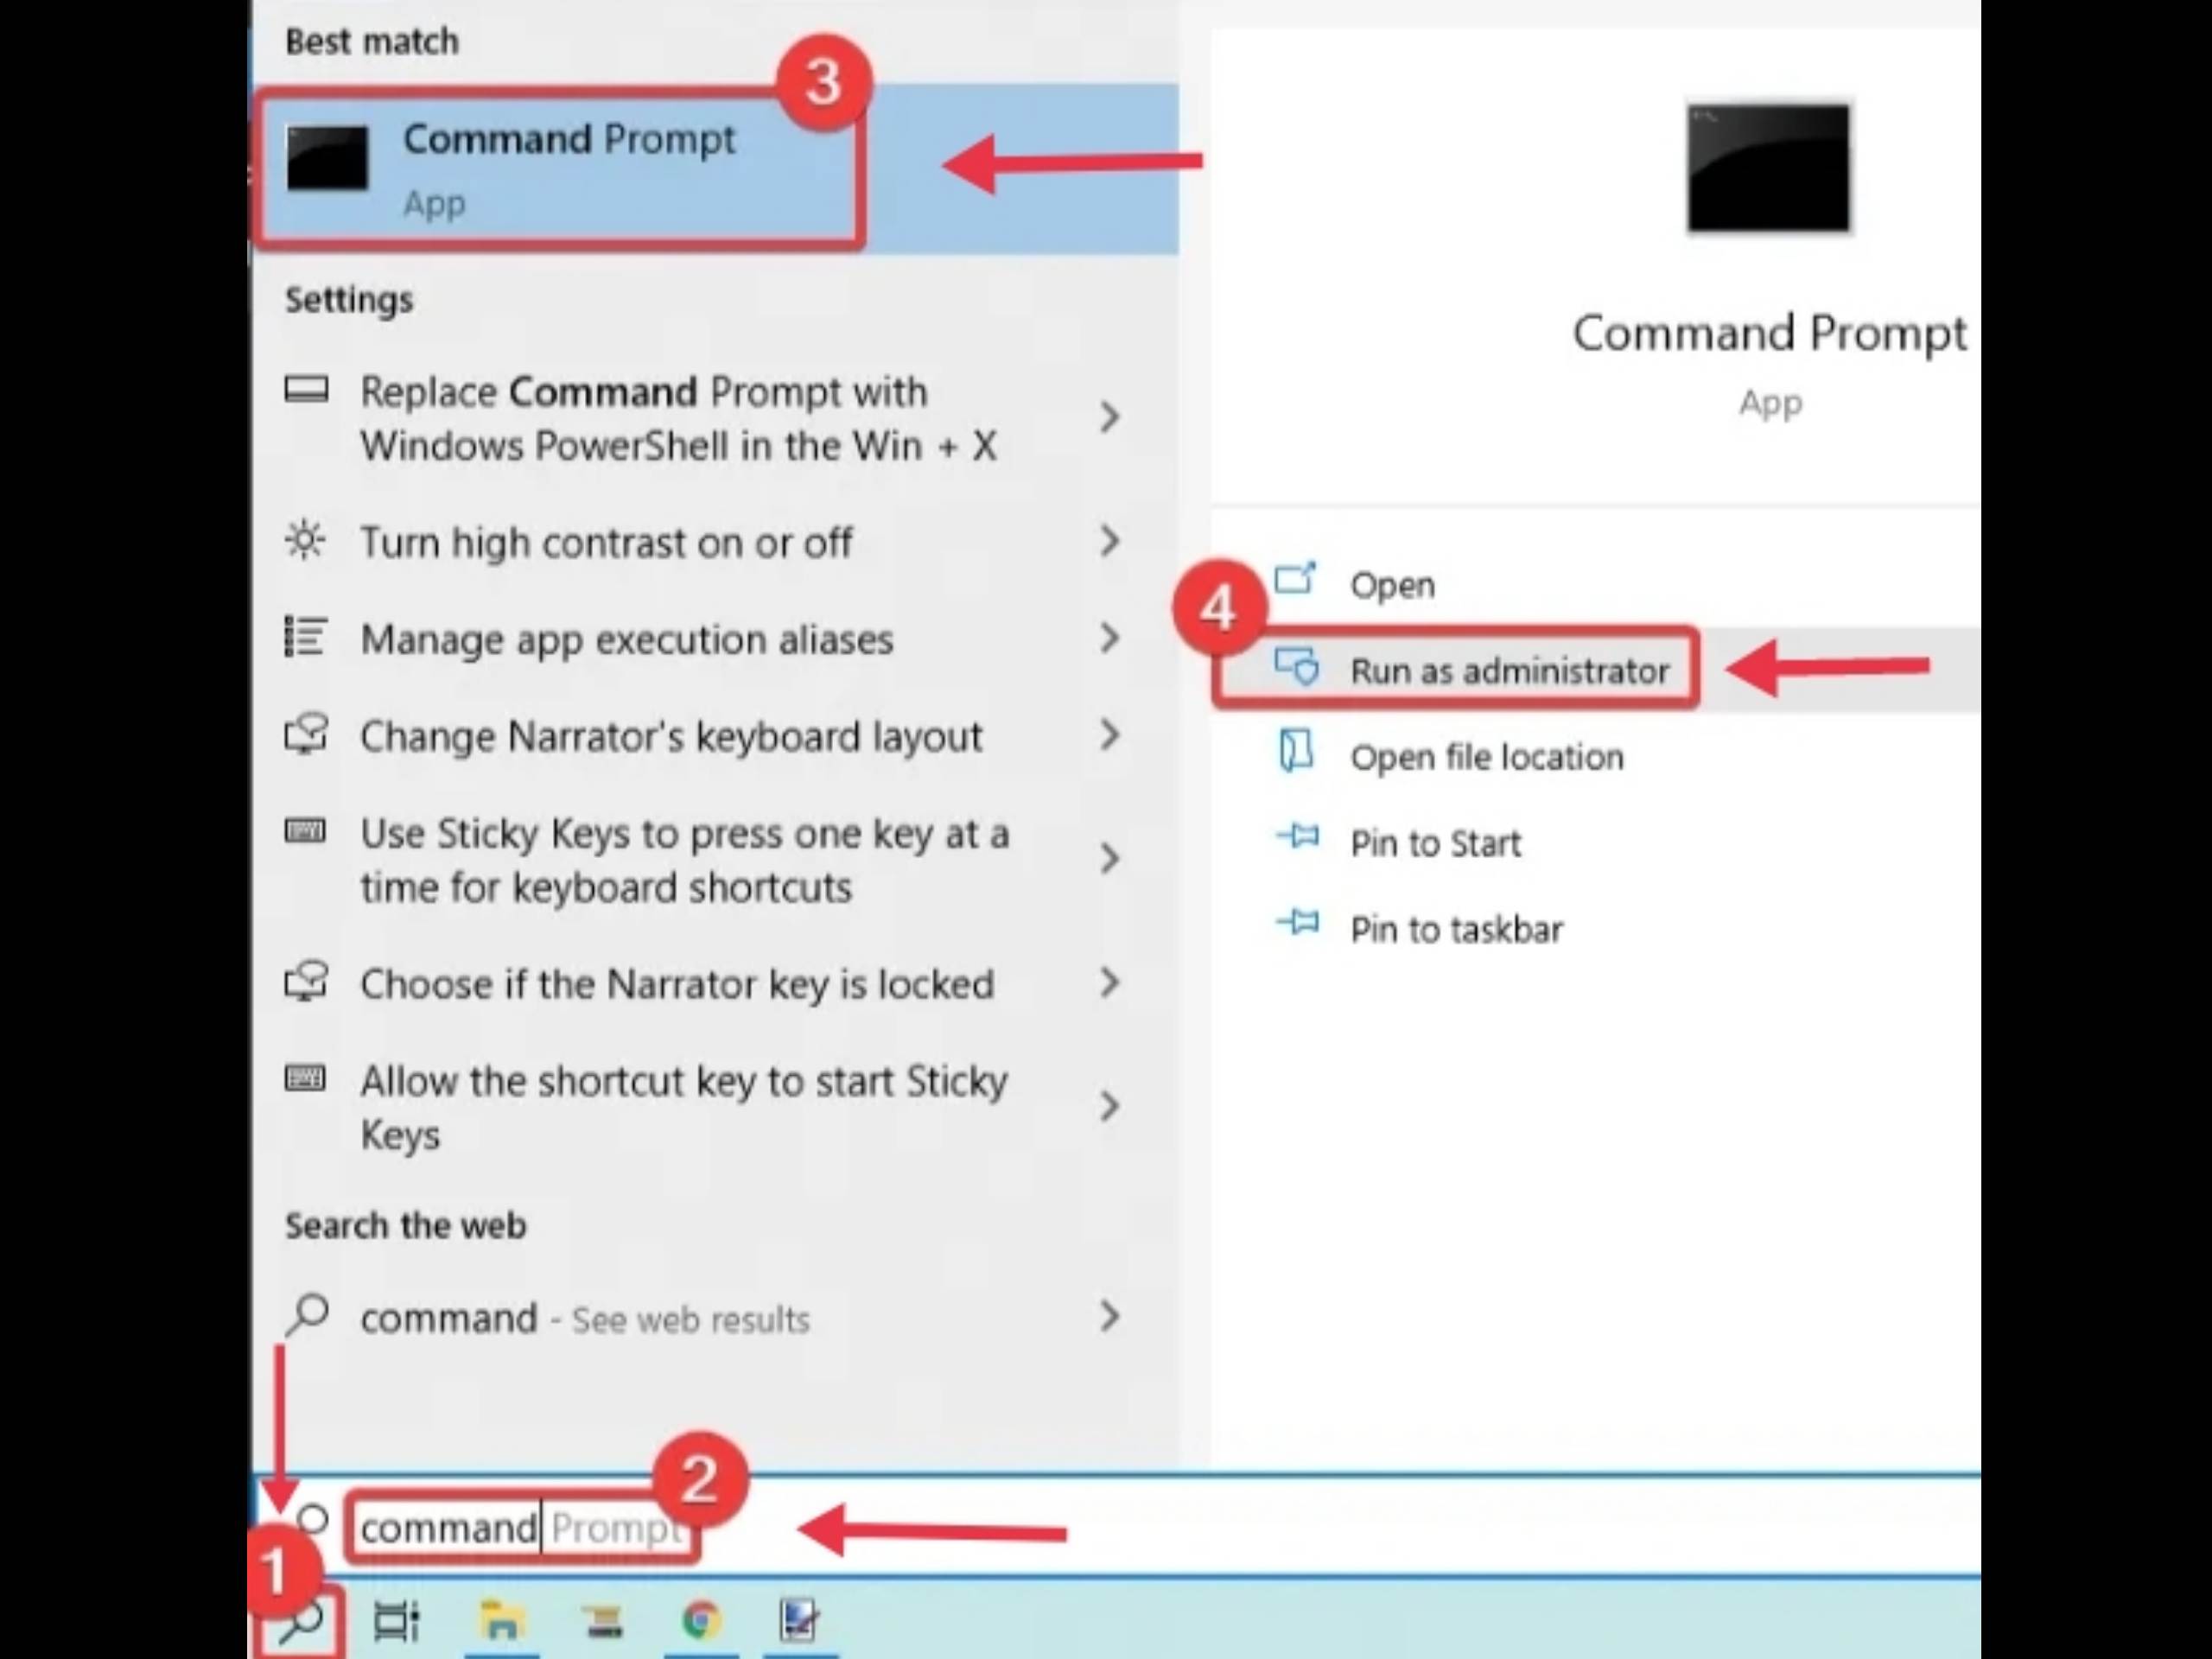
- Go to first the search Option in Windows 10 and look for command prompt.
- Then open the command prompt App and tap the Execute as administrator Option to start CMD with administrator rights.
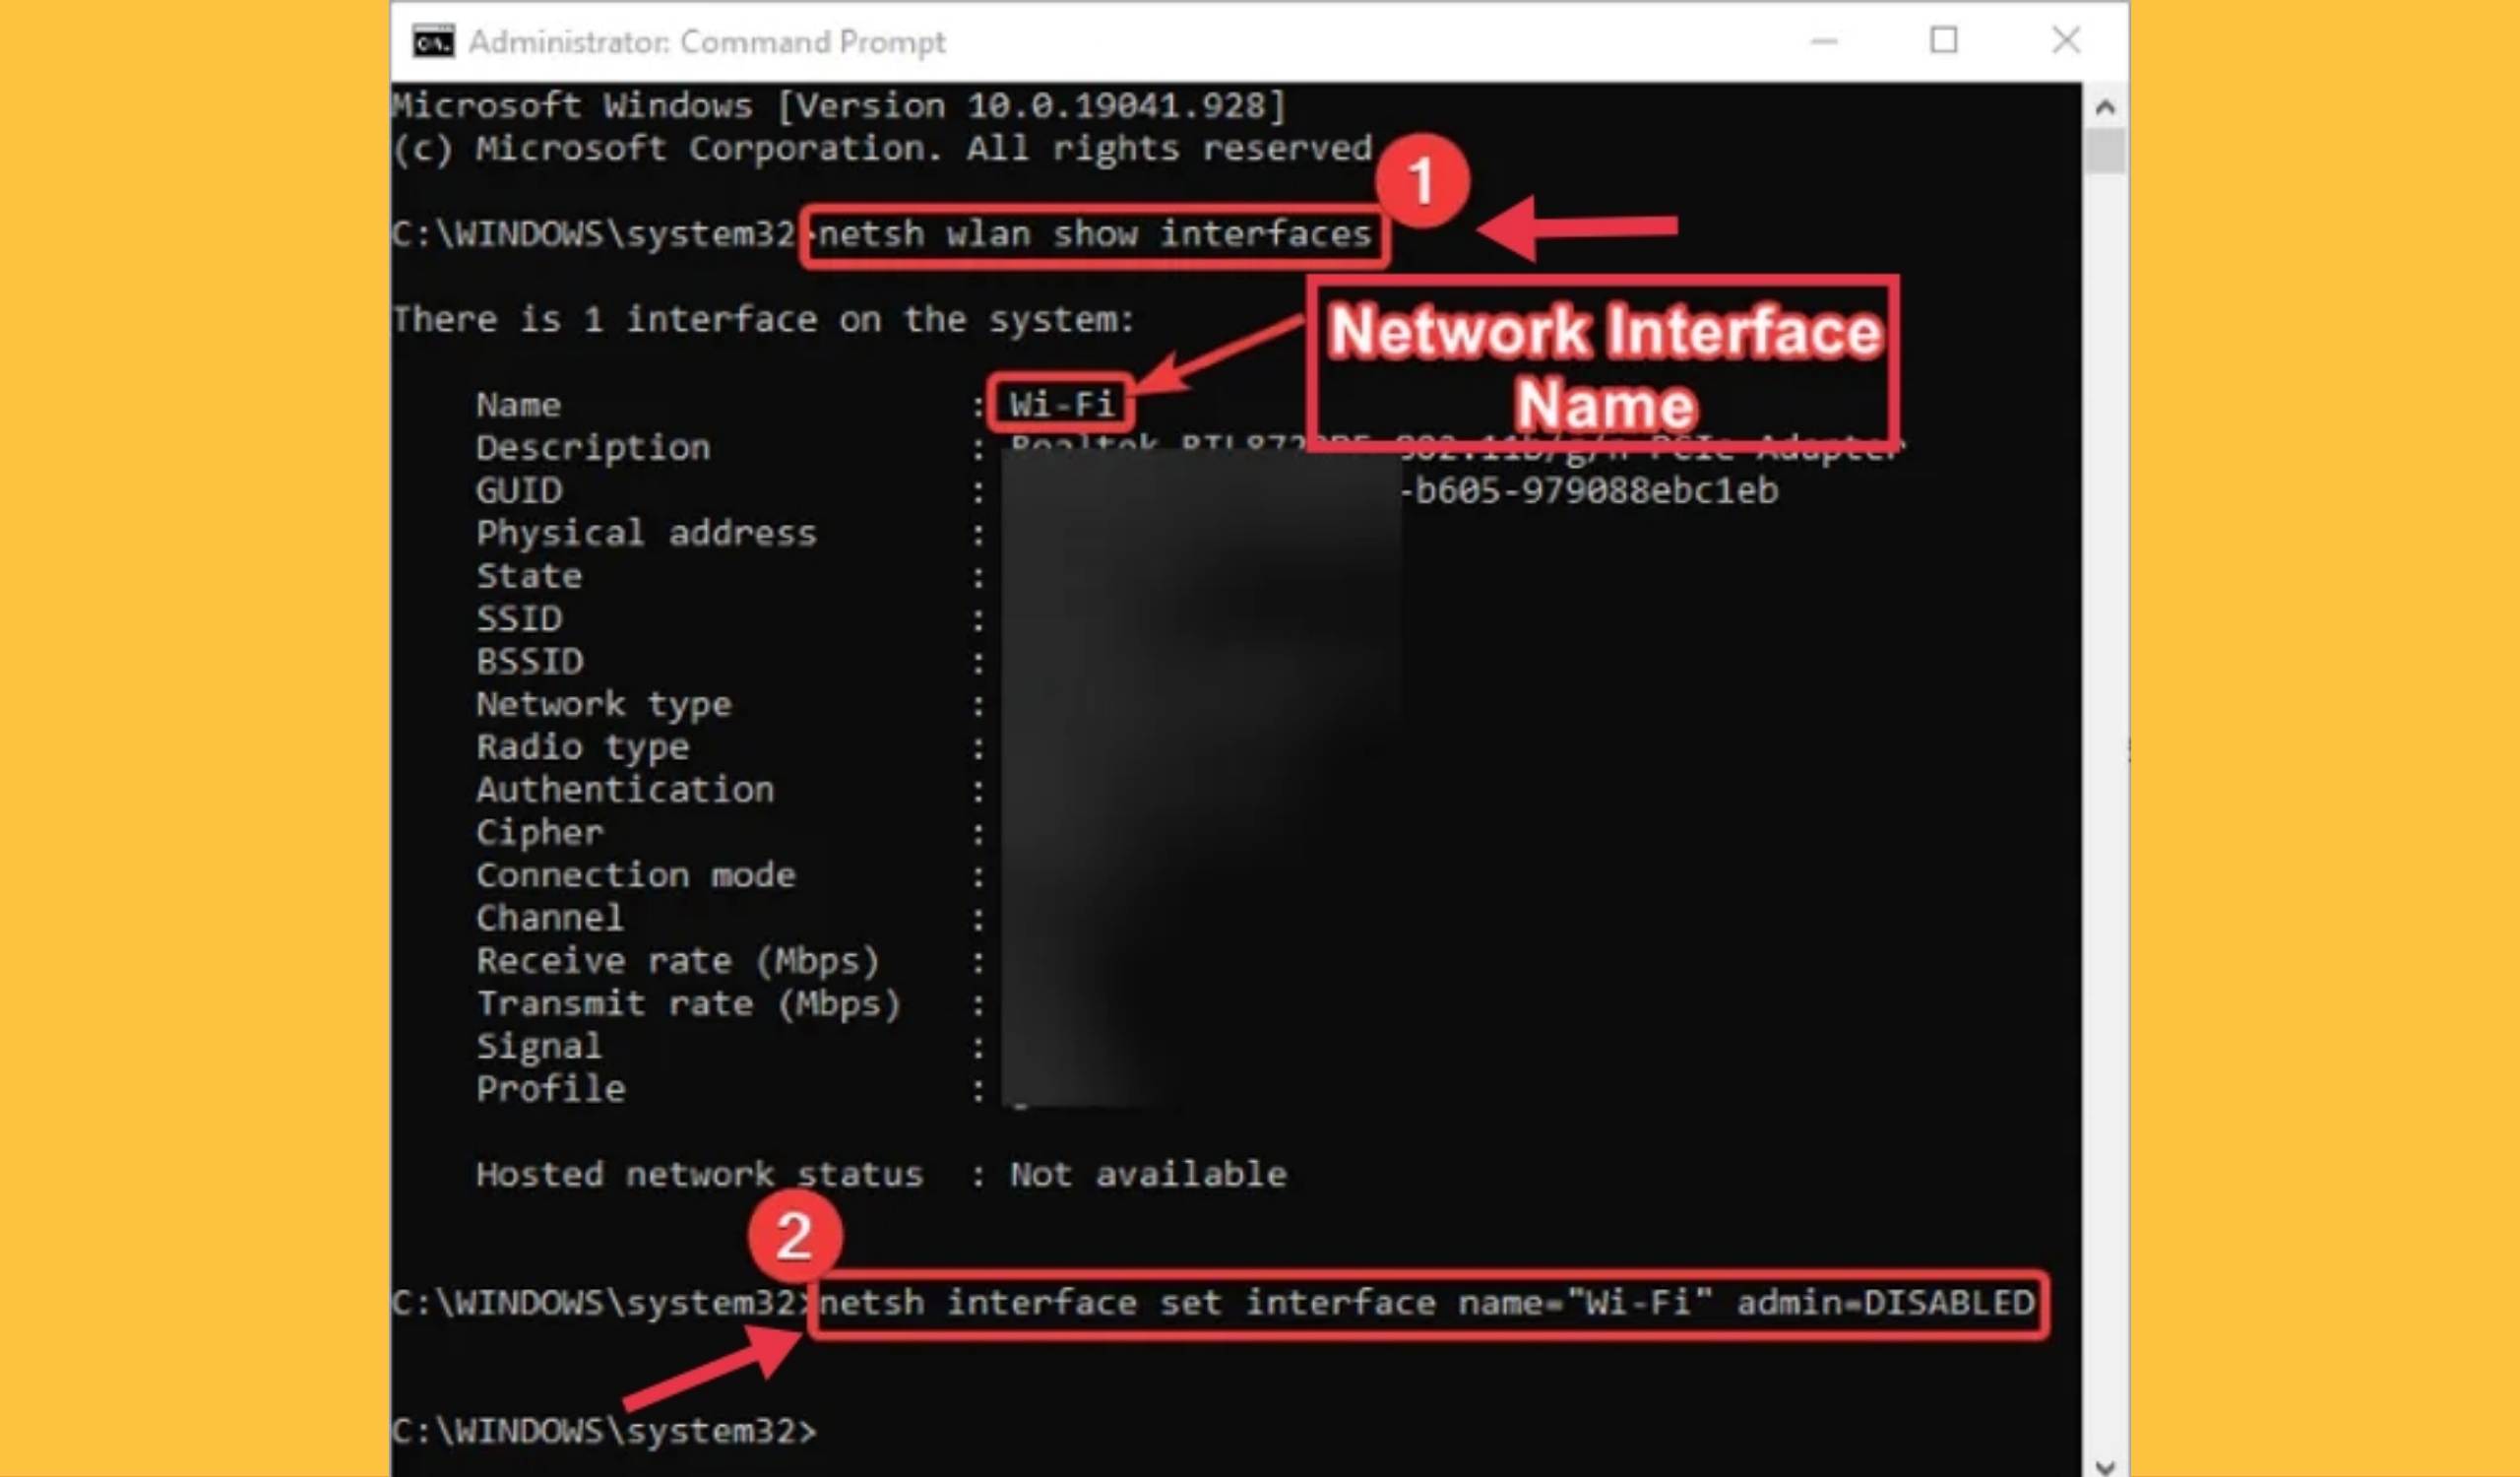
- You need to know the name of the wireless interface you want to disable before entering the command to disable Wi-Fi. So first, enter the following command to display the names of your network interfaces:
netsh wlan show interfaces
- Now write the following command that you use Disable WiFi in Windows 10:
netsh interface set interface name="WirelessNetworkName" admin=DISABLED
- Instead of
WirelessNetworkName, write the name of your wireless interface (see example below). - After typing the command, tap Enter to run it. It will disable WiFi on your PC.
Here are some other commands you need to know if you want to change WiFi settings:
- To activate WiFi connection again, enter this command:
netsh interface set interface name="WiFiNetworkName" admin=ENABLED
- If you just want separate WLAN you can use this command:
netsh wlan disconnect
- To connect this command can be used for a specific WiFi connection:
netsh wlan connect name="WiFiNetworkName"
2. Deactivate WLAN with Powershell
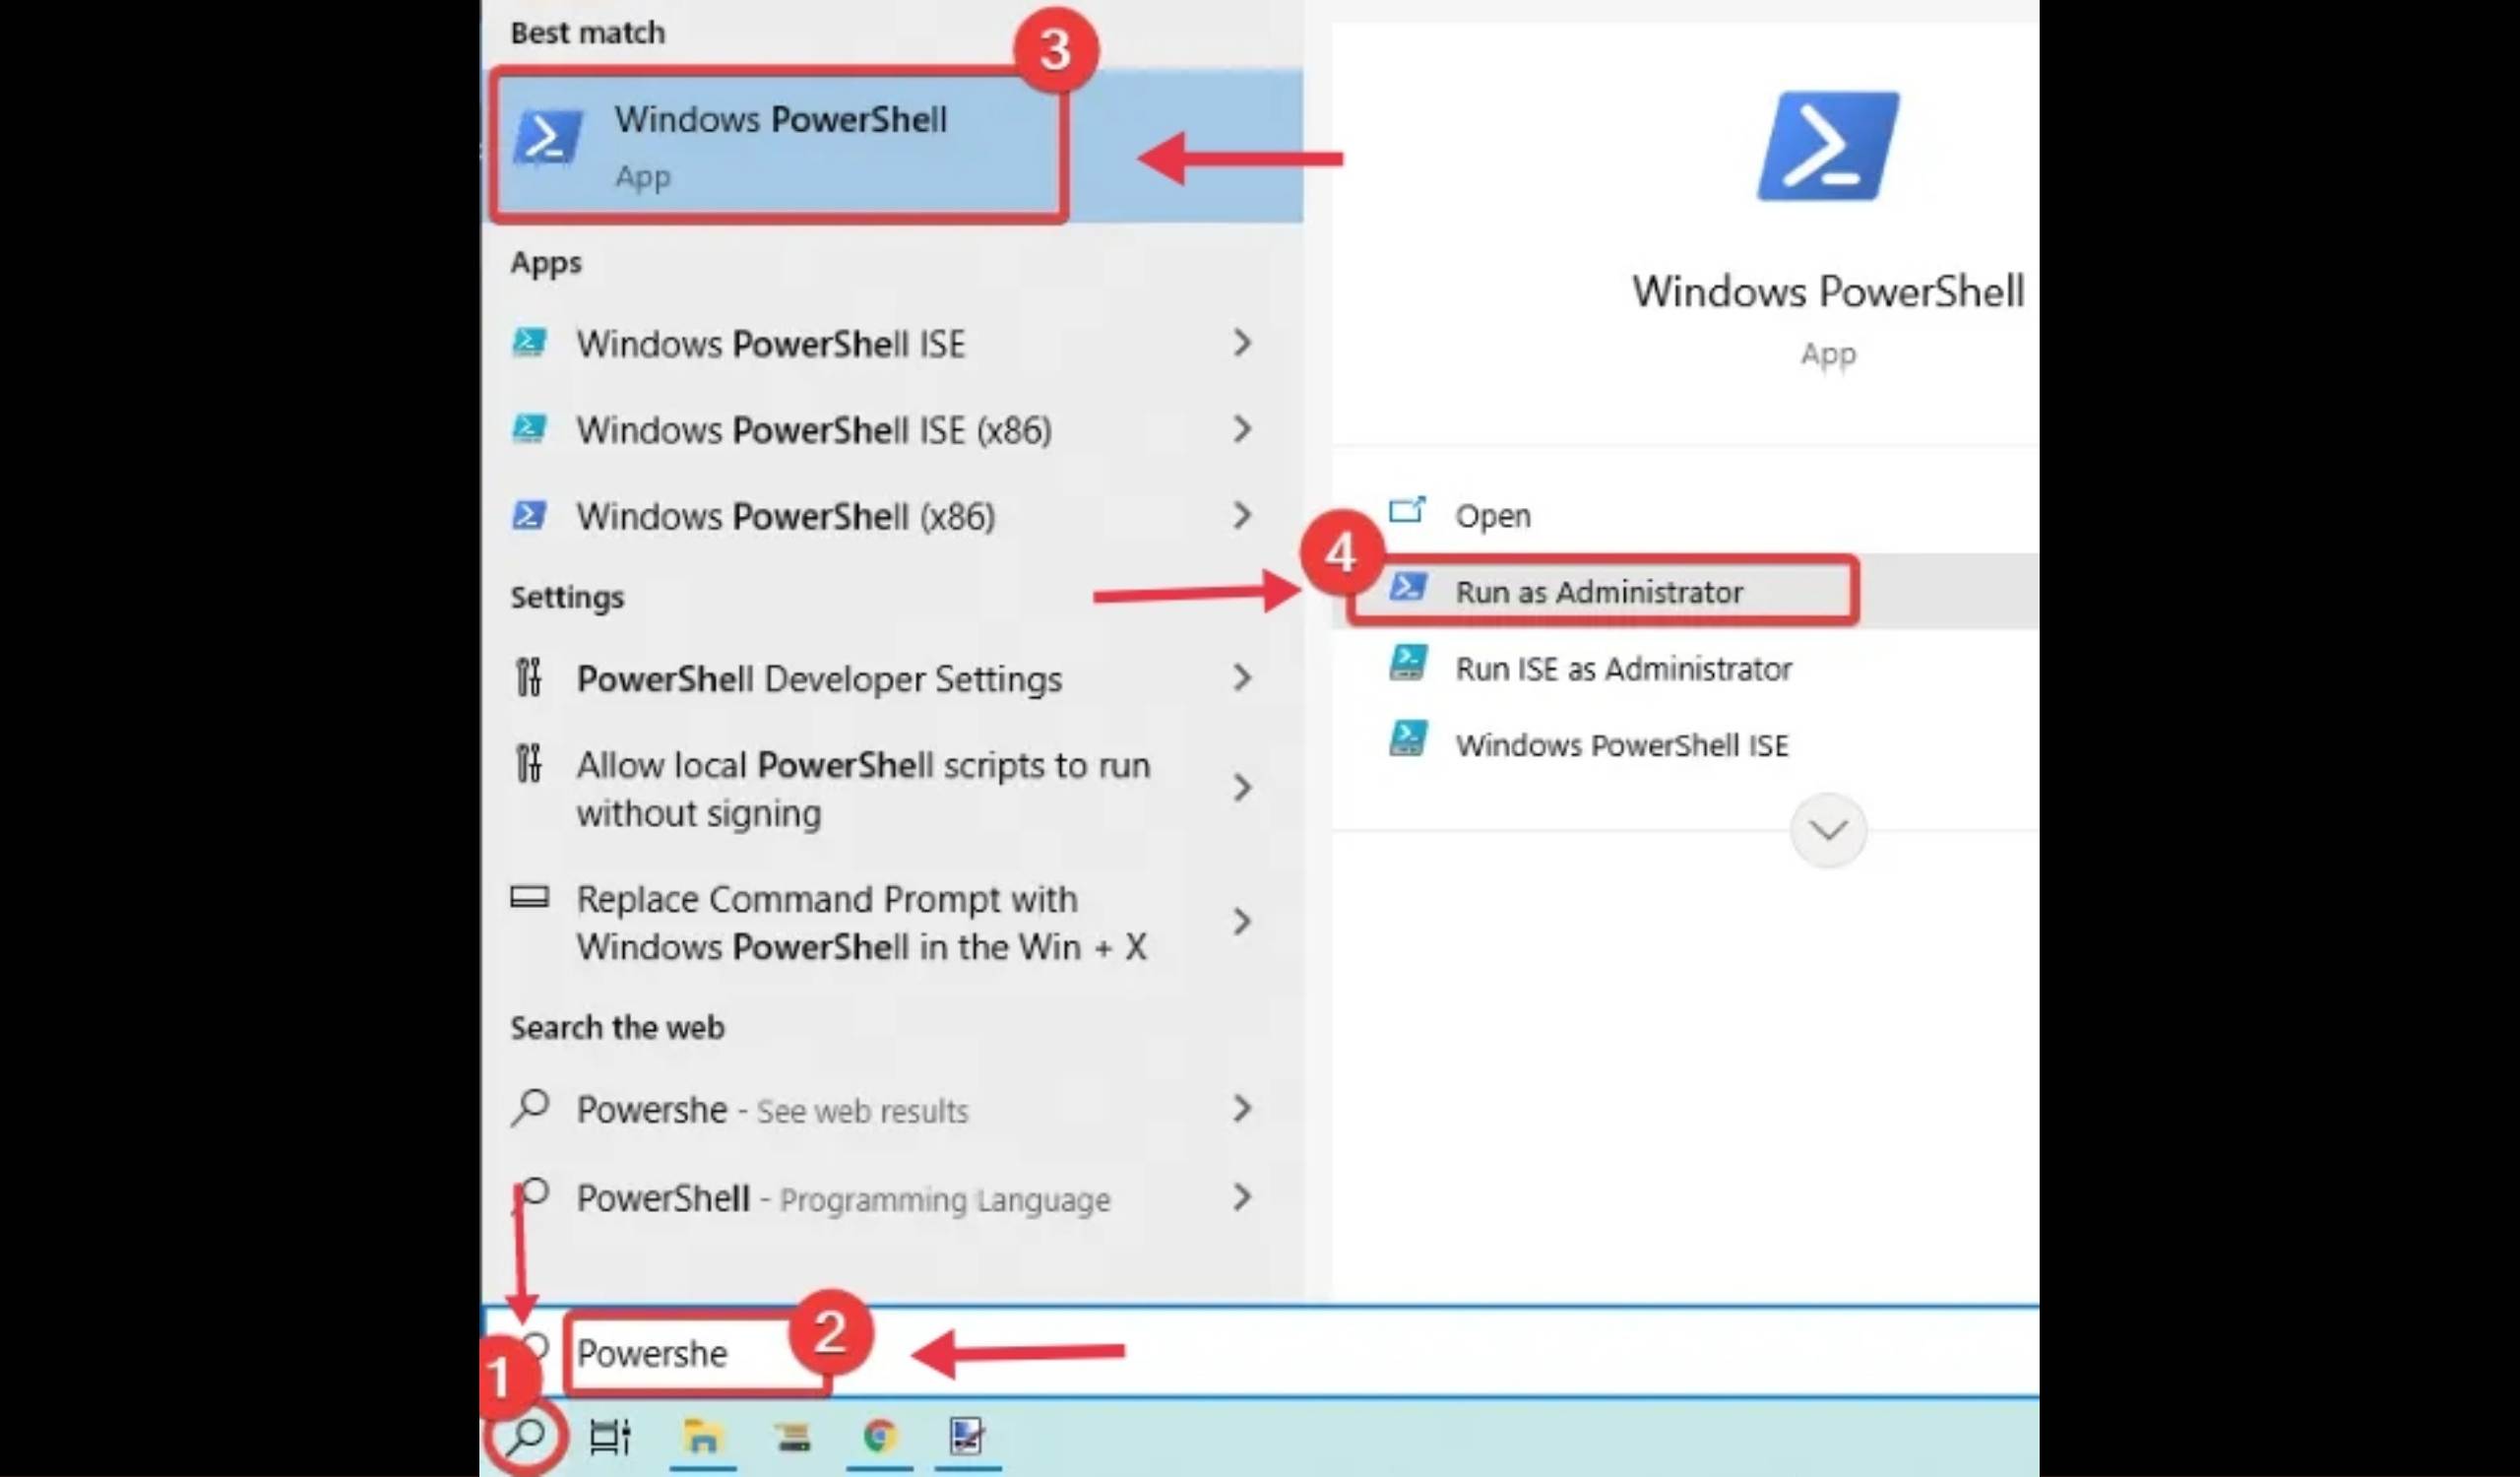
- Go to search Windows 10 option and type Power Shell.
- Next, run it with administrator rights as shown in the following screenshot.
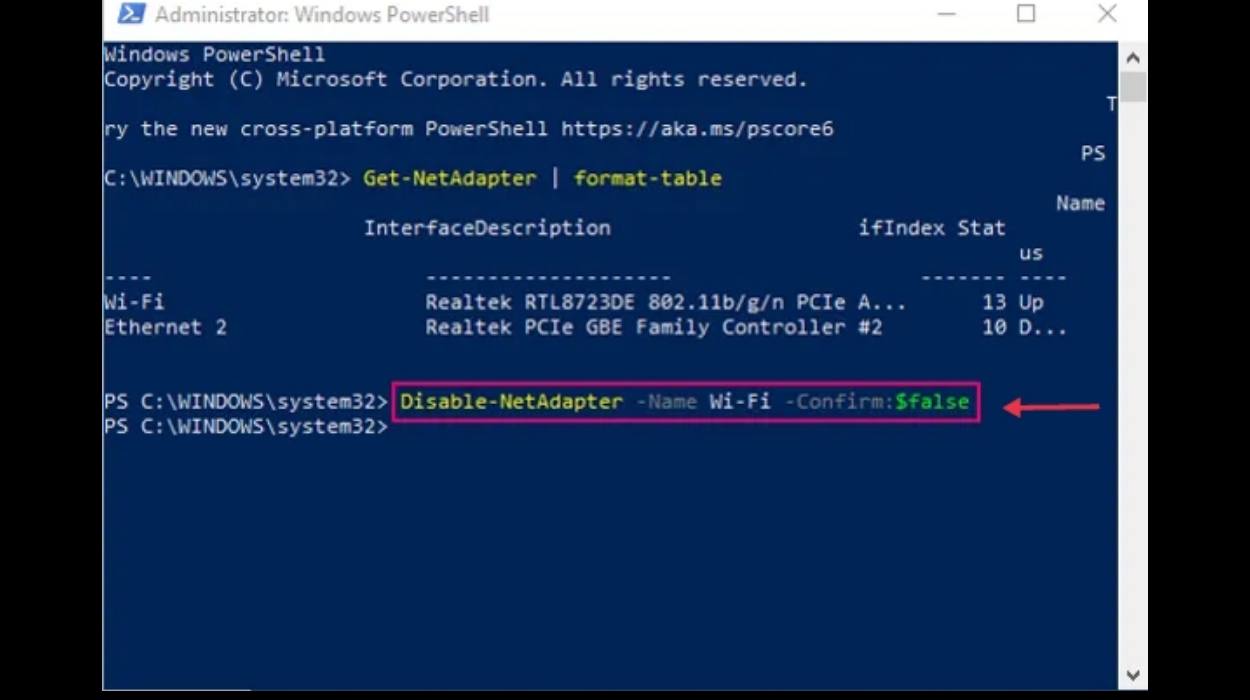
- Now to know the adapter name you want to disable you can use the following command in Powershell:
Get-NetAdapter | format-table
- After that, write the following command and press Enter to disable your WiFi:
Disable-NetAdapter -Name "Adapter-
- When you want to turn your WiFi back on, just use the following command in Powershell:
Enable-NetAdapter -Name "Adapter-Name" -Confirm:$false
Conclusion
So you can simply deactivate or activate WiFi in Windows 10 with CMD or Powershell. Simply enter a deactivation command and your WiFi connection will be deactivated on your computer.
If you want to turn WiFi back on, you can use the other command mentioned to turn WiFi connection back on.
Continue reading:
- How to Quickly Change Zoom Background on Android
- How to Schedule WhatsApp Messages on Your Computer