Microsoft OneDrive is pre-installed with Windows 11, which backs up your photos and files in the cloud. It syncs and is still available on all of your other devices connected to your OneDrive account. That means if you open your OneDrive account on another computer, you can access your photos and files from there.
While this is a good feature for many Windows 11 users, some may not prefer to keep their personal files on cloud storage and may want to stop doing so. It can also be useless if you’re using other online storage services like Degoo, Mega, Amazon Photos, or something similar.
On a Windows 11 PC, Microsoft OneDrive installs like a UWP app, and you can uninstall it from your device if you don’t like it. This means that if it is a useless application to you, you can easily get rid of the OneDrive application. It’s possible to use the built-in Settings app, which means you don’t have to use a third-party application to remove the OneDrive app from your PC.
How do I uninstall the OneDrive app from Windows 11?
Step 1. Open the Settings app by pressing
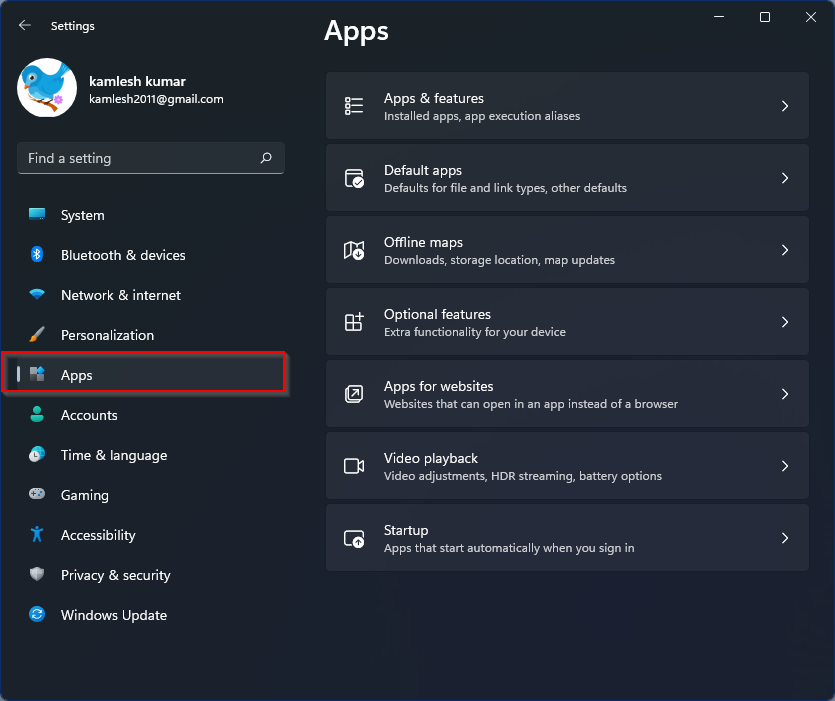
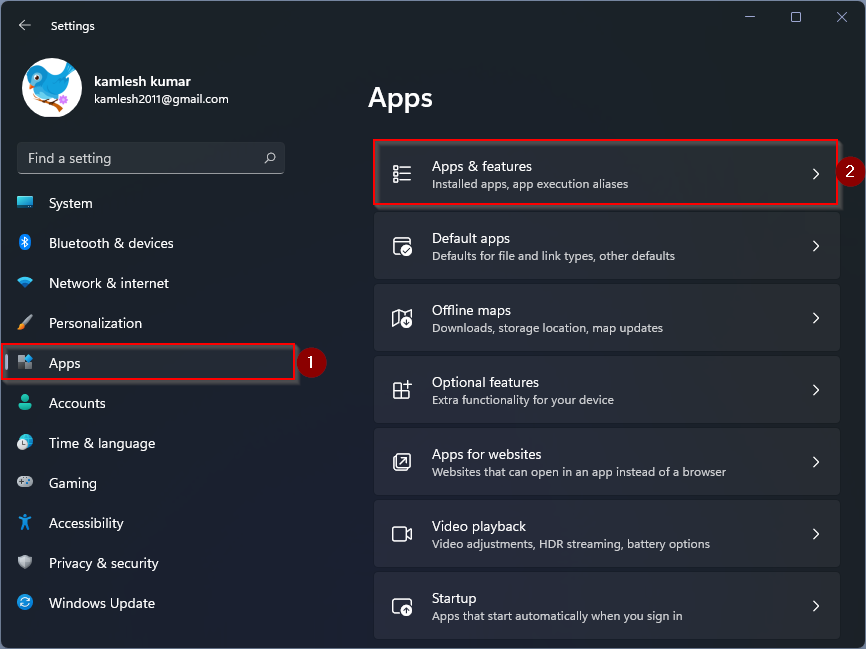
Step 2. Click the
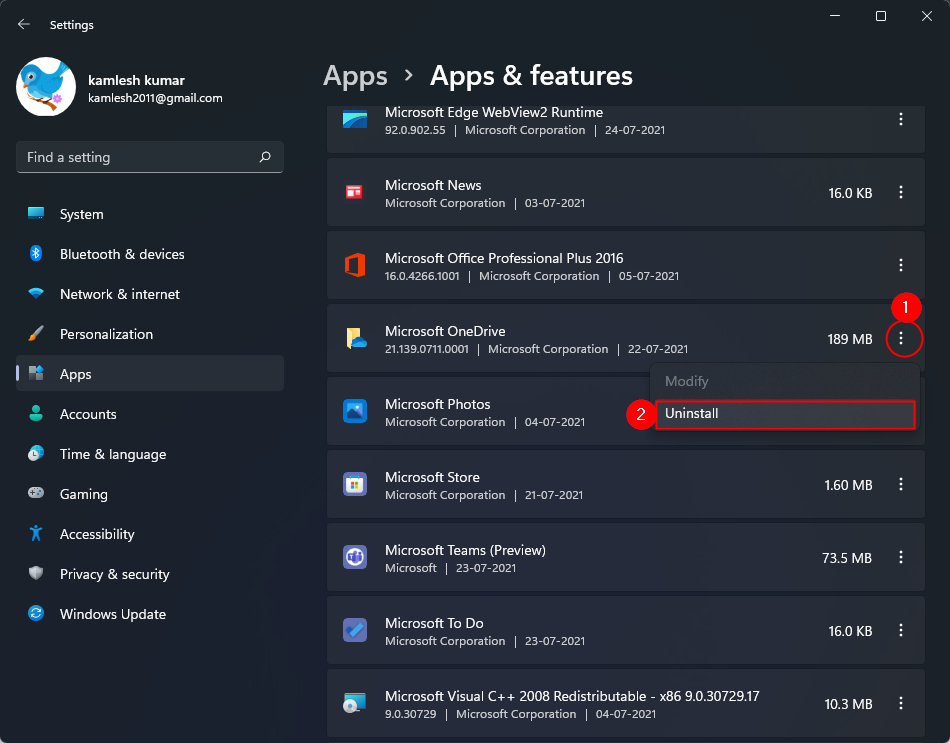
Step 3. Scroll down on the Apps & functions Settings to see that Microsoft OneDrive Entry and then click the three vertical points. Then click on that
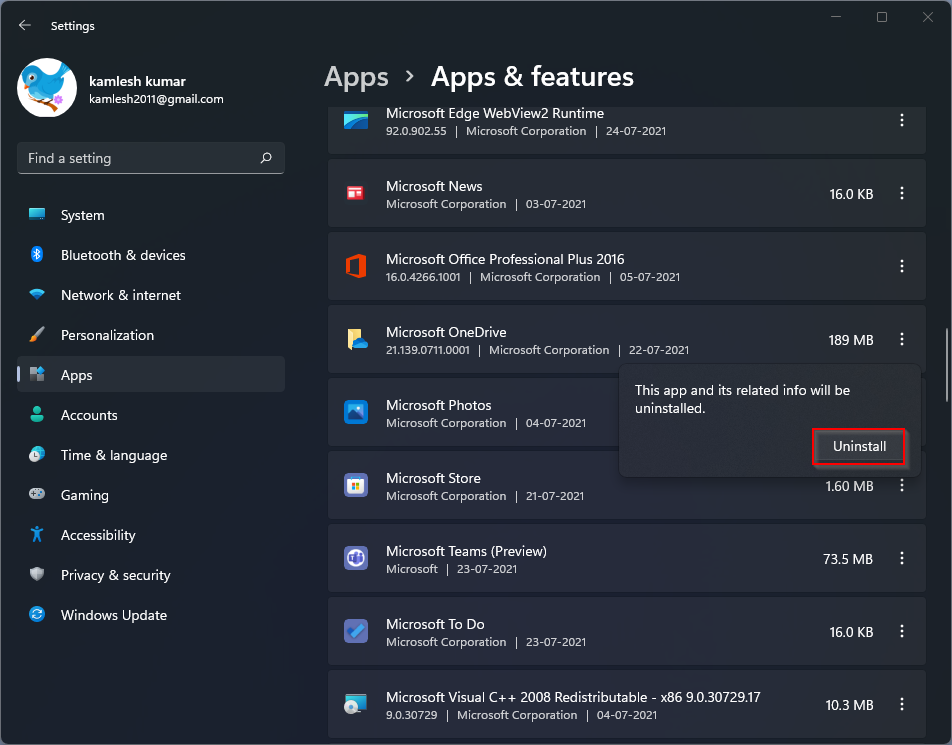
Step 4. Click the
After following the steps above, you won’t see Microsoft OneDrive on your Windows 11 computer or laptop.
If you want to install it on your computer again, you can do so through the Microsoft Store App.