Do you want to partition your hard drive in Windows 11? Depending on the hard drive or SSD size, you can create multiple partitions on your Windows 11 PC. All you need is a built-in disk management tool to resize or create a new partition. This means that you don’t need to install a third-party tool on your PC to partition your hard drive.
A hard disk is partitioned in the same way as with ABCD. This means that no technical knowledge is required for this. Any beginner can create partitions by reading this post.
Topics covered
Why is partitioning necessary?
If you buy a new Windows computer or laptop, it might come with an SSD or HDD. Most of the time, the hard drive has a single partition and it is not easy to organize your files and folders into different categories. A single partition also has its own disadvantage. If your Windows operating system has been damaged for any reason, there is a lot of work to do to get your data back. If you have created more than one or more partitions on your PC, you can simply erase the Windows drive and the rest of the stored data will be safe. That means you can run your PC without fear of losing data.
To divide your files into different categories, you may want to partition hard drives and create multiple drives. As mentioned above, Windows 11 also has a standard hard drive management option that allows you to create, delete, extend, shrink, and resize partitions. To partition a hard drive in Windows 11, you need to open the disk management tool. Let’s take a detailed look at how partitioning works on Windows 11.
How do I shrink a partition in Windows 11?
As mentioned above, when you buy a new PC, in most cases you will find a single drive that your operating system will be installed on. For example, suppose your computer has a 2 TB hard drive; Under “This PC” you will find a single drive “C”. Since your PC has a single drive that occupies all of the space on your computer, you must first free up some space. To free up space on the HDD or SSD, you need to Shrink it.
Step 1. Click the
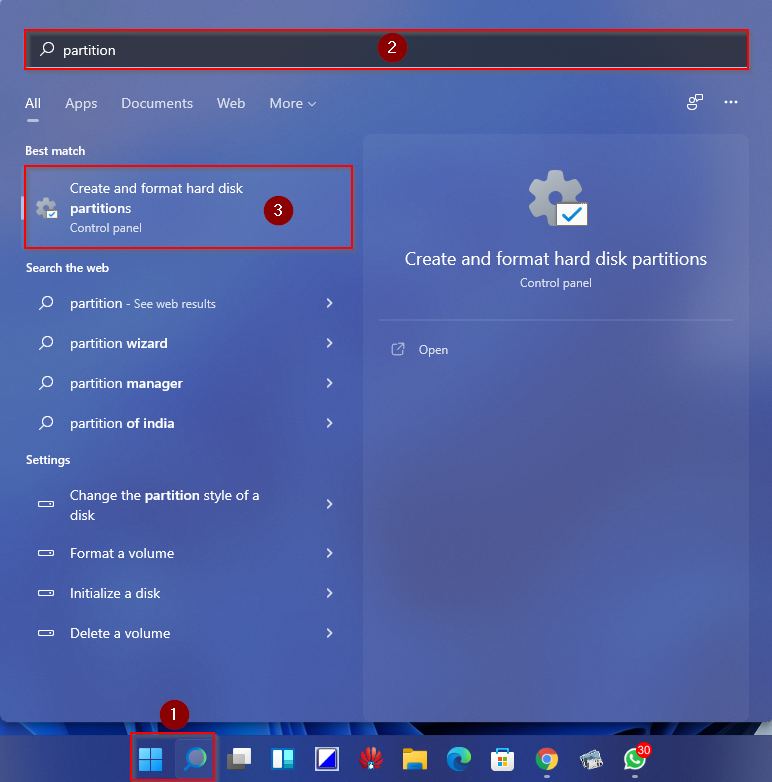
The above action opens the Disk Management window.
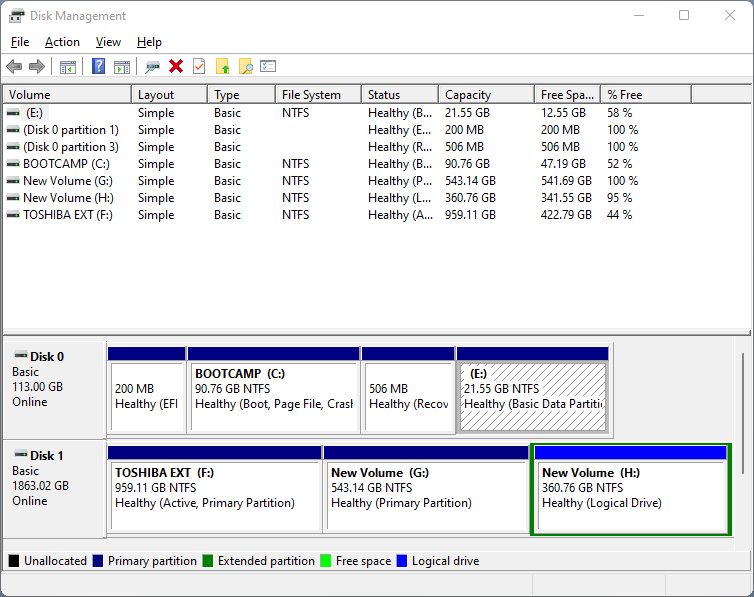
Step 2. Right click the partition that you want to shrink and free up space to create a new partition. Choose
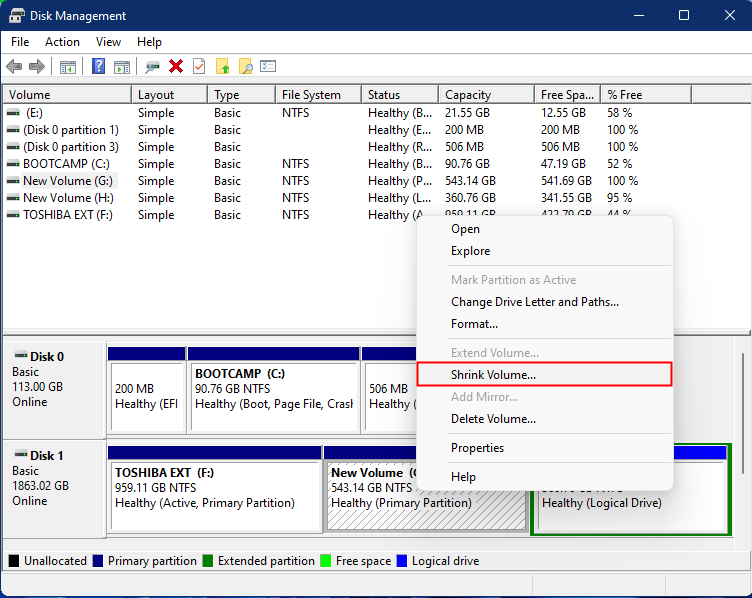
Step 3. A new pop-up window will appear. Here, next to the “Enter the space to shrink in MB” option, type the size (in MB) you want to free up from the selected drive, then click

Step 4. Now the selected volume size will be reduced and you will see a Unallocated Space next to the selected drive.
How do I create a new partition in Windows 11?
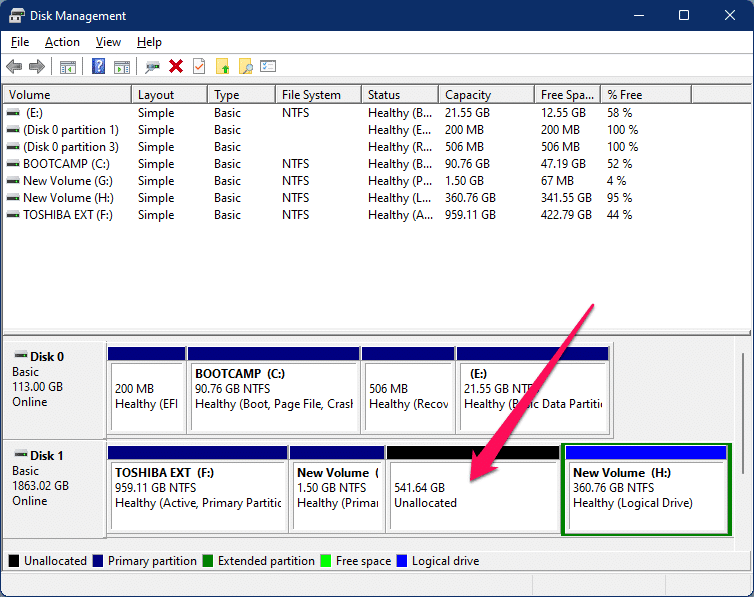
If you see an Unallocated Space and Disk Management window, or if you want to free up space by shrinking a partition and create a new drive or partition, do the following:
Step 1. Click the
Step 2. After following the steps above, you will see the “Disk management” Window. Right click on Unallocated Space and then select
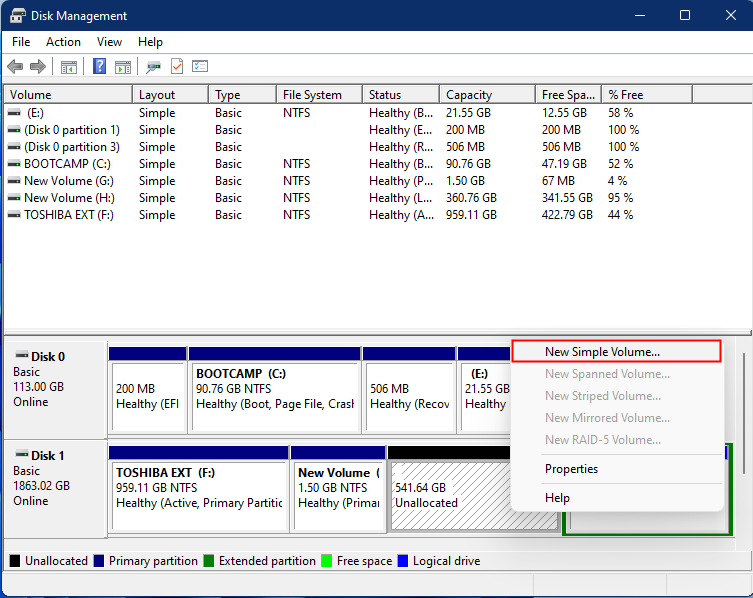
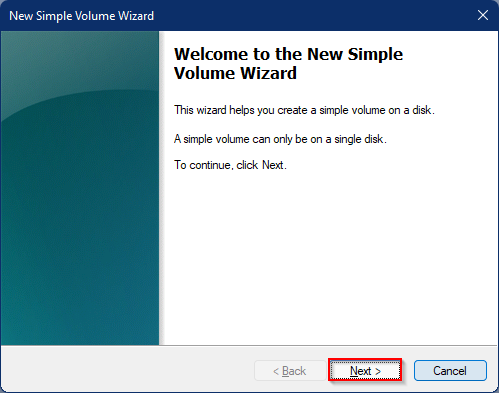
Step 3. Click
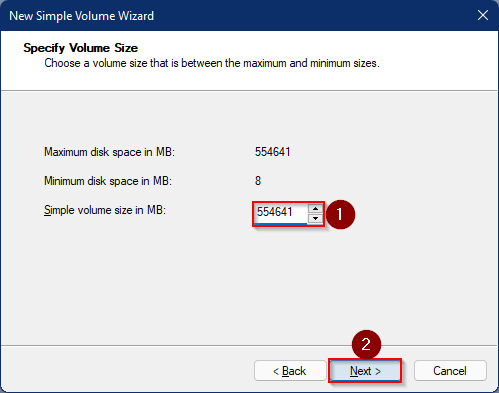
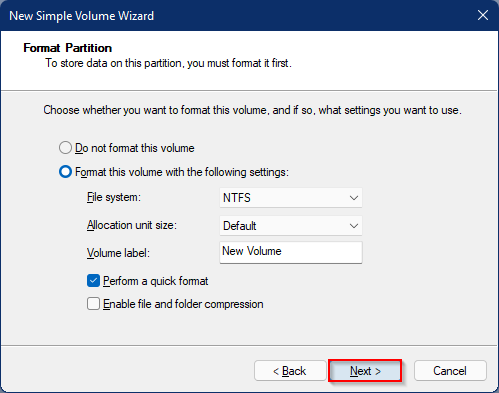
Step 4. If you want, in the next window you can reduce the size of the partition by changing the default value next to “Simple volume size in MB”. By default, Windows 11 allocates all of the free space. After setting the partition size you want, click on the
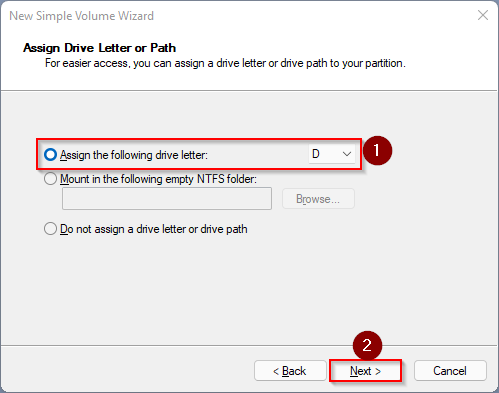
Step 5. Windows will now automatically assign a free drive letter for your partition. If you want to change, click the “Assign the following drive letter” drop-down menu and select the desired drive letter for your partition. When you’re done, click that Next Button.
Step 6. Click Next Button.
Step 7. Finally, click the
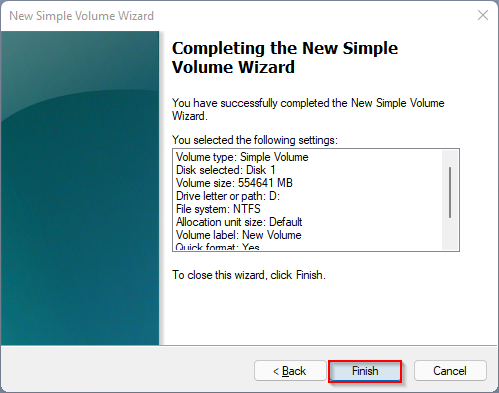
Now Windows 11 will create your new partition and format it for you. You can access your newly created drive at File manager or This pc.
How to delete an existing partition in Windows 11
If you want to delete a partition or drive on a Windows 11 PC, for whatever reason you can do it using the disk management tool.
Step 1. Click the
Step 2. After following the steps above, you will see the “Disk management” Window. Right click on the volume or partition you want to remove from your PC and select the
Note: Deleting a partition will erase all data from that drive. Make sure you have a backup of your existing data in case you have any important data.
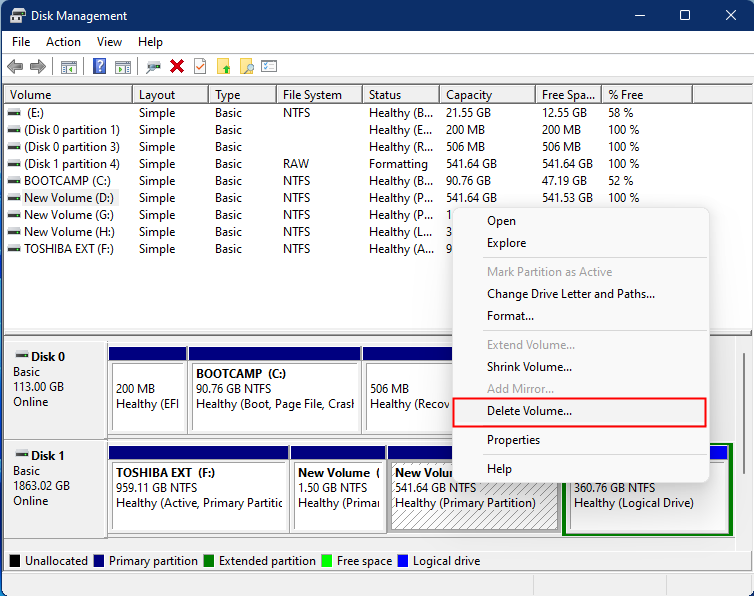
Step 3. Click the Yes when prompted.
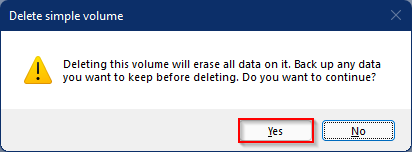
After following the steps above, the selected drive and its data will be permanently removed from your computer.
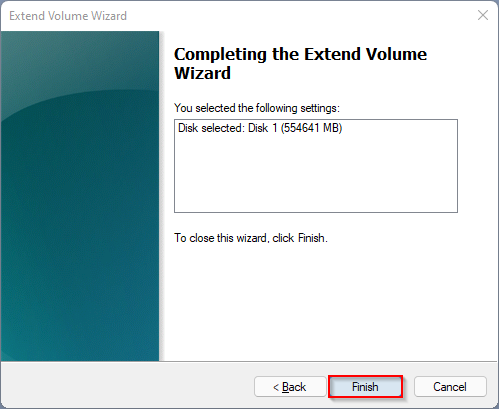
How to extend an existing partition in Windows 11
If you find that an existing drive or partition is running out of space, or for some reason you want to increase its size, you can use Disk Management tool to increase the space. However, this feature is only available if there is free space after that partition or drive. For example, suppose you have a “G” drive that you want to expand. Unallocated space should be immediately after the “G” drive; Otherwise, you cannot increase the “G” partition size.
Step 1. Click the
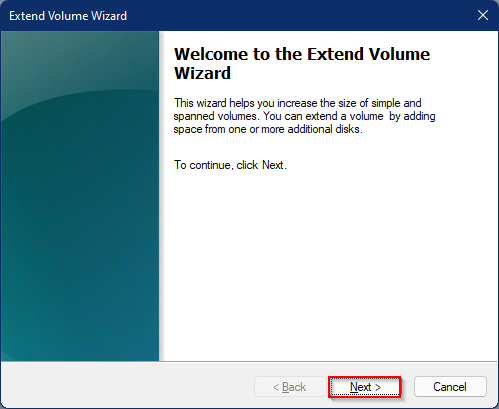
Step 2. After following the steps above, you will see the “Disk management” Window. Right-click the volume or partition that you want to extend on your computer, then select the

Step 3. In the next window, click the Yes Button.
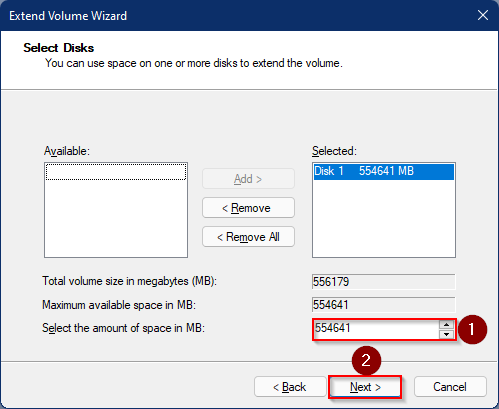
Step 4. In the next window, Windows 11 will automatically allocate all of the free space next to your selected drive that you want to expand. If you want, enter the size you want next to the “Select the distance in MB“Option. Once the size has been entered manually, click on the.”
Step 5. Finally, click the