You may want to create a local account. Maybe you need to create an account for someone at home or a small business who doesn’t have or doesn’t need a Microsoft account. Anyway, here’s a look at the facility. In this guide we will show you Here’s how to add and create a local user account on a Windows 11 PC or laptop, you will also learn how to change the account type for the local user.
What is a local account on Windows 11?
You may have already used a local account. This name might be confusing to inexperienced users, but it is nothing more than an account to access a Windows 11 PC or laptop as a standard administrator. Local accounts apply to this particular computer but not to other computers. You log in, change settings, install software and differentiate your user area from other users of the system.
The benefits of using a local account include:
- More data protection: Your Windows 11 settings and computer usages will not be transmitted to the remote serverrs. Everythingng is saved locally on a computer.
- Safer: You create a complex password that works on one computer and nowhere else.
- Internet independent: Microsoft sign-in requires an Internet connection to get user preferences and settings; In Windows 11, no internet connection is required to log on locally.
- Custom login name: Your email address is not used as a login name, so it will not appear on the login screen when your screen is locked.
However, when you sign in to Windows 11 with a Microsoft account, you agree to share a lot of information with Microsoft. Signing in with a Microsoft account has a number of benefits, such as: For example, synchronizing personal settings between Windows 11 devices, synchronizing files on OneDrive and accessing apps from the Windows Store.
Create a local user account on Windows 11
Now that you know the benefits of having a local account and want to create one for your computer, do the following:
- To create a local user account under Windows 11, use the keyboard shortcut Windows + I to start the Settings app directly.
- In Settings, tap the ‘Accounts‘Tab.
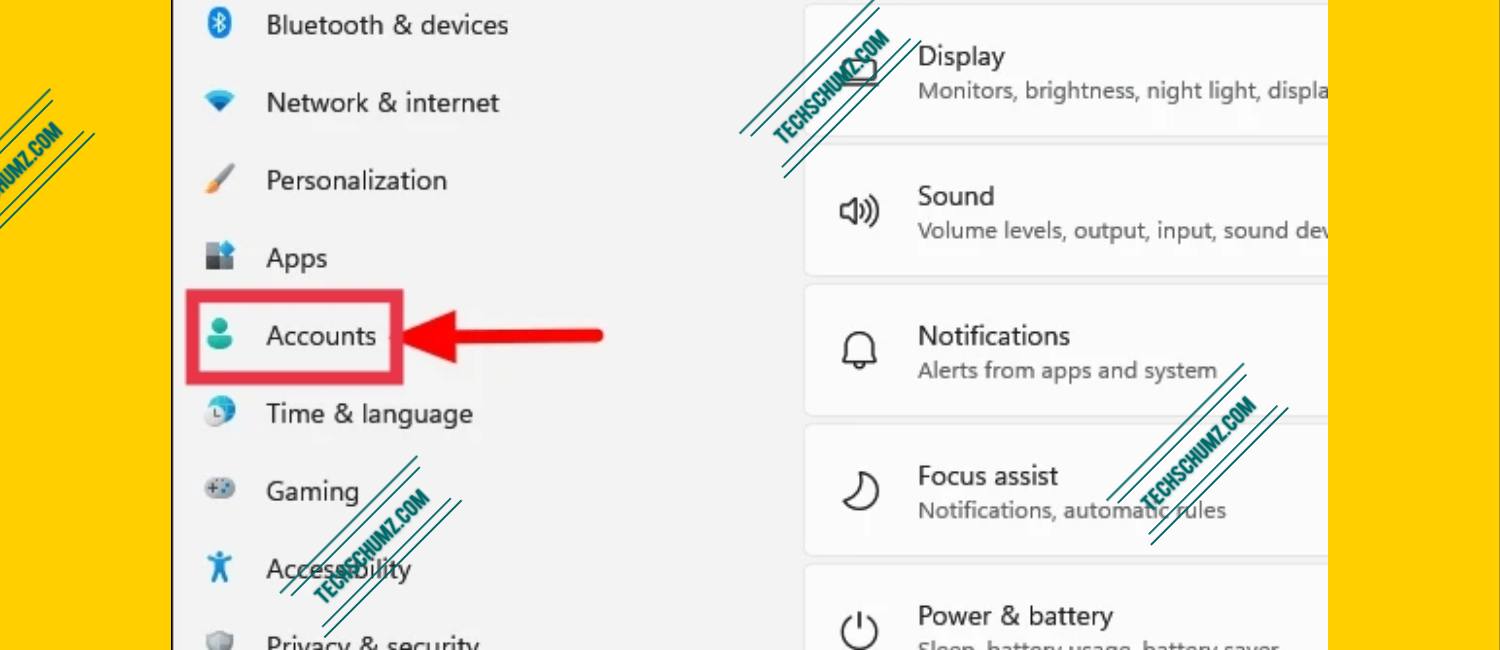
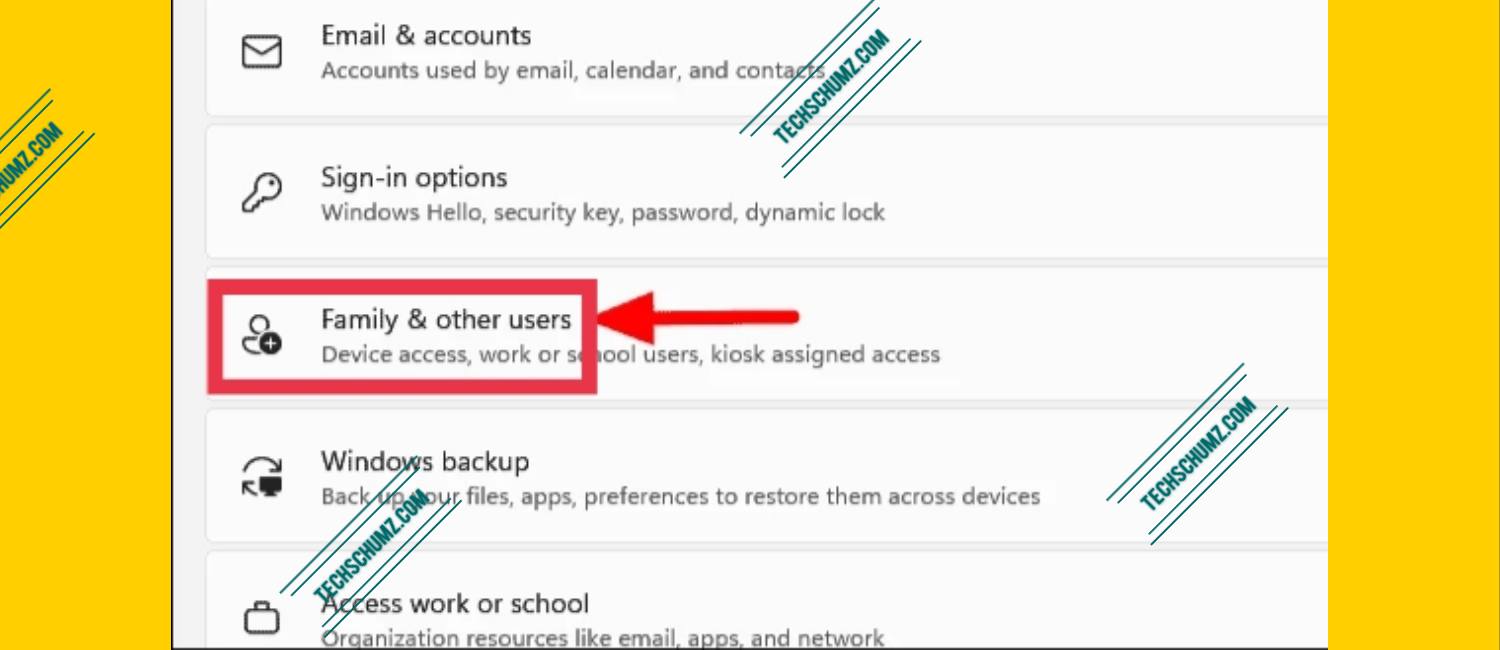
- Tap the ‘Family and other users“Listed on the right.
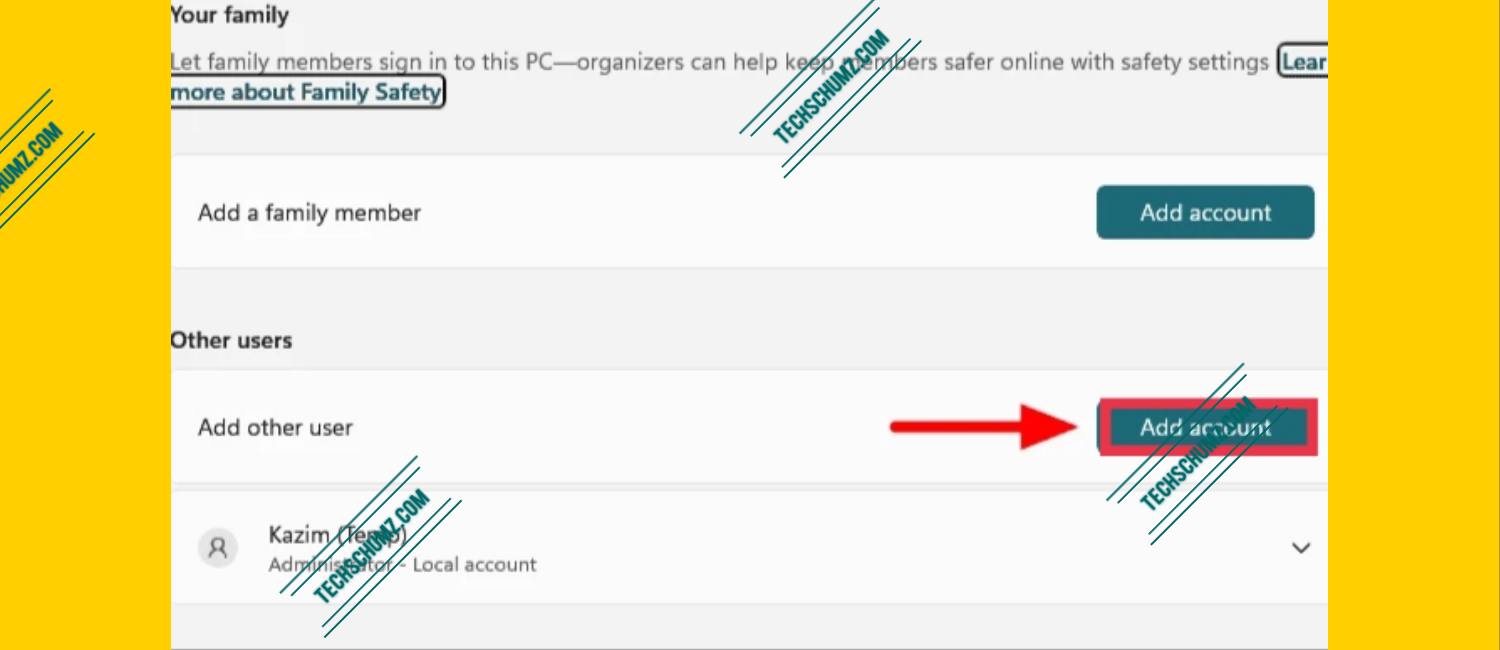
- Click on the ‘Add account‘under the setting’ Other users’.
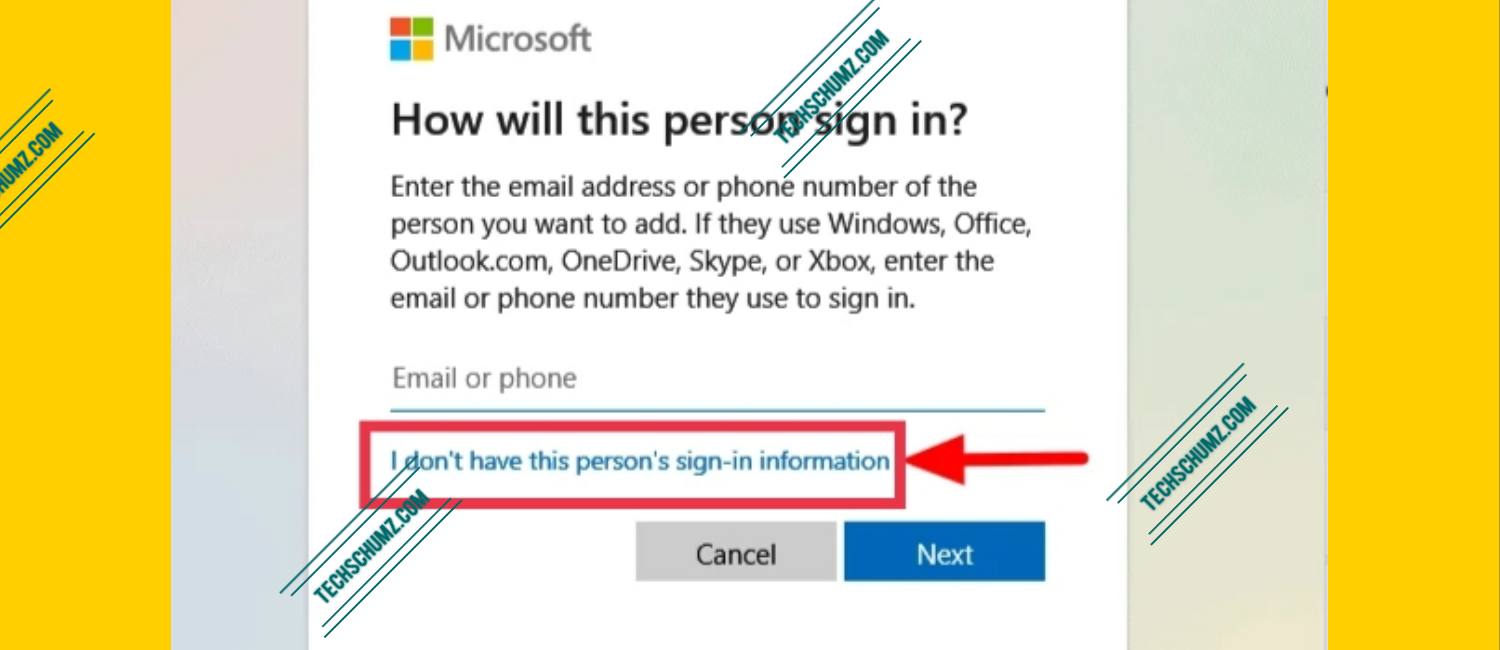
- In the start window select ‘I don’t have that person’s credentials.‘
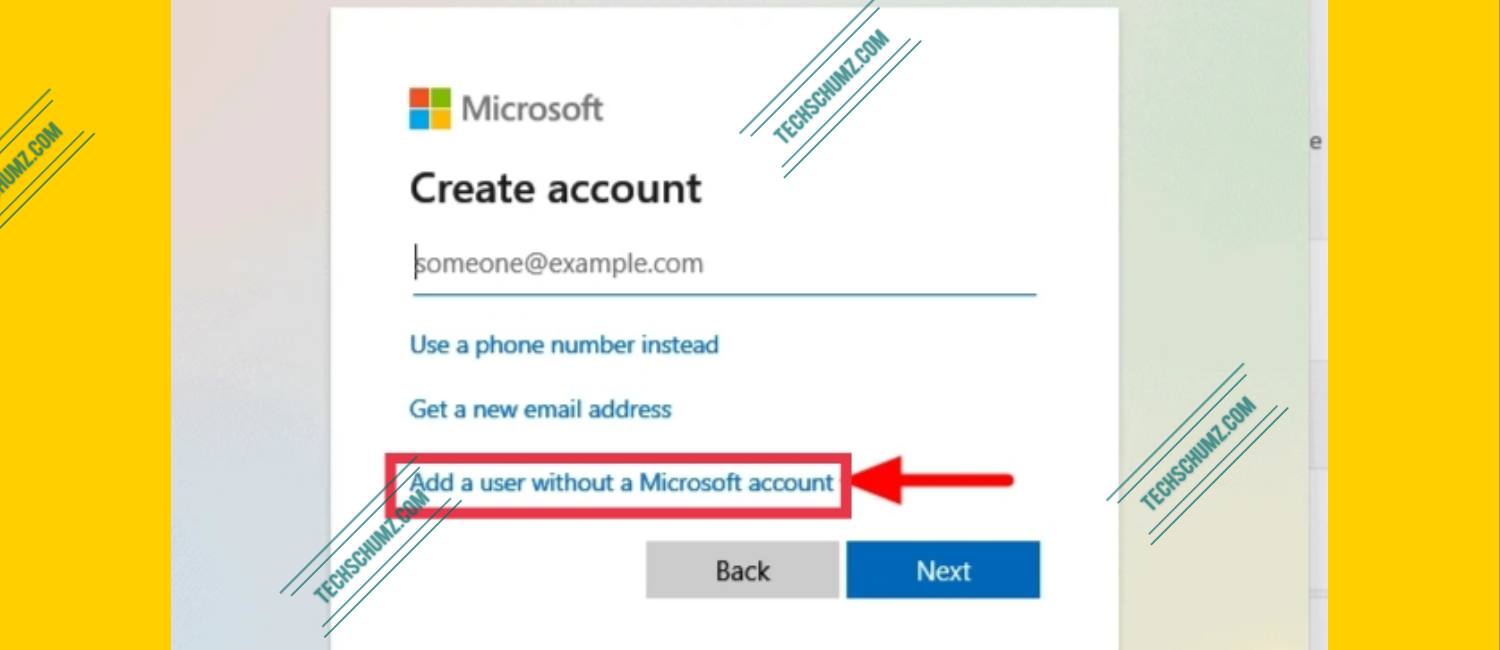
- Then click on ‘Adding a user without a Microsoft account‘.
- You will now be asked to enter your username and password in the appropriate sections. After completing the required parts, click Next below to create a local account.
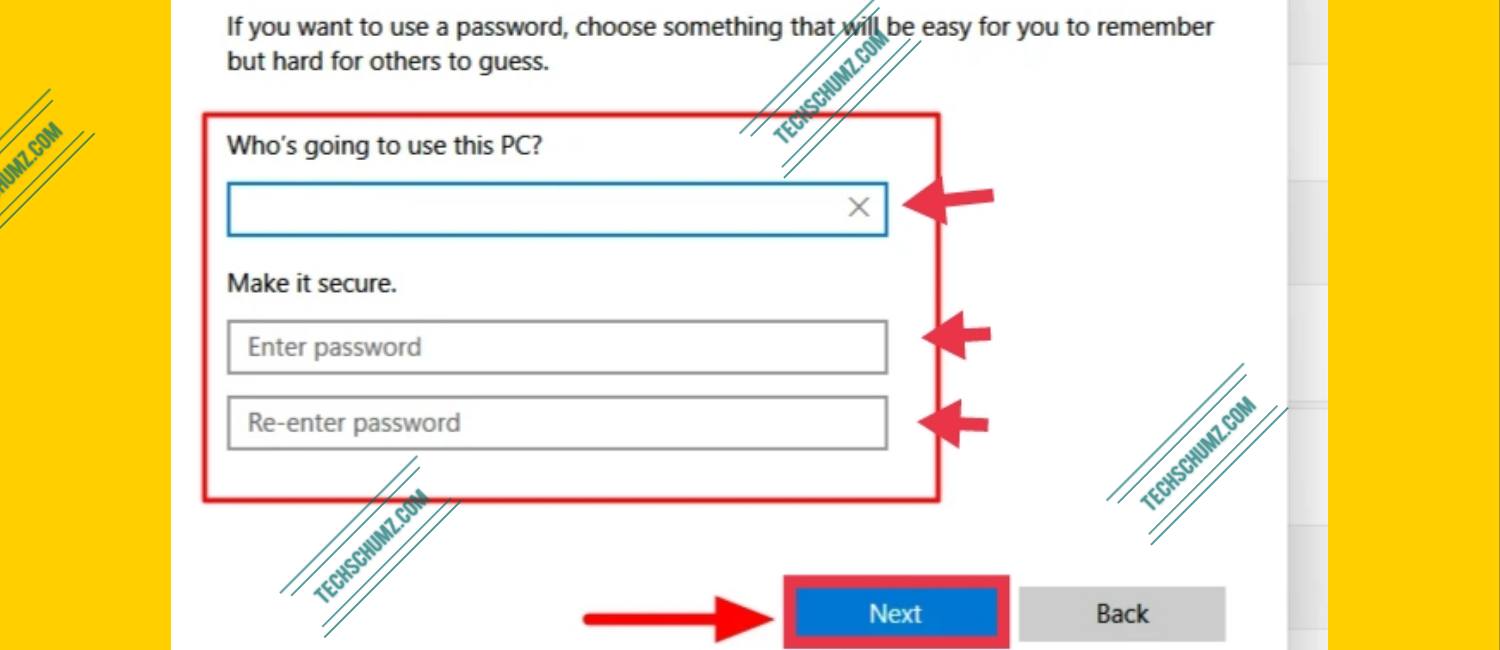
Note: When creating a local account, you can choose to proceed with or without a password. If you do not want a password-protected local account, leave the password section blank and click on “Next”.
Now, if you have a Microsoft account linked to your Windows 11 PC or laptop and you want to remove it from your computer, open the link below to read it.
-> How to remove a Microsoft account from your Windows 11 computer
Change the account type for a local user
When creating a new local user account, the default is a standard user account which is more secure. You can change it to an administrator account. However, you should only do this if the account is for you or someone you trust.
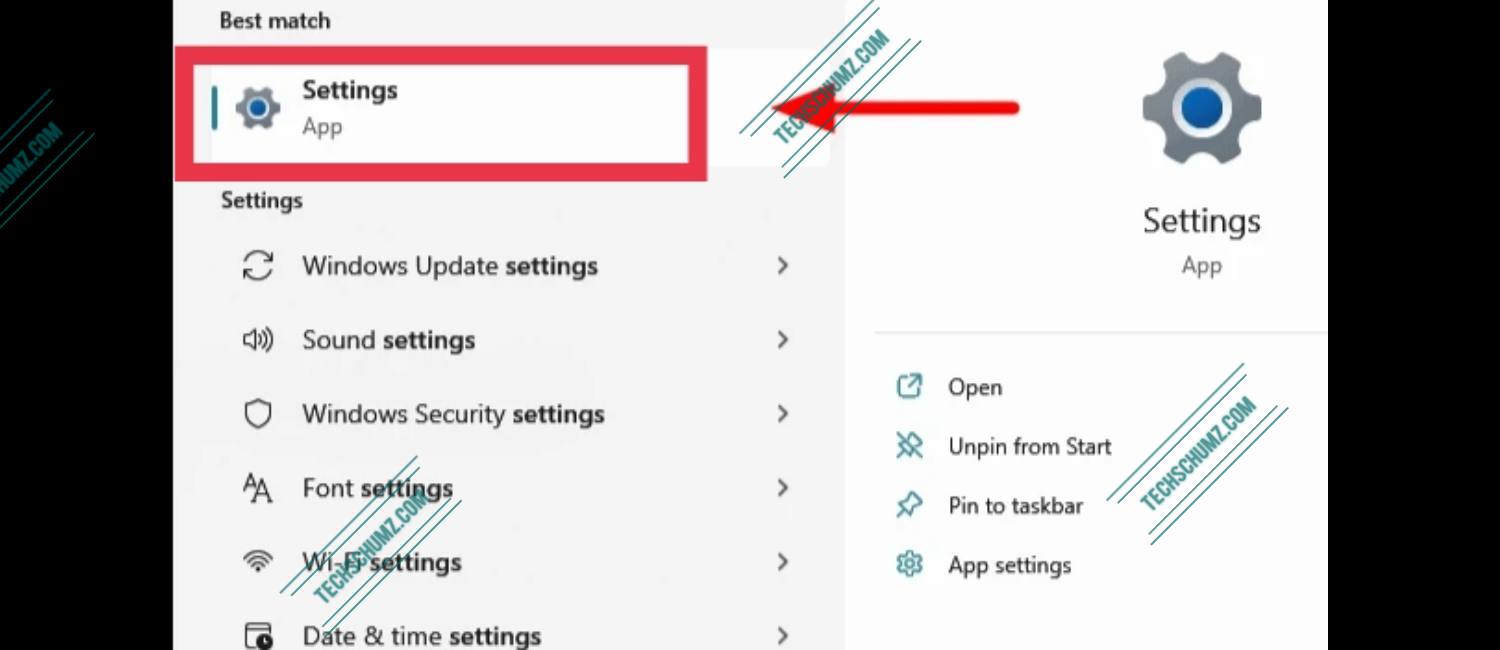
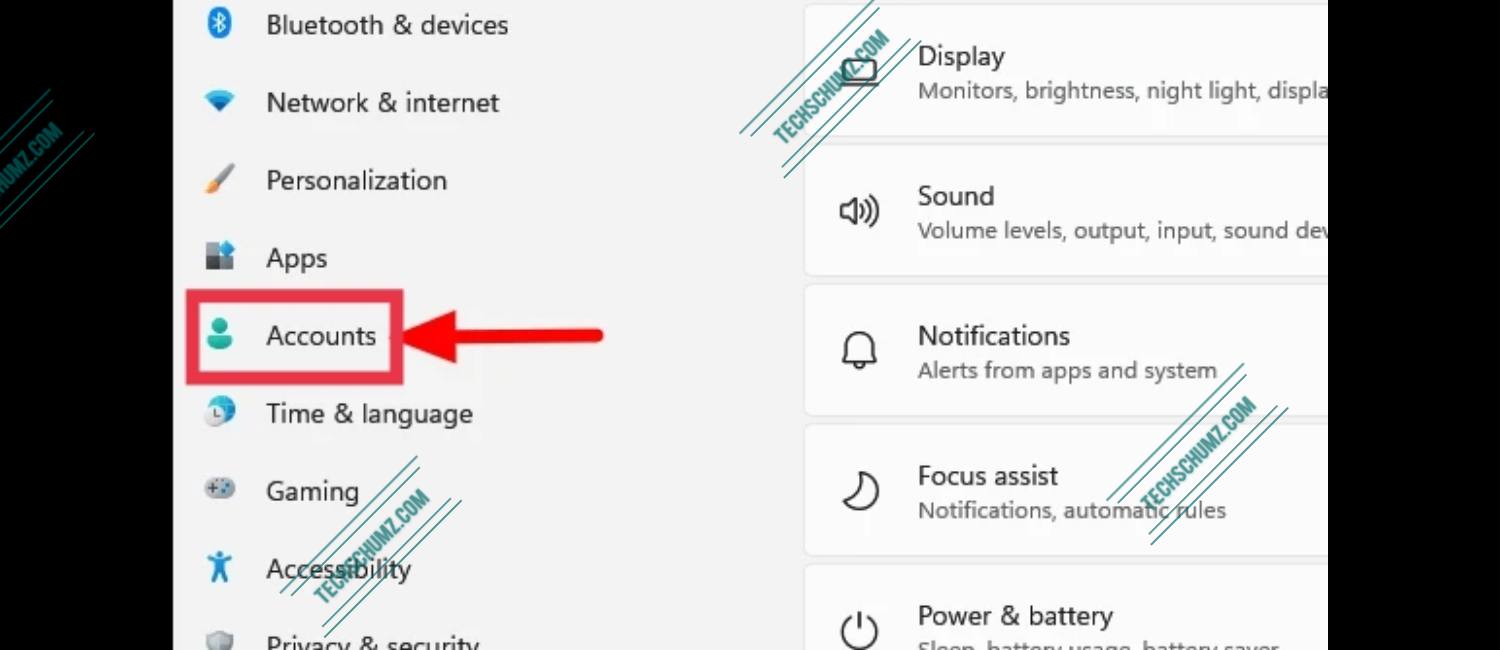
- To change the account type to administrator, search for “Settings” in the start menu and click on the corresponding search result to start the app.
- Choose ‘Accounts‘Tab.
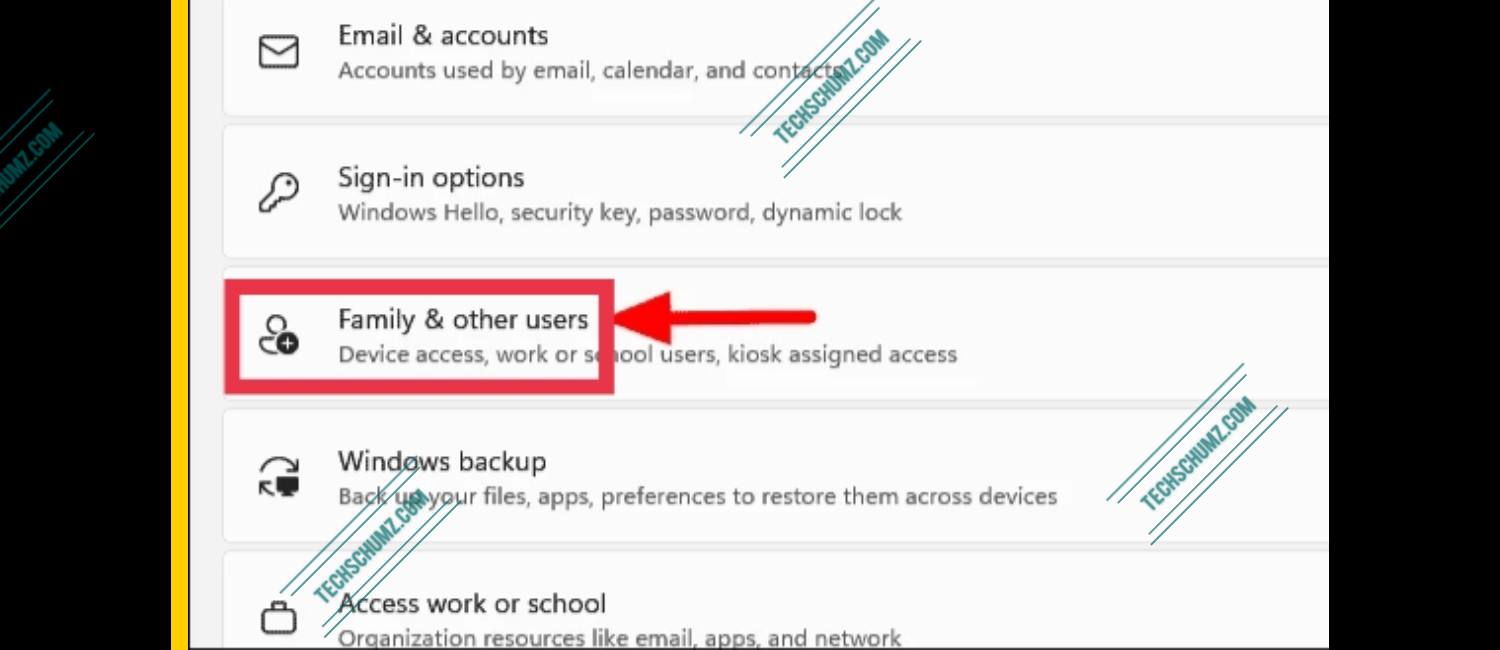
- Choose ‘Family and other users‘.
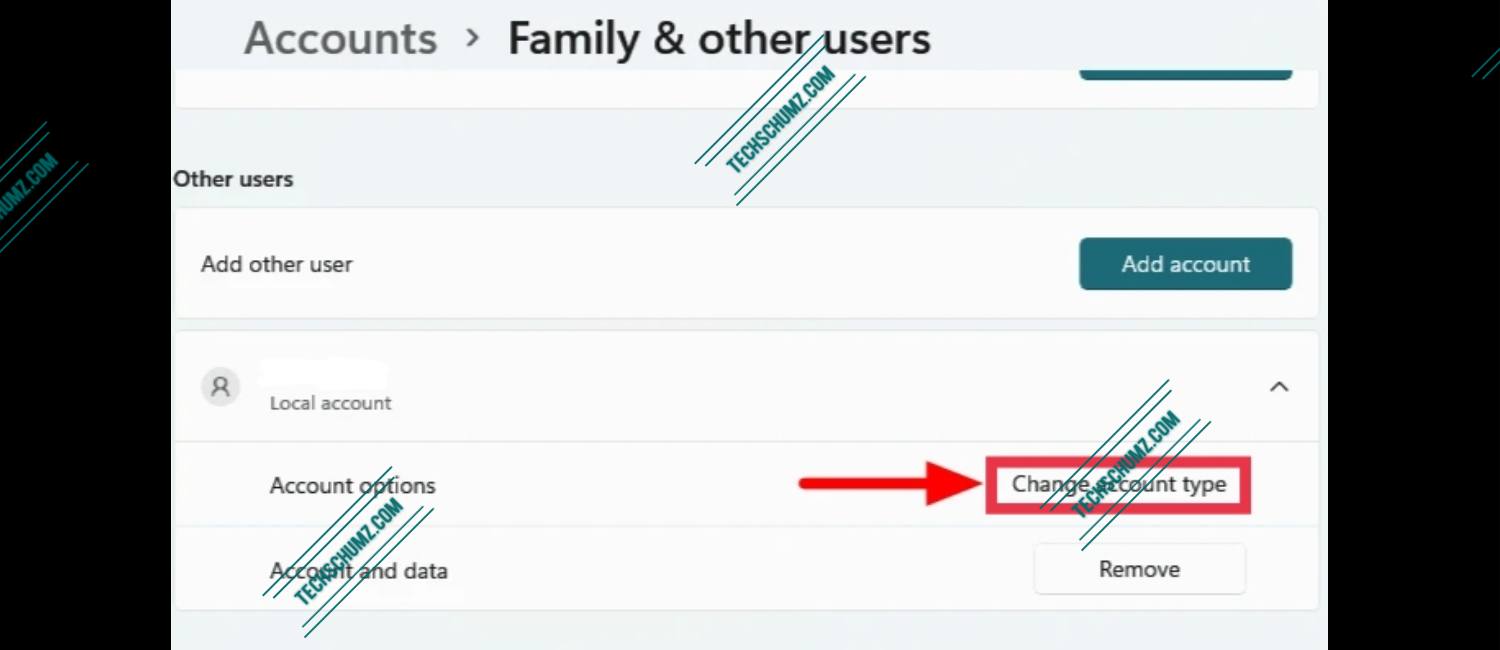
- Click on the account name under ‘Other users‘in the settings.
- Tap the ‘Change account type‘next to’ Account Options’.
- In the “Change Account Type” window, click the drop-down menu under “Account Type” and select “Administrator‘.
- Finally click on ‘OK‘below to save the changes.
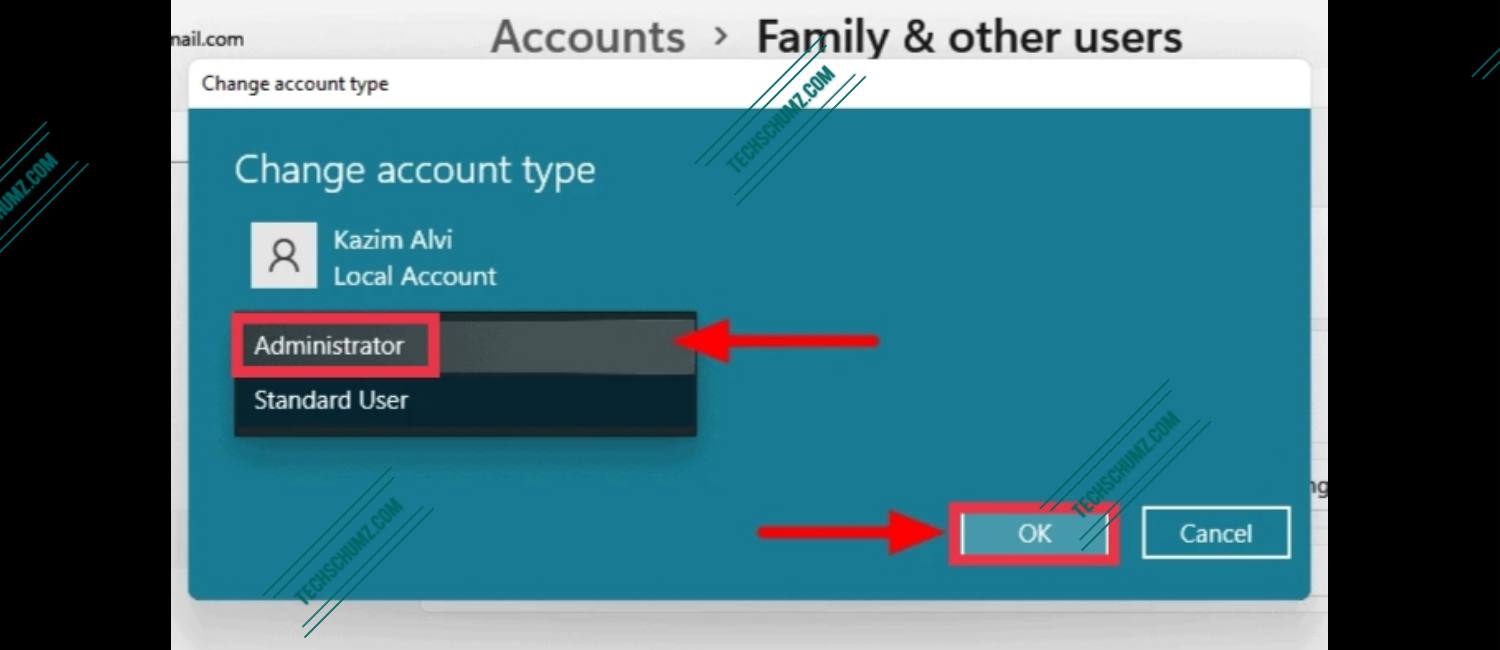
You have now set up a local account with administrator rights under Windows 11. Remember we wrote an article about how to change administrator in Windows 11. To read it, click on Here.
last words
This article is about how to create a local user account on Windows 11 and change the account type for the local account user. If you want a secure computer with more privacy and a custom login name, then you have a local account. However, if you want to sync your personal settings between your devices, sync files on OneDrive, and access apps from the Windows Store, you’ll need to sign in with a Microsoft account. It’s your decision!
Good luck! Enjoy Windows 11!
Also read:
- How to connect a Windows 11 computer to WiFi
- Here’s how to connect to a hidden WiFi network in Windows 11
