PDF and PNG are the two most popular image formats worldwide. When taking a screenshot or downloading images from the Internet, which are usually saved as JPG or PNG files. Sometimes you may prefer to convert these JPG and PNG files to PDF format to share with someone. In this Gearupwindows article, we are going to walk you through how to convert these images to PDF format using the Photos app built into Windows 11.
When you double-click a picture, Windows 11 opens it on the photos app if you haven’t changed the default app for viewing photos. The same photos Application that allows you to convert JPG and PNG to PDF file. If your default app for opening an image is different than photos, do not worry; You can still open it in the built-in Photos app.
How to convert a JPG or PNG to PDF on Windows 11?
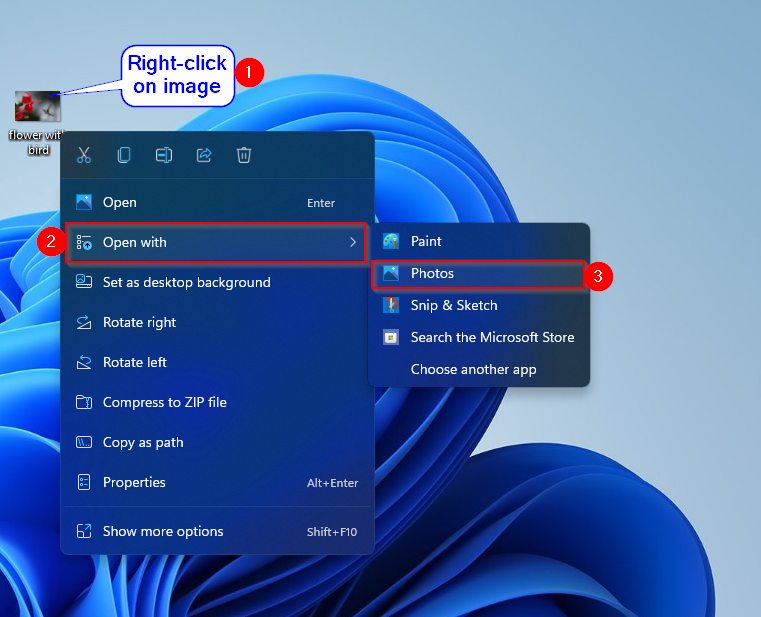
Step 1. Right-click the image (JPG or PNG) that you want to convert to a PDF file. Now choose the
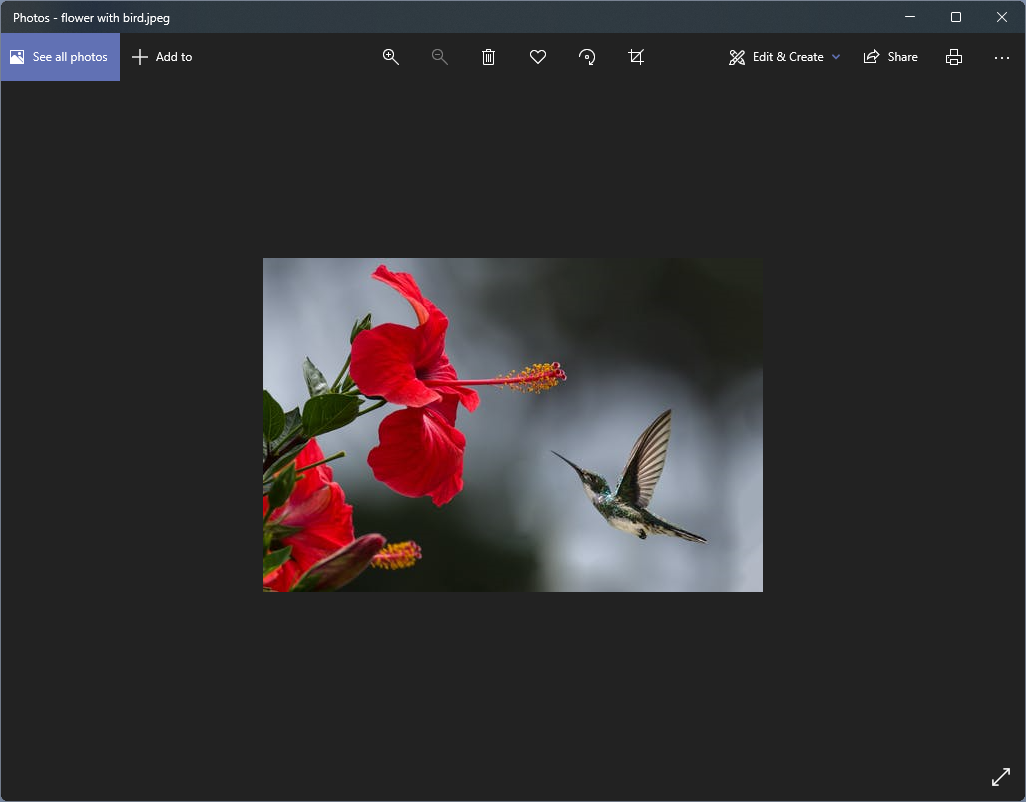
Step 2. Once you have completed the above steps, the selected image will be displayed in the photos App on your computer.
Step 3. Now press
![]()
Step 4. After following the steps above, a To press Dialog box appears.
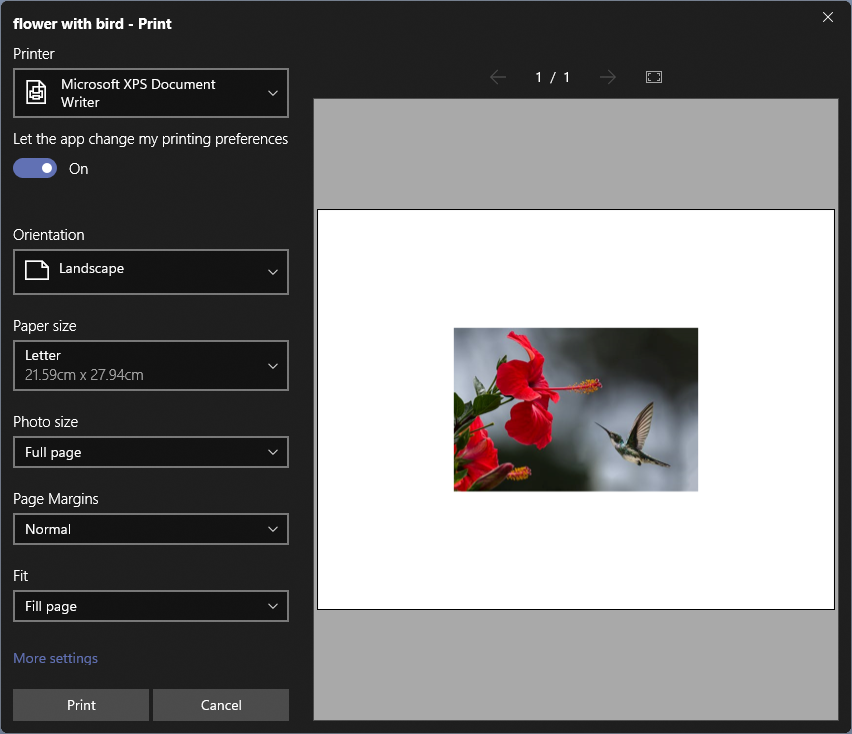
Step 5. Click the drop-down menu under the printer Option and choose
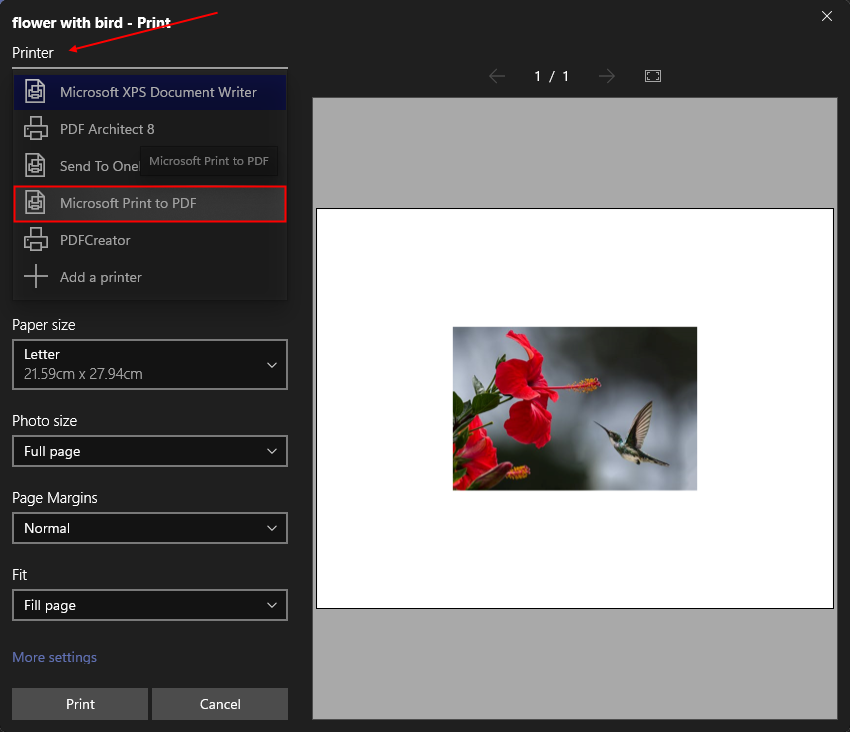
Step 6. Now click on that

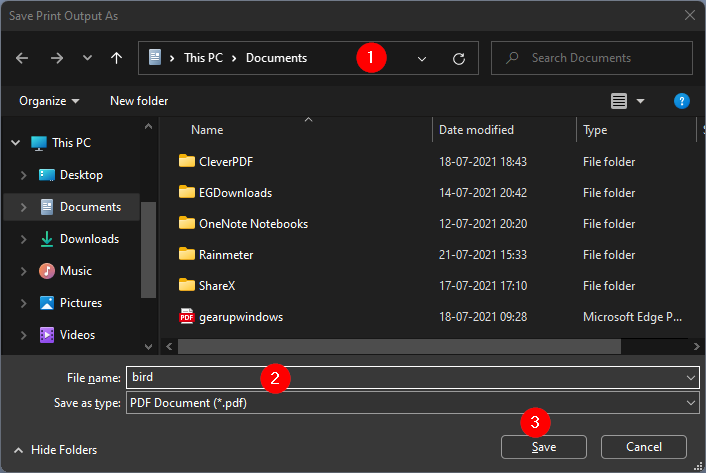
Step 7. Well, File manager will open. You will notice “Save as”Is selected as PDF document. Now select the location where you want to save the file and give it a name. Finally, click on that
That’s all. Your selected image (JPG or PNG) will now be saved as a PDF file on your Windows 11 PC in the desired location. Ain’t it easy Let us know in the comments box.