Microsoft, like its competitors, is trying to integrate you as much as possible into the Microsoft ecosystem by integrating services like Microsoft Office, Xbox and OneDrive on Windows. Above all, OneDrive, which is designed as a cloud service for Windows files and documents.
If you’re a Windows 11 user, you’ll likely find that OneDrive sits in the notification area of your system tray. In this guide, I’ll show you three different and easy methods to completely remove or disable OneDrive on a Windows 11 PC.
What is OneDrive in Windows 11?
OneDrive is a cloud-based online storage solution from Microsoft running on Windows 11 or another Windows. Most OneDrive users can access it as part of a Microsoft 365 subscription that includes Microsoft Office and a 1TB OneDrive store. However, you can get a free OneDrive account with 5GB of storage.
With OneDrive, you can sync files created and saved on your Windows 11 computer with the cloud. You can connect other devices like laptops, cell phones, and tablets to OneDrive so you can keep these files in sync and use them from anywhere.
OneDrive also lets you back up specific cloud locations on your Windows 11 PC. When you select this feature, you can automatically save files to the Documents folder on your desktop and the Pictures folder on OneDrive, effectively ensuring a reliable, automatic backup of your most important files.
Method 1. Disable OneDrive on Windows 11 from the command prompt
If you don’t want or don’t use OneDrive on your Windows 11 computer, you can simply turn it off or uninstall it by running a few simple commands. This will completely remove it from Windows.
- To disable OneDrive on Windows 11, the first thing you need to know is whether you are running the 32- or 64-bit version of Windows 11.
- After you know this, go to the start and search for “command promptThen select the app and right click to Execute as administrator.
- Next, run the following commands to disable and uninstall OneDrive.
- For 64-bit version of Windows, run these commands:
- taskkill / f / im OneDrive.exe% SystemRoot% SysWOW64 OneDriveSetup.exe / uninstall
- For 32-bit version of Windows, run the following commands:
- taskkill / f / im OneDrive.exe% SystemRoot% System32 OneDriveSetup.exe / uninstall
That’s it! This will now disable and uninstall OneDrive from your computer.
Method 2. Uninstall OneDrive from Windows 11 via Settings
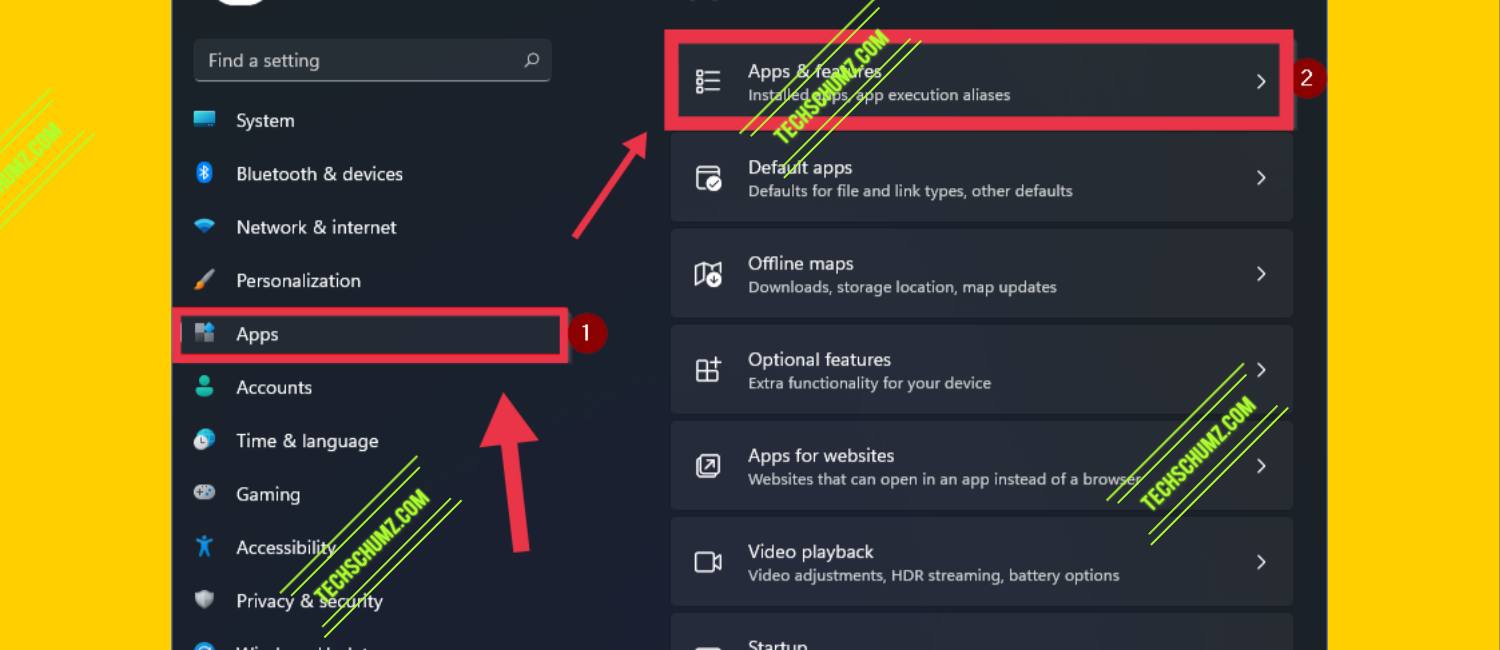
- To get started, open the Settings app by using Windows + me Keyboard shortcuts.
- Then tap that Apps Category from the left side of the page.
- Next, select the Apps & functions Tab in the right pane.
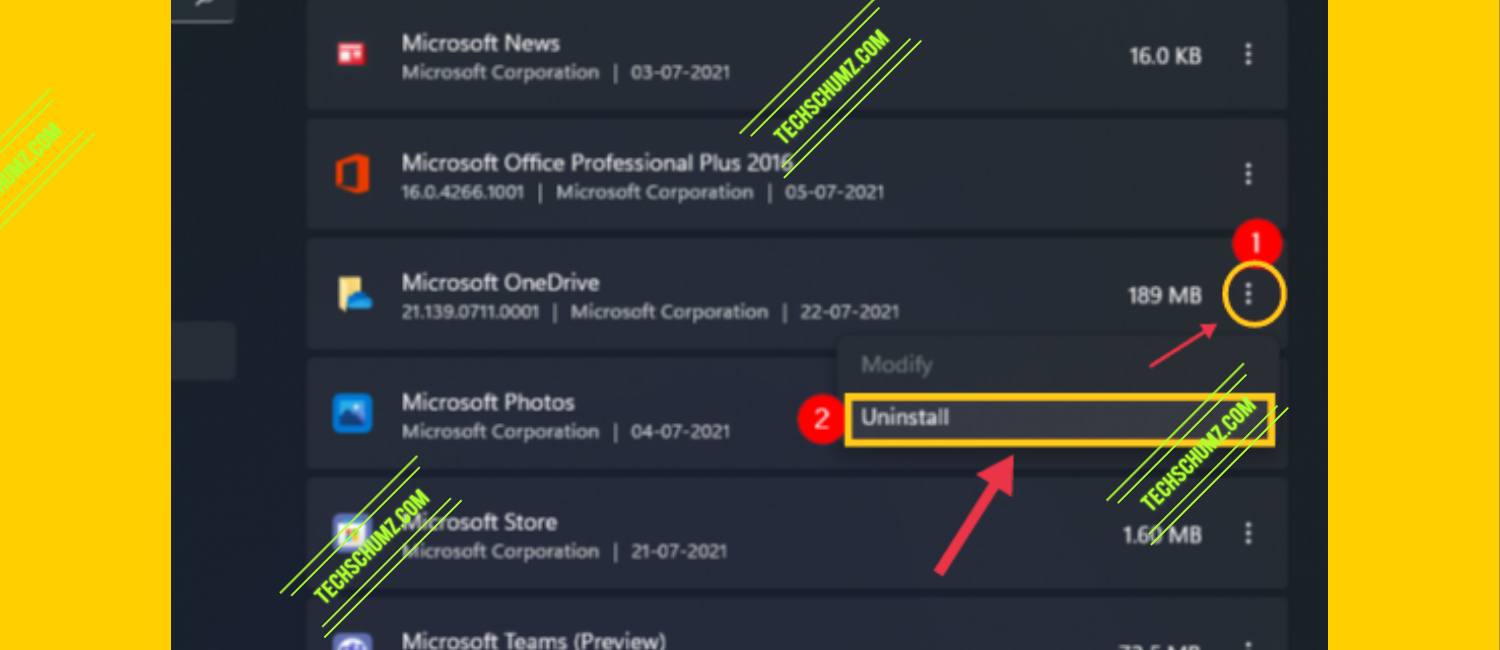
- Now scroll down and find the Microsoft OneDrive Entry and then click the three vertical points. Then tap that Uninstall Opportunity.
- Finally, you will see a pop-up window, click on that Uninstall Button, and you’re all set!
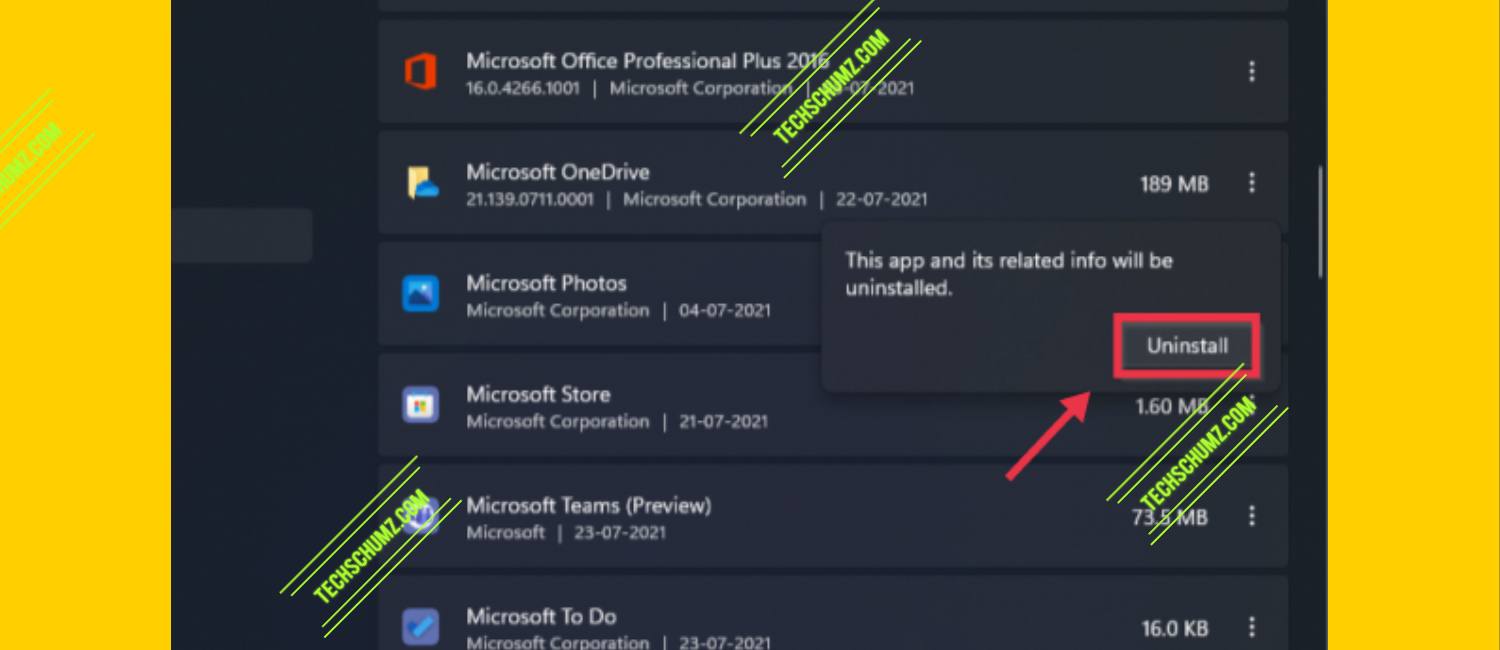
After following the steps above, you will no longer see Microsoft OneDrive on your Windows 11 PC or laptop.
Method 3. Remove OneDrive from Windows 11 by unlinking it from the PC
To turn off OneDrive, you’ll need to unlink or unlink your Microsoft account from the service. This will disable OneDrive in Windows 11 and prevent your PC from continuously updating data from the cloud and synchronizing it with your local hard drive or SSD.
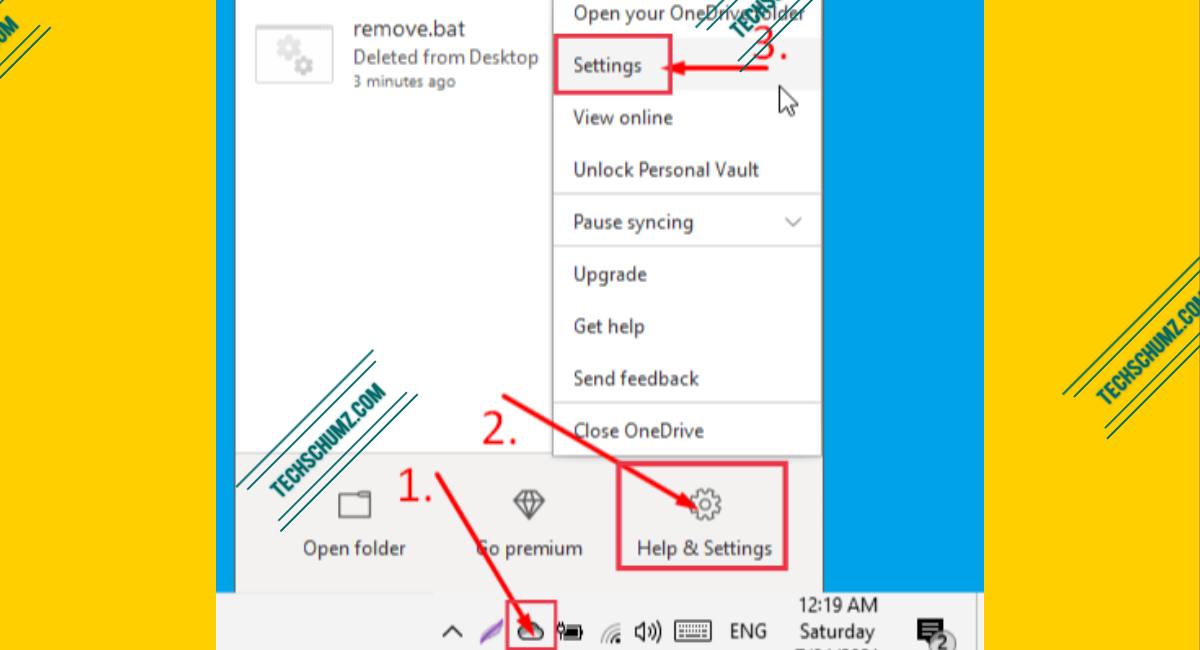
- To disconnect OneDrive from your PC, tap the OneDrive cloud icon from the system tray
- Alternatively, if you can’t see the icon, click seek, Type a ride, and hit Enter.
- Then tap the Help & Settings opportunity.
- Now choose settings from there.
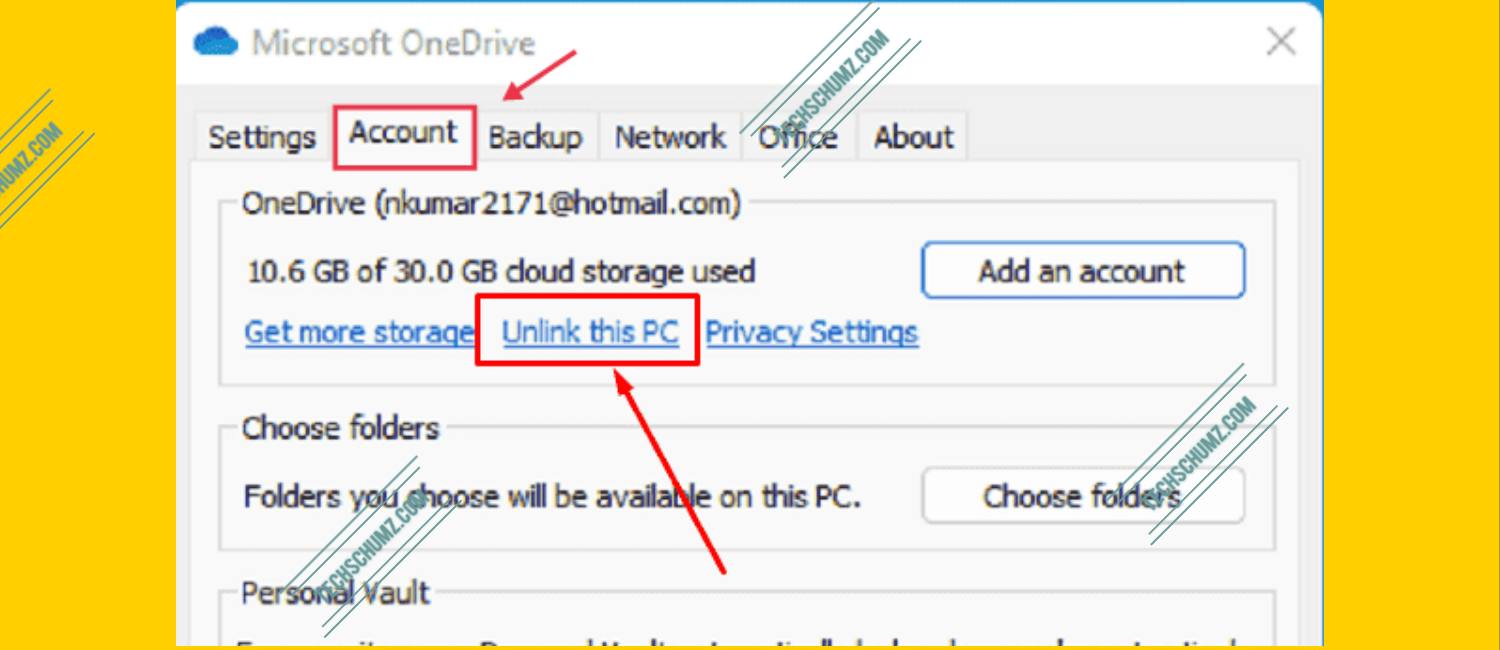
- To turn off OneDrive, just tap Unlink this PC.
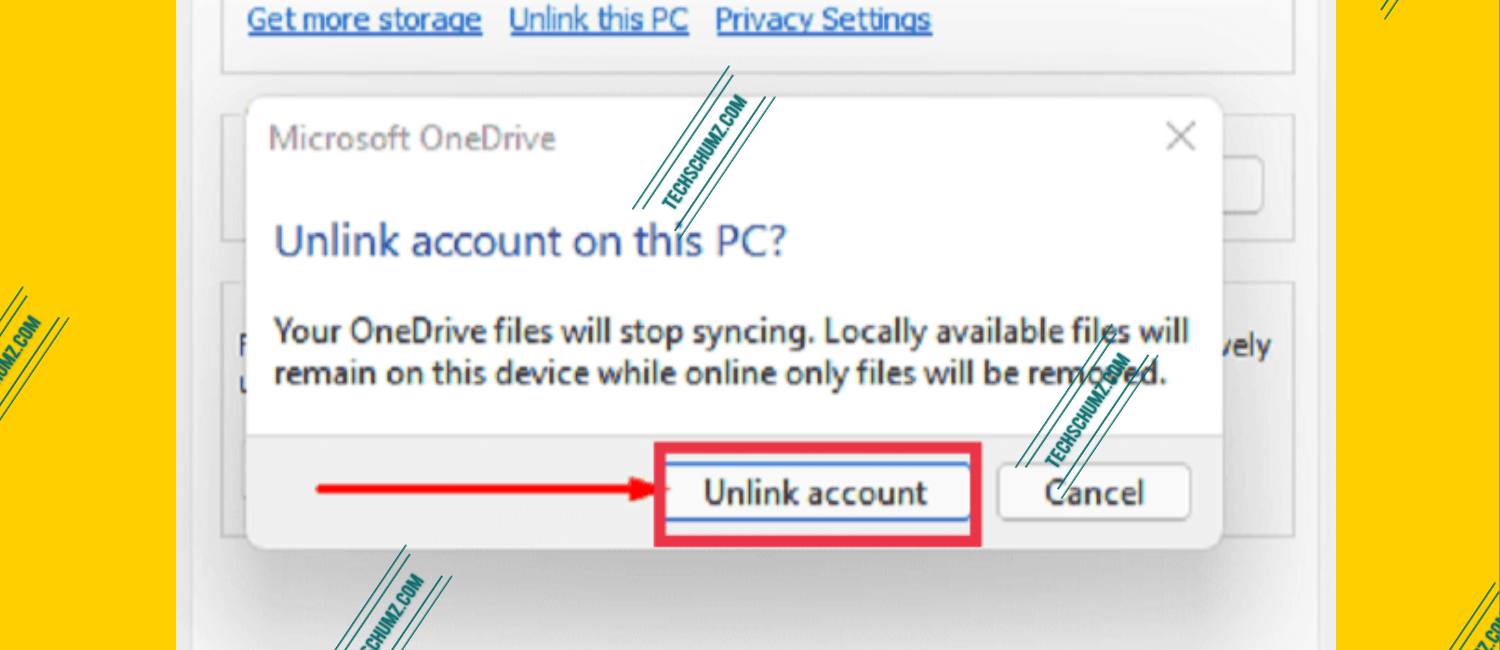
- In the confirmation window that appears, tap the Cancel account connection button.
last words
This article showed three different methods of uninstalling or removing OneDrive from a Windows 11 PC using Command Prompt, Settings, and unlinking it directly from your computer. We hope you find this article useful. If you run into any type of question, please let us know in the comments section below. Much luck! 😊
Based on Windows 11:
- How to disable or remove the login password on Windows 11
- How to uninstall or remove fonts on Windows 11
- How to download and install fonts on Windows 11
