When looking to buy a new PC or laptop, it is helpful to know what CPU you have and how fast it is, or what generation your Intel processor is in Windows. This article tells you How to check the generation of your PC or laptop on Windows 10, Below are 2 ways to do this.
Differences between the generations of a laptop or PC
“Generation” refers to the age of the CPU. The difference between different generations can be in frequency, power consumption, lithography, cache amount, denomination and number of cores and threads, supported instructions, slots used, supported RAM, PCI fast channel number, integrated graphics, voltage control device and so on. The performance is different, but not what anyone expected.
Each generation uses more energy more efficiently, generates less heat, and so on. Hence, the seventh generation laptop will be much thinner than the fourth generation laptop.
2 ways to check the generation of your PC or laptop running Windows 10
Here I will show you 2 different ways how you can know and find the generation of a laptop or PC.
1. How to recognize the generation of your laptop or PC via properties
If you have a laptop or desktop system with Windows 7 or higher, you can check the generation of your Intel processor by following the steps below:
You can check it out or find it just by right clicking on it My computer and select properties and you get a summary view of the currently configured hardware and the operating system. This information includes the processor you operate, but who is mentioned by his sales / marketing name.
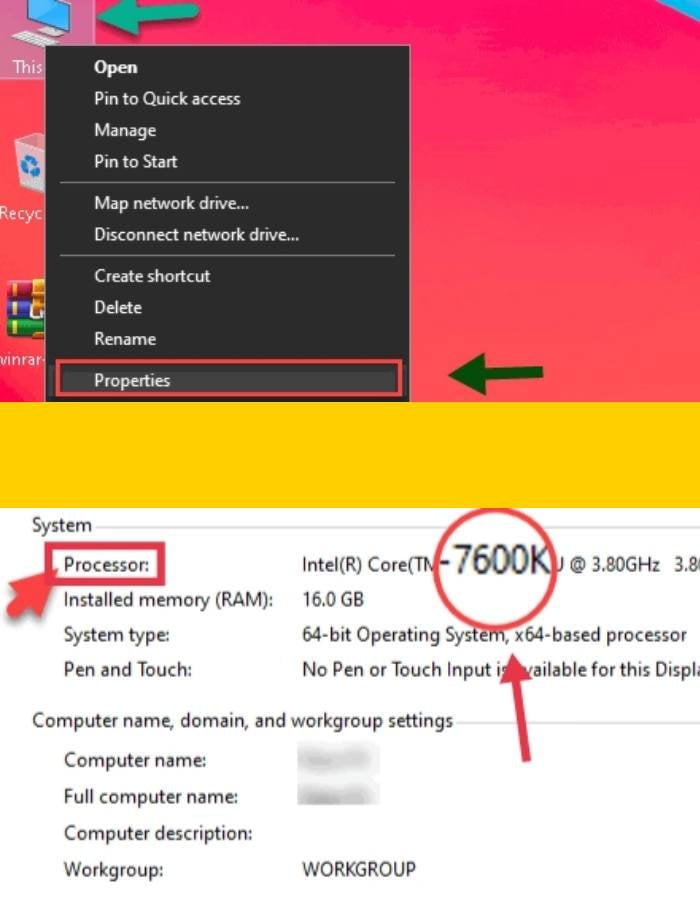
- Right click on My computer or This pc and tap Properties.
- Now you can see your processor and the first number after i3, i5 or i7 is simply the generation of your laptop or PC. For example, my current chipset is the i5, 7th generation Under the system Section. In the screenshot below, 7th is the number after i5 So this is the generation of my laptop or PC 7th.
This number can range from 1 to 9. This indicates that your generation can be anywhere from 1 to 9.
2. How to find the generation of a laptop or PC using the task manager
You can find detailed CPU information like the generation and much more in Windows 10 Task manager. To find that Right click in the system tray and select “Task manager”Or just use it Ctrl + Shift + Esc to start it. Tap on “performance”Tab and select“Central processor. ”The name and speed of your computer’s CPU will be displayed here.
How to check the generation of your laptop using Task Manager in Windows 10:
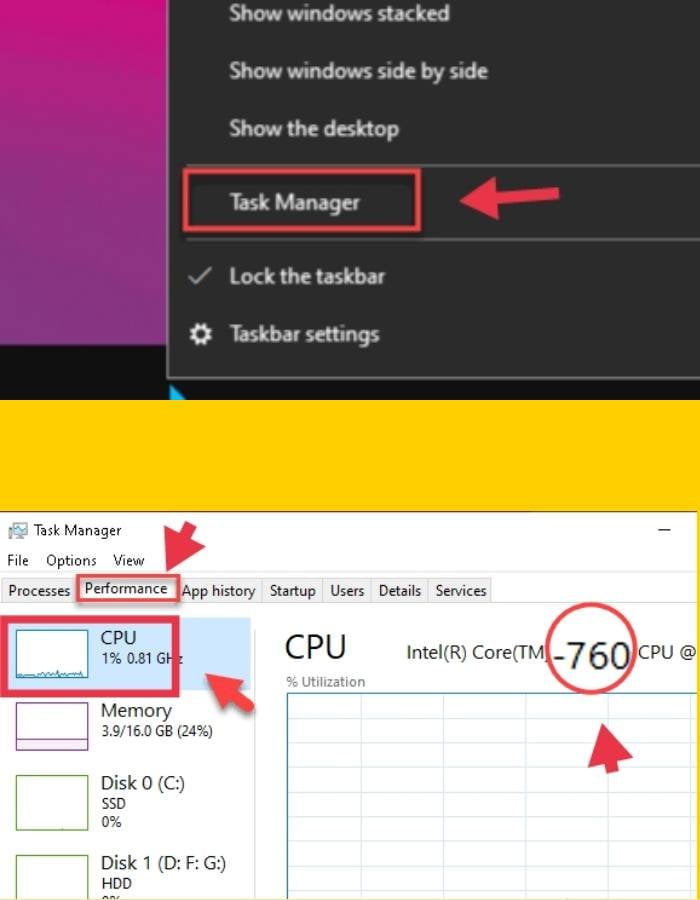
- To begin, Right click Your Taskbar and choose Task manager.
- Then tap the performance Tab and click Central processor. Here are the details of the Intel processor and generation. For example, in the following screenshot 7th is the number after i5 is simply the generation of my laptop or PC.
Conclusion
These are 2 ways to find or check the generation of your PC or laptop using PC Properties and Task Manager. You will receive detailed information about your PC and laptop. Knowing Intel’s processors and generations would be helpful, especially if you’re looking to buy a PC, laptop, or add general information about your computer.
Also read:
- How to check Windows 10 Version, Edition and OS Build on Windows PC
- Here’s how to create a shortcut to the Windows Tools folder for easier access
- How to control Smart Home from your Android quick settings