How do I check RAM speed or frequency on Windows 11/10? If you want to add more RAM to your computer or laptop, you should check your RAM speed and see if your PC has free slots.
Let’s take an example and see how it works? Suppose you have 4 GB of 2400 MHz RAM installed in your computer and you want to upgrade it to 8 GB. If you buy a 3200 MHz RAM and install it next to the 2400 MHz RAM, your PC will behave badly. You may also not be able to start your computer after installing the wrong RAM on your PC. It is for this reason that you should check the RAM speed before buying or installing any other RAM.
In this Gearupwindows article, we are going to walk you through three different methods to check RAM speed or frequency on your Windows 11/10 PC. These are the following: –
- Using the Task Manager
- Via PowerShell
- Via the command prompt
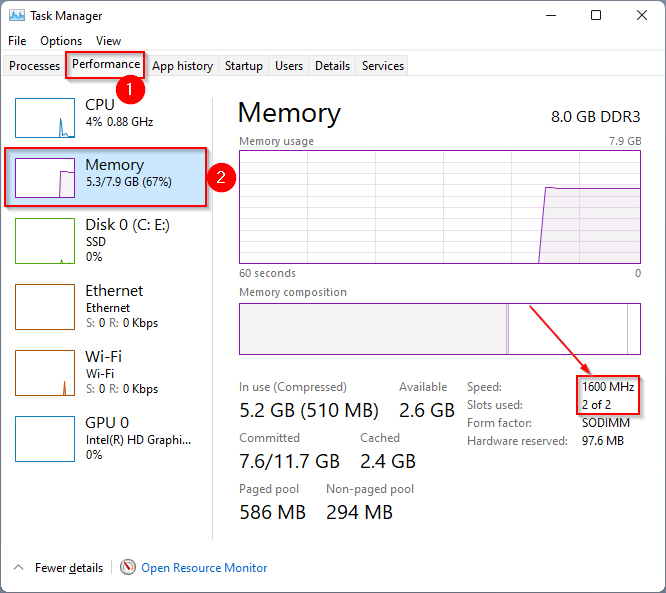
How do I check RAM speed or frequency on Windows 11/10 using Task Manager?
Open Task Manager by pressing Ctrl + shift + Esc Keyboard shortcuts. Now navigate to the perfomance Tab and then click the Storage Option from the left side panel. On the right you can see the RAM speed and Used slots.
How to view RAM speed or frequency on Windows 11/10 through Windows PowerShell?
Step 1. Open Windows PowerShell.
Step 2. At the PowerShell prompt, copy and paste the following command, then press Enter from the keyboard: –
Get-CimInstance -ClassName Win32_PhysicalMemory | Format-Table Devicelocator, Manufacturer, Speed
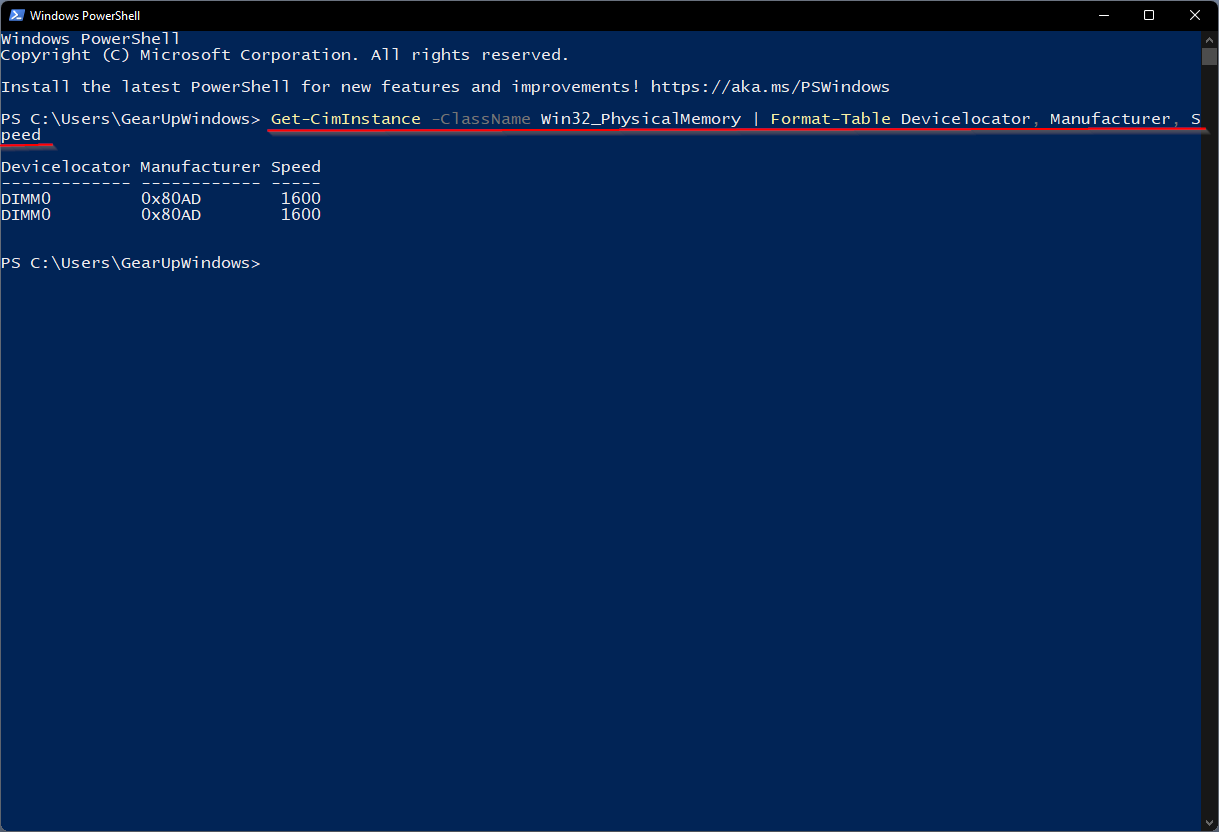
After following the steps above, you will see the RAM speed of each slot.
How can I view RAM speed or frequency from Command Prompt on Windows 11/10?
Step 1. Open the command prompt.
Step 2.In the command prompt, type the following and press Enter on the keyboard:
wmic MemoryChip get DeviceLocator, Manufacturer, Speed
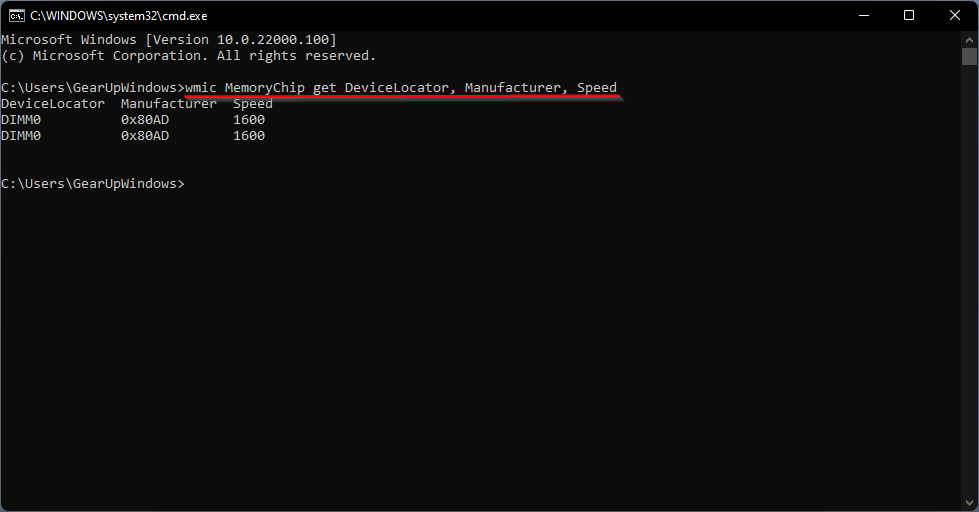
After following the steps above, you should see the RAM speed of the slot used.