Windows 11, like the previous version, allows you to change the color and size of the mouse pointer. Many users opt for this because the default cursor may be too small or the color of the pointer is not easily identifiable. The good news is, the process is still as easy as it used to be.
Different customizations are available to meet the needs of all users. Let’s see what all the options are available and how to apply them to Windows 11.
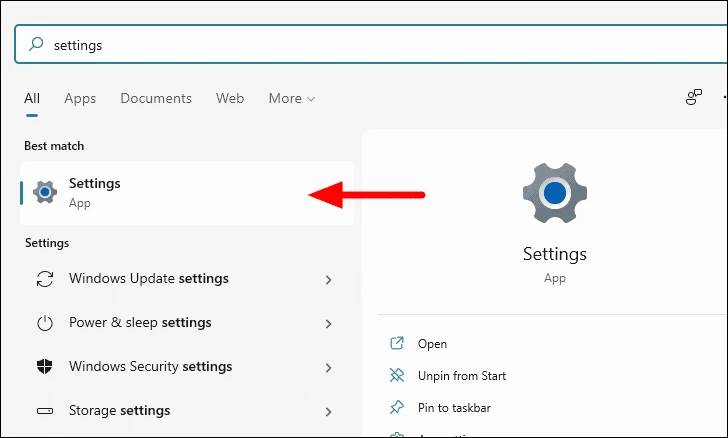
To change the color and size of the mouse pointer, first of all, launch the “Start Menu” either by clicking on the icon on the taskbar or by pressing WINDOWS , search for “Settings” and click the corresponding search result to launch the application.
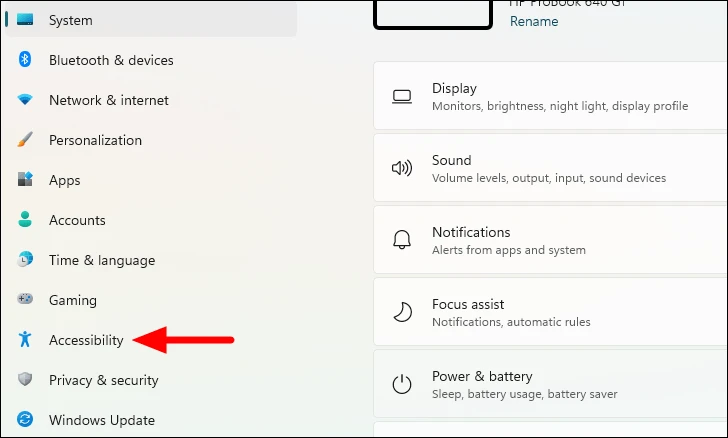
In Windows 11, the ‘Settings’ app has been completely redesigned. There are different ones listed on the left, select “Accessibility” from the list.
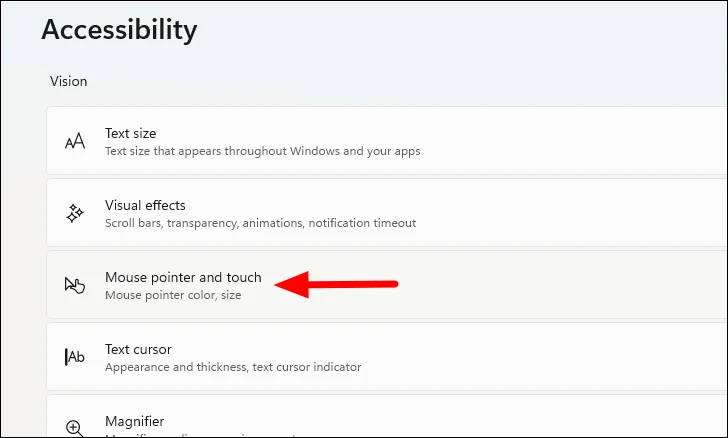
In the “Accessibility” settings, select the “Pointer and Mouse Key” tab on the right under the “Vision” section.
You are now in the “Mouse pointer and touch” settings where you can change both the size and color of the mouse pointer.
Change pointer color
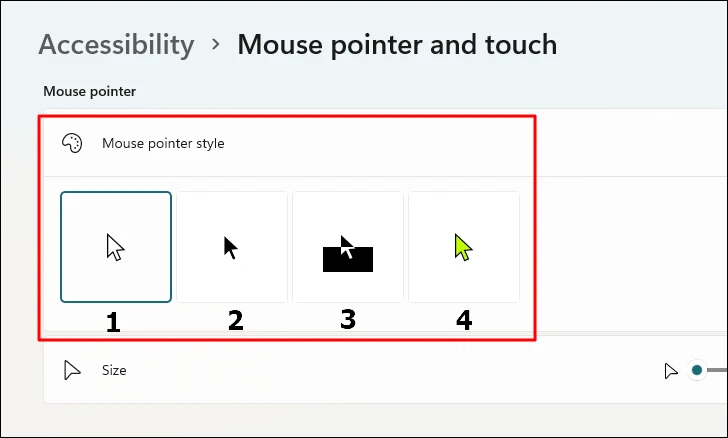
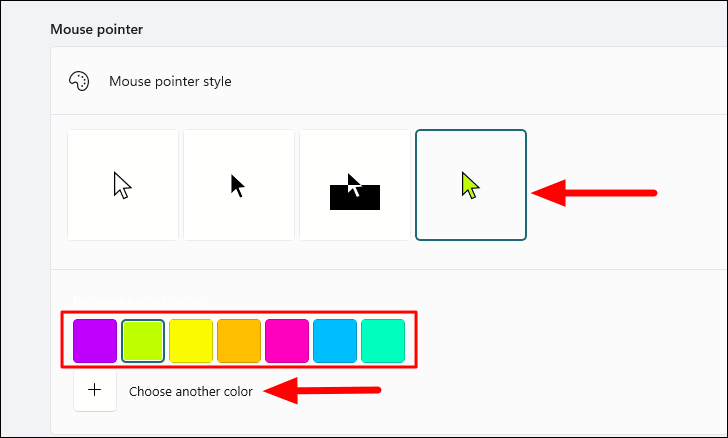
You will find four options under “Mouse Pointer Style”. The first option is selected by default. Let’s see what these four options are.
To note: The numbers mentioned under each option are added to provide a better explanation for each and are not part of the Windows 11 settings.
- White: The first option is selected by default and the pointer appears in white.
- Black: When you select the second option, the pointer color changes to “Black” as the name suggests.
- Inverted: When you select “Inverted”, the pointer appears “Black” on a “White” background and “White” on a “Black” background.
- Customized: The fourth option i.e. Custom allows you to choose any color.
Since the first three options are straightforward and have been explained in detail, it’s time to explore what the “Custom” option has to offer.
When you click on the ‘Custom’ option, the color ‘Lime’ will be selected by default. You can select any other color from those listed below. Or to choose one that is not in the list, click on the “Choose another color” option.
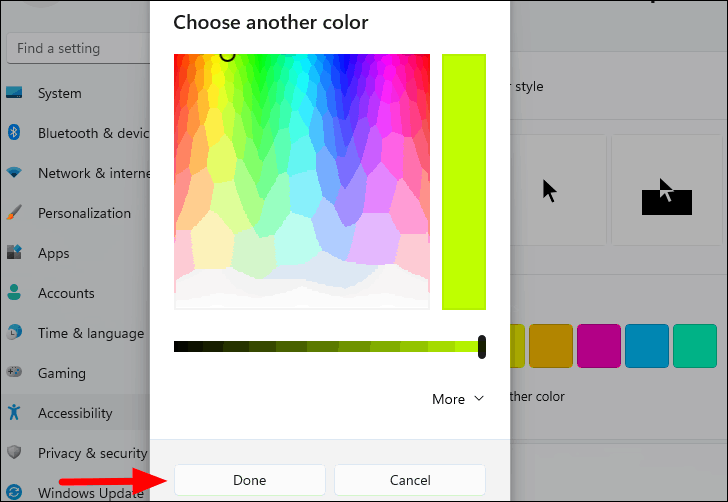
You can now choose the color of your choice for the pointer. Just click on a particular part of the area, then use the slider below to adjust the color value. Finally, click “Done” to apply the changes to the mouse pointer color.
Change the size of the mouse cursor
To increase the pointer size, drag the slider next to “size” to the right. The pointer size is set to “1” by default, which is the minimum size. You can increase it up to ’15’.
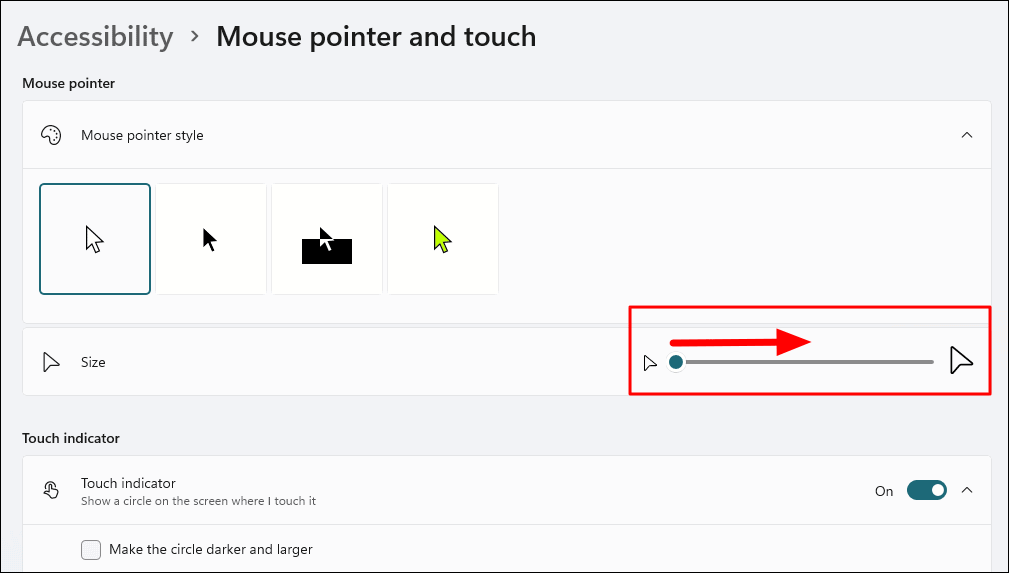
The size numbers mentioned here wouldn’t make much sense until you drag the slider yourself. Also, the pointer size will change as you drag the slider, and you can stop dragging further when it reaches the size you want.
The ability to change the pointer size is convenient for the visually impaired as it helps them see the cursor clearly. Besides, you can choose refreshing and attractive pointer colors and make the work fun.