Easily change the resolving IP address of a domain in the hosts file on Windows 11
A hosts file is a text file that stores information used to map servers or host names to IP addresses. Even though DNS is now primarily used for IP resolution, Windows still stores the hosts file.
Occasionally you may need to modify this hosts file. Editing the host file allows you to trick your computer into resolving to a specific IP address that you want. There can be many reasons why you want to modify the hosts file. You may be working with software that is independent of the domain name. Or you are leaving an old server and want to test your domain before moving the DNS settings. Whatever the reason, it’s pretty straightforward to edit the hosts file in Windows 11.
First, back up the hosts file
Before modifying your hosts file, you must create a backup of the hosts file. If anything goes wrong, you should be able to restore it to a version that worked.
Launch File Explorer on your PC, then navigate to C: → Windows → System32 → drivers → etc folder. If your Windows is in another drive, you will need to change the drive accordingly. C: on the drive where Windows is installed on your computer.
Alternatively, you can also copy and paste the file path below into the file explorer and hit enter to open the hosts file folder.
C:Windowssystem32driversetc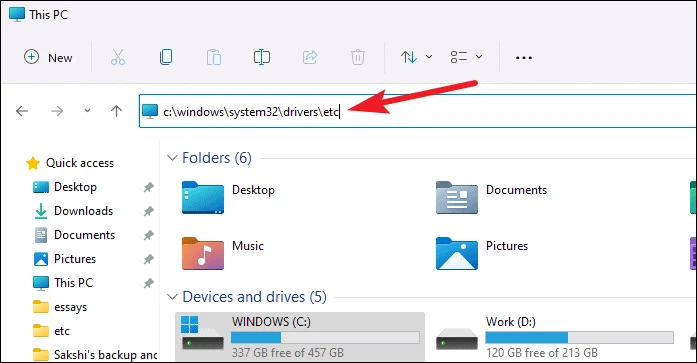
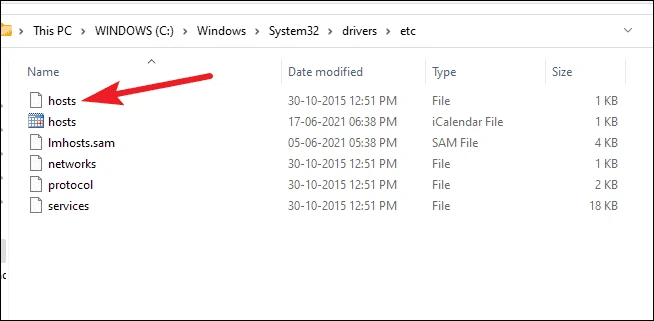
You would see a file with the name hosts in this file. Copy the hosts file and paste it to another location for backup. You can also save it in the etc folder by another name, but it will ask for administrator permission to do so.
Edit the Hosts file using Notepad in Windows 11
First, open Notepad as administrator. To do this, search for “Notepad” on the Start menu, then right-click the Notepad application icon and select “Run as administrator” from the menu.
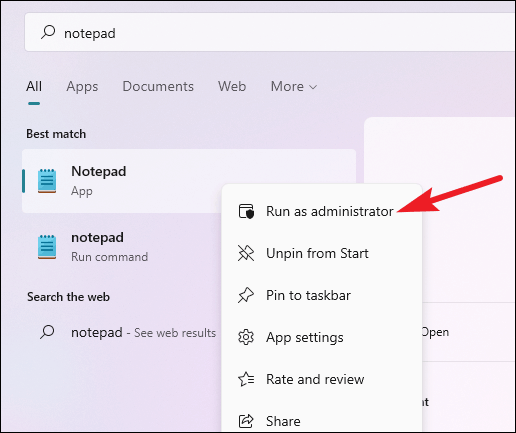
Windows will display a permission prompt asking, “Do you want to allow this application to make changes to your computer?” »Click on the ‘Yes’ button. This will open Notepad with administrator privileges so that you can edit the hosts file using it.
Then, in Notepad, navigate to the “File” menu option and select “Open” from the menu. You can also use the keyboard shortcut ‘Ctrl + O’.
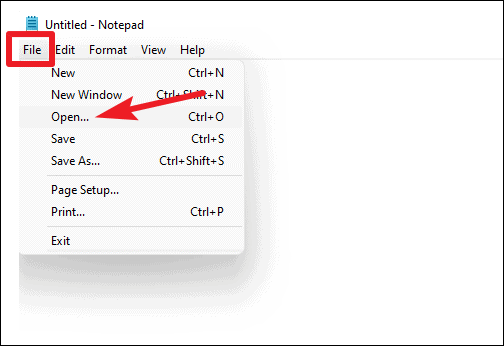
Then copy and paste the hosts the address of the file in the “File Name” field of the Open dialog box and press Enter.
C:WindowsSystem32driversetchosts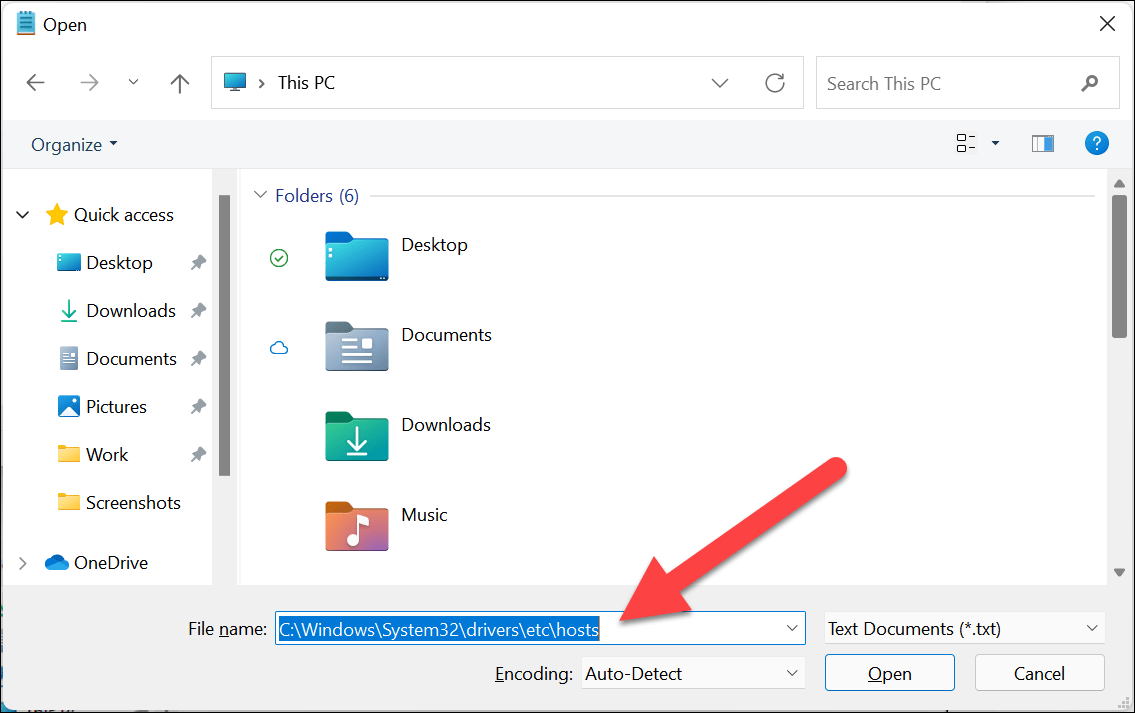
You can also manually access the hosts file and open it by going to C: → Windows → System32 → drivers → etc folder in the Open dialog box. But first, you need to change the file type from “Text Files” to “All Files” because the hosts file is not your standard text file.

The hosts file will open in Notepad and you can easily edit it.
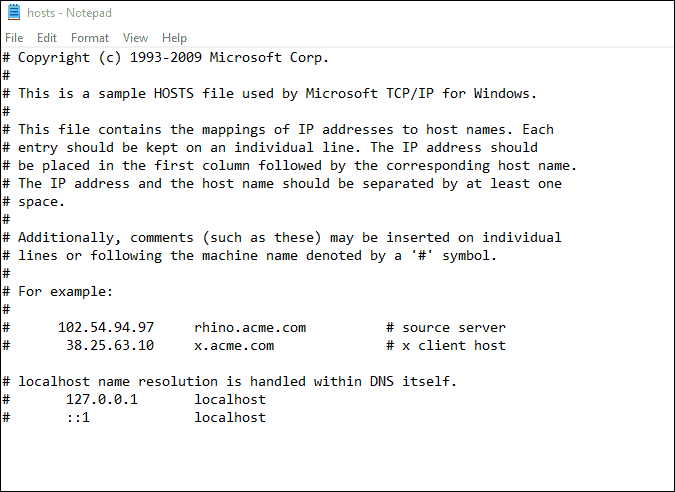
Add the new IP addresses and domain names you want to resolve at the end of the file and save it using the Ctrl + S keyboard shortcut. Since we opened Notepad in Administrator mode, you will be able to easily save the file without needing any other permissions.
And that’s all. You have successfully edited your hosts file in Windows 11.
Windows 11 may look very different from Windows 10. But most of the underlying elements remain as is, especially the file and folder structure of the Windows system folder. You can easily navigate and use the same tricks you used in Windows 10 to move around Windows 11 as well.