The Windows 11 taskbar includes a chat icon by default. Clicking the Chat icon brings up the Chat drop-down menu, showing your recent individual and group conversations. Chat works with Microsoft Teams and it’s free!
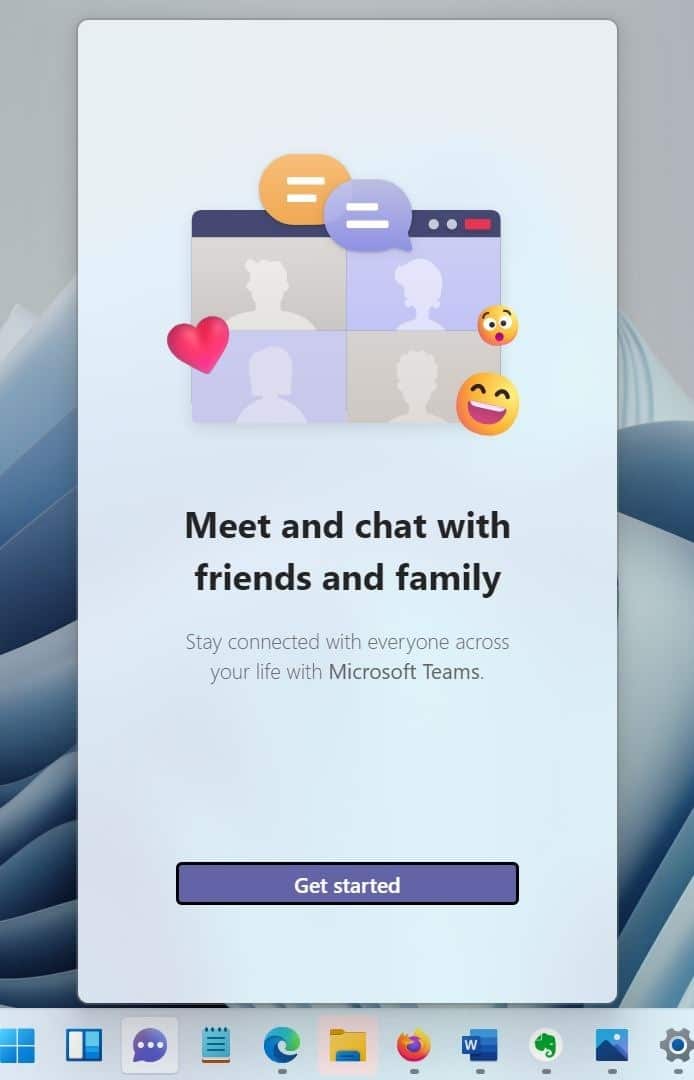
If you are a Microsoft Teams user, the new Chat may be convenient for you, as you can quickly start and view conversations with your friends and family. In addition to clicking the Chat icon, the Chat drop-down menu can always be opened using the Windows hotkey + C.
However, if you use something else to connect with your family and friends, you may want to ditch the Chat icon to free up space and reduce clutter.
Removing the Chat icon from the taskbar is, while easy, it is not. In early versions of Windows 11, we could right-click the Chat icon on the taskbar and then click the Hide option on the taskbar.
The option no longer appears when you right-click the Chat icon. In fact, this applies to other default icons like search, task view, and widgets.
With that said, the Chat icon can be removed from the taskbar through the Settings app. In addition to removing the Chat app, you can also completely uninstall the Microsoft Teams app through the Settings app. You do not need to start PowerShell for work. Here’s how to do it.
Remove the chat icon from the Windows 11 taskbar
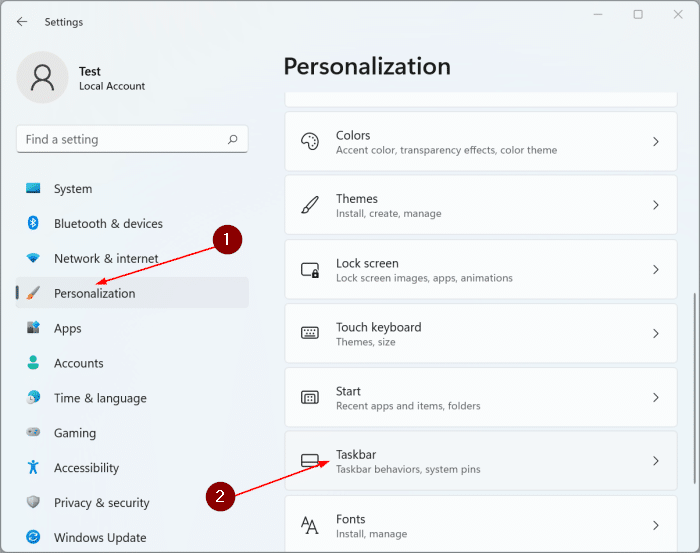
Step 1: Open the Settings app. On the left side of the Settings window, click Personalization. On the right side, click Taskbar.
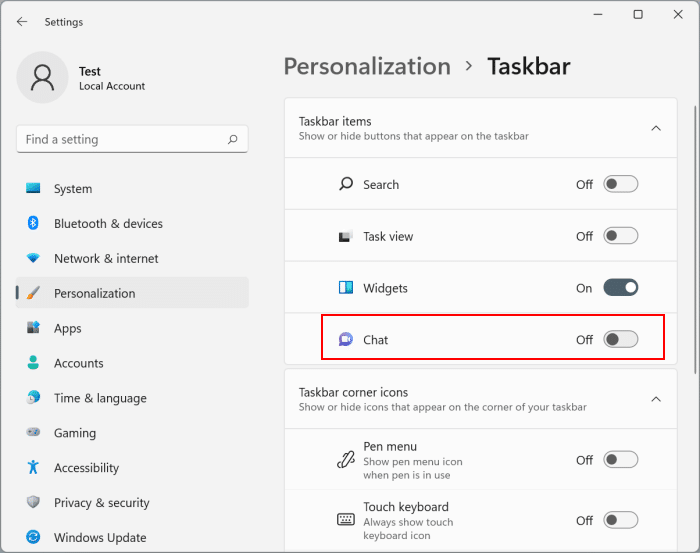
Step 2: Now on the right side, on the Taskbar items section, turn off the Chat option to remove chat icon from Windows 11 taskbar immediately.
Now that you’ve removed the Chat icon from the taskbar, it’s time to uninstall Microsoft Teams.
Remove Microsoft Teams from Windows 11 startup
By default, Microsoft Teams loads with Windows 11. If you are not using it, you can remove it from startup to improve startup time. Note that you can skip this if you are uninstalling Microsoft Teams.
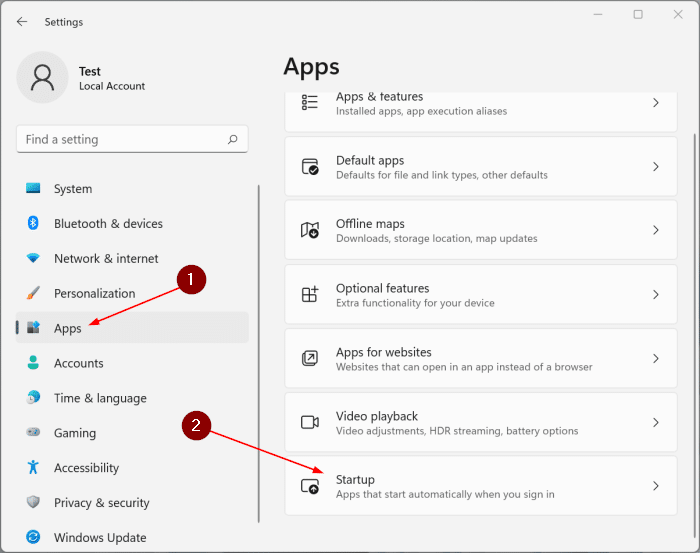
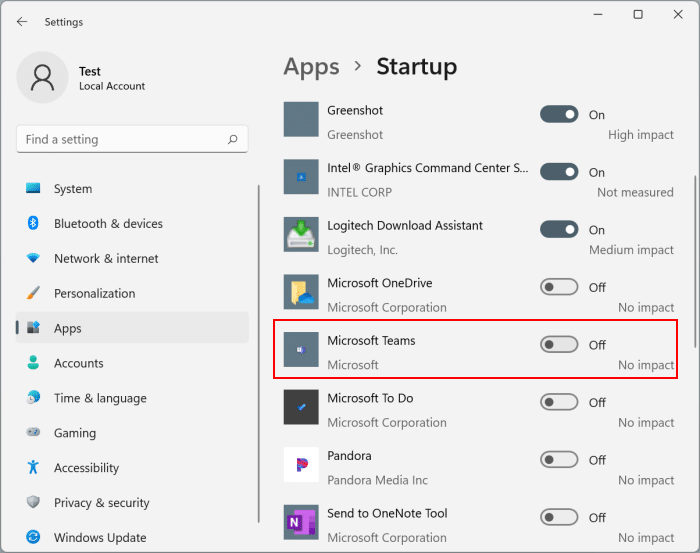
Step 1: Navigate to Settings > Applications > Start up page.
Step 2: In the list of startup applications, turn off the Microsoft Teams option to prevent it from loading with Windows 11.
Uninstall Microsoft Teams from Windows 11
Method 1 of 2
Uninstall Microsoft Teams through Settings
Step 1: Open the Settings app using Start Search or Windows + I hotkey.
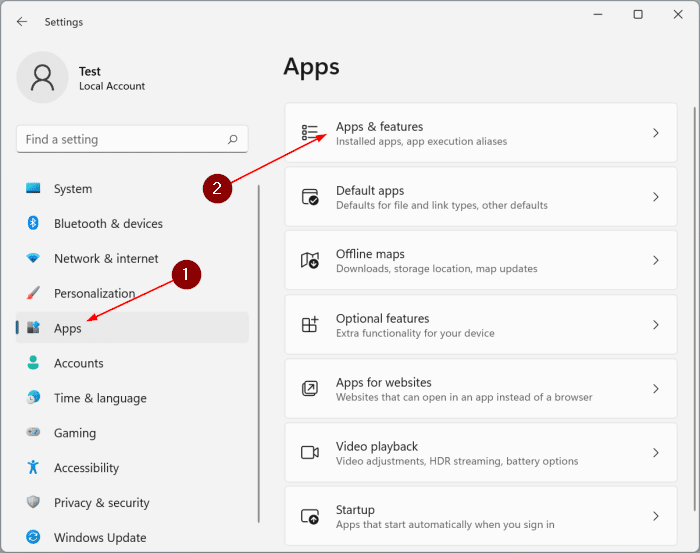
Step 2: In the left pane of Settings, click Applications. On the right side, click Apps and Features to see all installed applications.
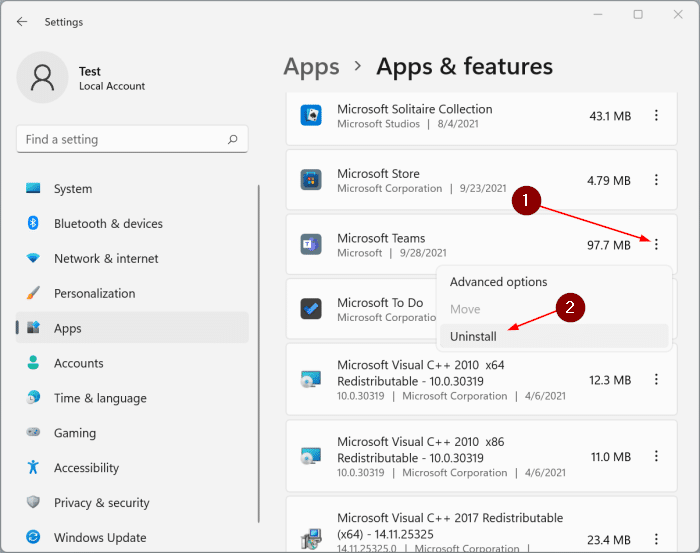
Step 3: Scroll down the list of installed apps to find the Microsoft Teams entry. Click on the three vertical dots (see image below) next to your entry and click on the Uninstall option.
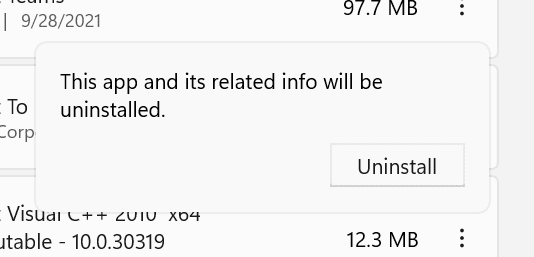
Step 4: Click on the Uninstall when you see the following confirmation to uninstall and remove Microsoft Teams from Windows 11.
Note that the Chat icon will continue to appear on the Settings> Personalization> Taskbar page even after uninstalling the Microsoft Teams app. As of now, there is no way to remove it from the Settings page.
Method 2 of 2
Uninstall Microsoft Teams through the Start menu
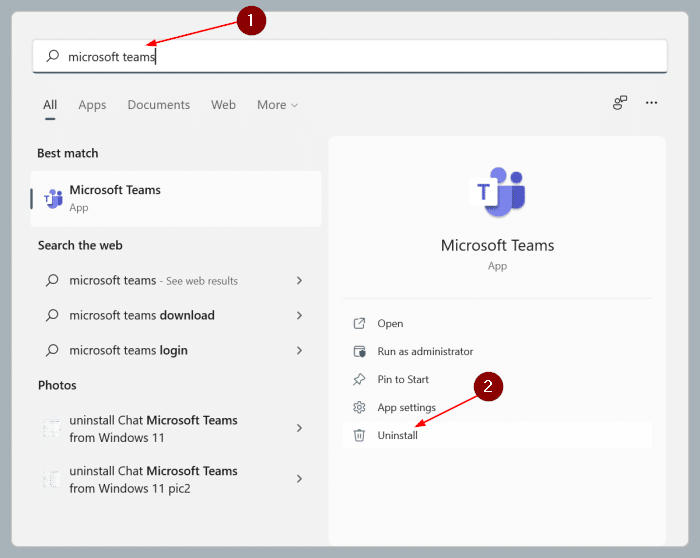
Step 1: In the Start menu search, type Microsoft Teams to see your entry.
Step 2: On the right side, click the Uninstall option (see image below) to remove Teams from your PC.
Our guide on how to add the search icon back to the Windows 11 taskbar may also interest you.