Does your Windows 11 computer constantly change screen brightness? Don’t you want Windows 11 to automatically adjust screen brightness? This guide will tell you how to disable automatic or adaptive screen brightness in Windows 11.
Why does Windows 11 automatically change the screen brightness?
The ambient light sensor on your Windows 11 device measures the light around your device and automatically adjusts the brightness of the screen. As you know, this is not new. These days, all smartphones automatically adjust the brightness of the screen.
In addition to the ambient light sensor, the graphics driver or graphics support software can constantly change the screen brightness to save power and extend battery life.
Why disable the automatic screen brightness function?
A large percentage of PC users like to manually adjust the screen brightness. Also, the screen brightness and contrast set automatically by the ambient light sensor or graphics software may not be ideal for many users.
Below are the four ways to disable automatic screen brightness in Windows 11.
Tip: If you’re on Windows 10, read our guide on how to disable automatic screen brightness in the Windows 10 guide.
Method 1 of 4
Disable automatic brightness through Settings app in Windows 11
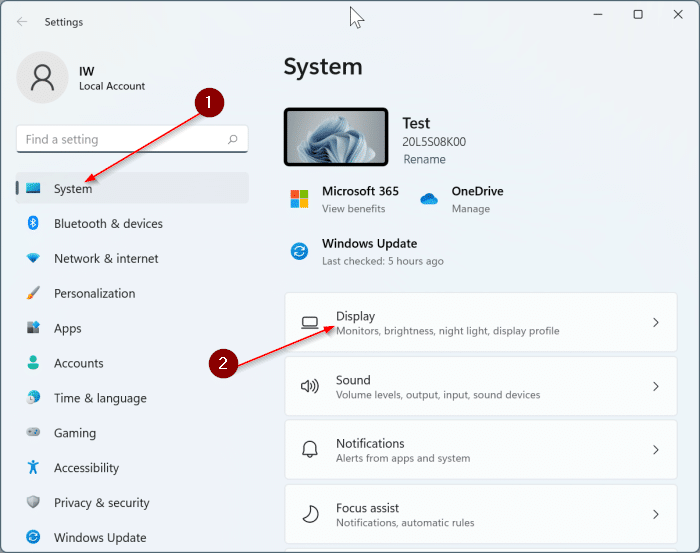
Step 1: Open the Settings app. On the left side, click System to open the System category page.
Step 2: Now on the right side, click Monitor to view the display page.
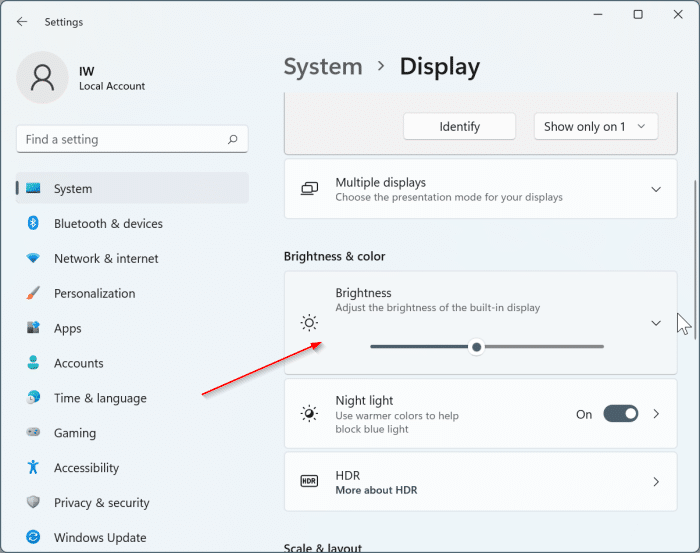
Step 3: Click on Brightness to expand it.
Step 4: Deselect the option labeled Help improve battery life by optimizing displayed content and brightness option. That is all!
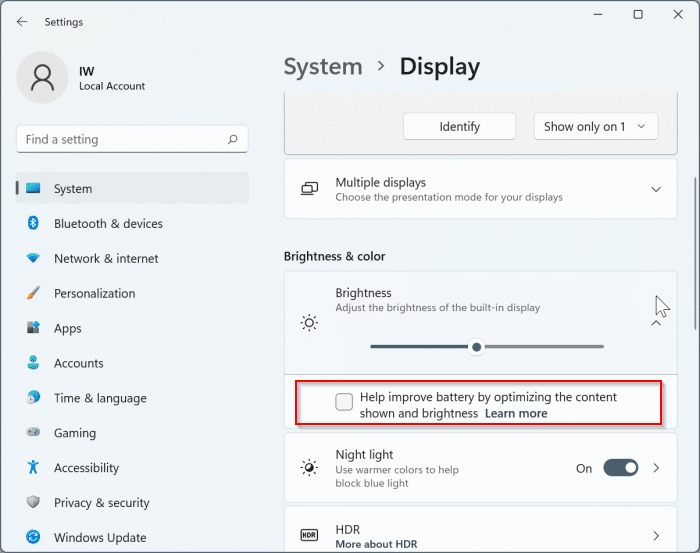
If available, also turn off the Changes brightness automatically when lighting changes option.
If one or none of the options are available on your PC, go to the next method.
NOTE: It goes without saying that these options will not be visible when you have connected your device to an external monitor.
Method 2 of 4
Disable automatic brightness through the Intel Graphics Command Center
NOTE: Use this method only if the Intel Graphics Command Center application is installed on your PC. If you have AMD graphics in place, see the instructions in Method 3 (scroll down to see).
When turned on, the Intel Display Power Savings option conserves power and extends battery life by decreasing the intensity of the backlight. When you disable this feature, the battery life may be affected.
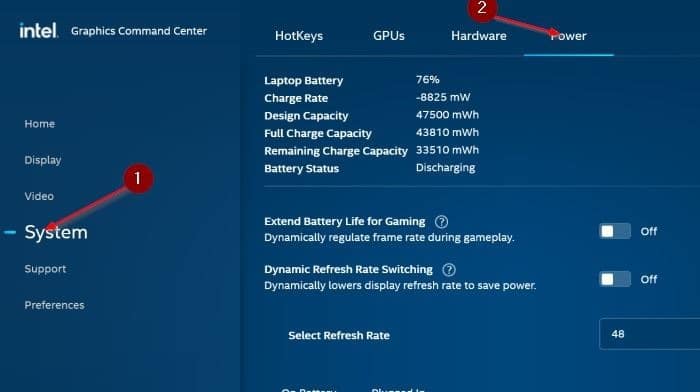
Step 1: Use the search function to open Intel Graphics Command Center app.
Step 2: On the left side, click System. On the right side, click the Can tab to switch to it.
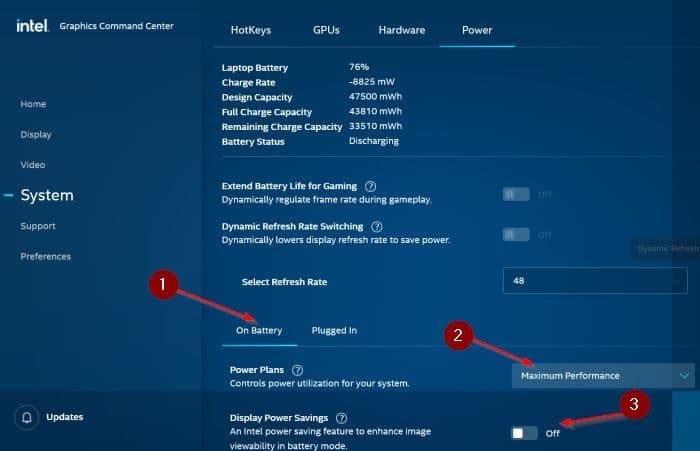
Step 3: Under the In the battery section, turn off the Screen power saving option and select the Maximum performance in the drop-down menu next to the Power Plans option.
Method 3 of 4
Disable automatic brightness through AMD Radeon settings
Step 1: Opened AMD Radeon Settings.
Step 2: Check if the Vari-Bright the option is activated. If so, turn it off.
Method 4 of 4
Disable adaptive brightness in BIOS / UEFI settings
Many computers have the option to turn adaptive display brightness on / off in BIOS / UEFI. If none of the above-mentioned methods helped you disable automatic brightness, you can check if your PC has this option in BIOS.
Step 1: Restart your computer and access BIOS / UEFI settings. Instructions for accessing BIOS / UEFI vary by manufacturer. So, look for instructions on the web.
Step 2: Check each tab in BIOS / UEFI settings for an option called Dynamic backlight control or Dynamic brightness control. Turn off the same.