How do I activate and use the “Clipboard History” function in Windows 11? Copy (Ctrl+ C.) and insert (Ctrl+ V.) are basic functions of Widows that we normally perform on our PC on a daily basis. It doesn’t matter if you are surfing the web or programming or something else, copy and paste functions are needed on a daily basis.
In Windows 11, if you want to copy a file, you need to right-click the file and click the copy icon, and to paste it in a different location, right-click and click the paste icon again. If you copy an item on your PC again, Windows forgets the previously copied item. But Windows 11 takes the copy and paste functionality to a higher level. The latest operating system is flashed with the clipboard history function. However, this feature is disabled by default. That means using it; You need to enable this feature on your computer first.
After activating the clipboard history function, Windows 11 remembers pictures, text, scripts, links, documents and videos under 4 MB. However, the number of entries that are saved by Windows 11 is only 25. As soon as the limit of 25 is exceeded, the very last element copied is removed from the clipboard. This means that the oldest items will disappear from the clipboard history as new ones appear. Also, the clipboard history list is reset every time you restart your computer or laptop, unless something is pinned on the clipboard.
In this post, we are going to show you how to enable clipboard history and view your clipboard history.
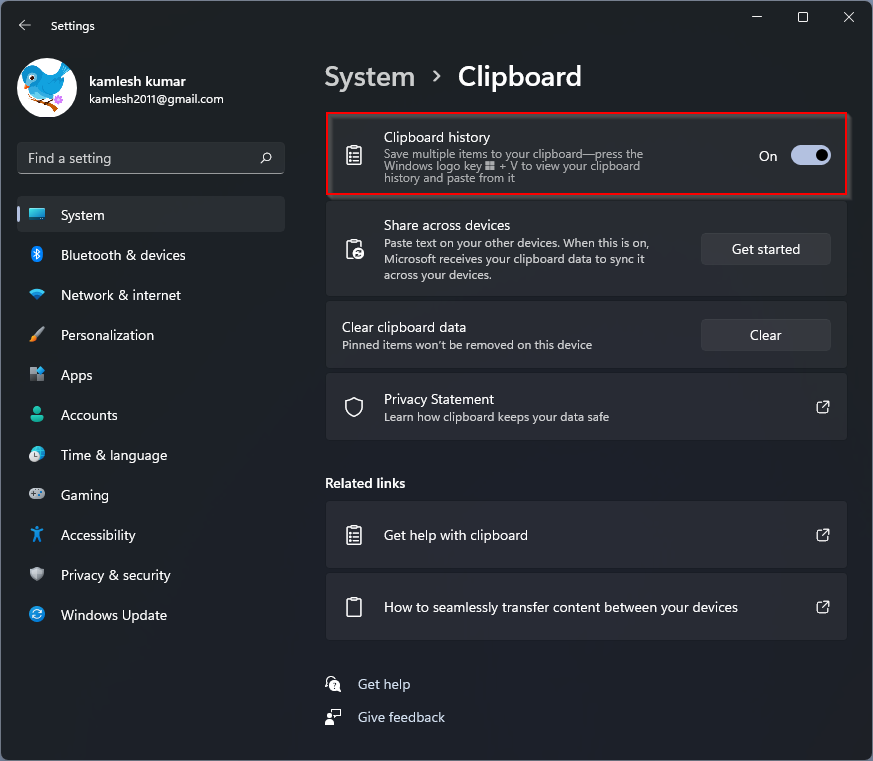
How to enable clipboard history in Windows 11
Step 2. Im settings Window, click that system Category.
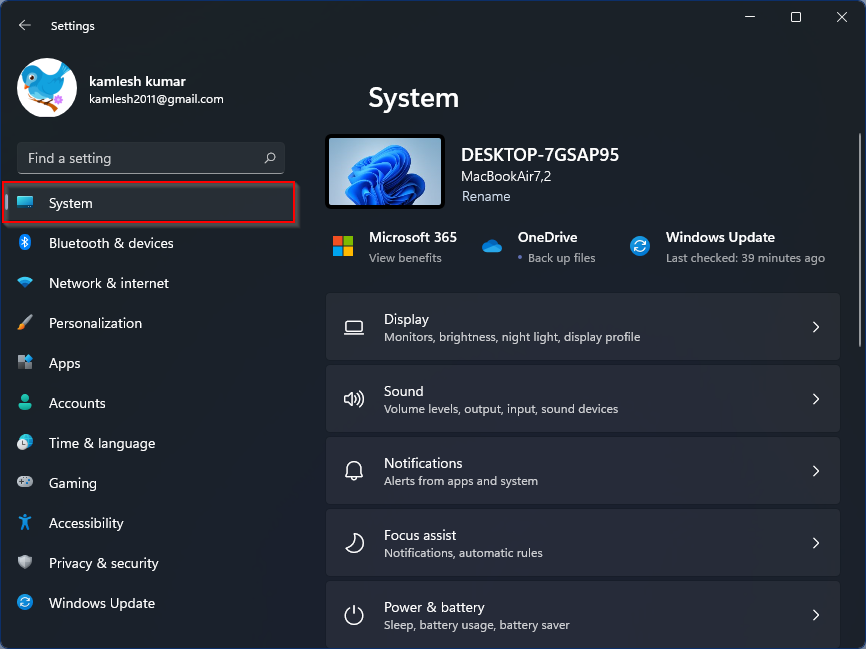
Step 3. On the right side of the system, click on the Clipboard.
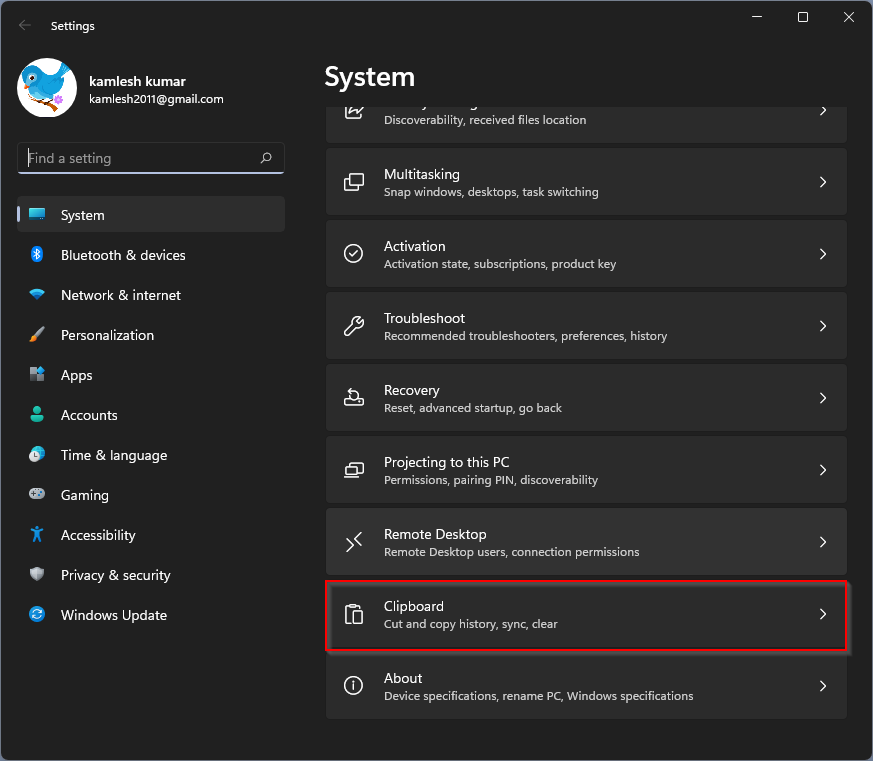
Step 4. On the right side of the Clipboard, turn the toggle switch on on Position next to the Clipboard history.
Step 5. The clipboard history is now enabled on your Windows 11 PC. You can now close the Settings app and use this feature in any application.
How to view clipboard history in Windows 11
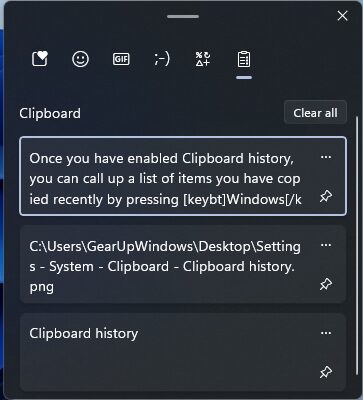
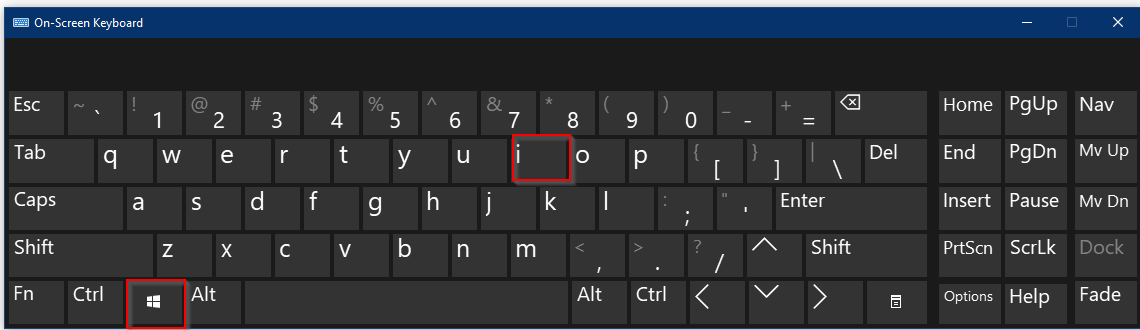
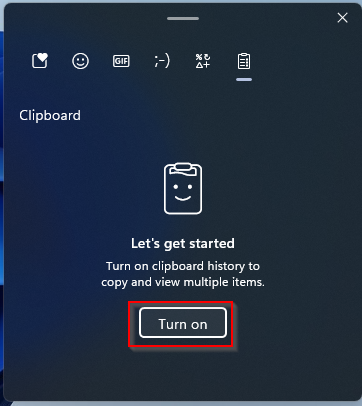
Once you have activated Clipboard history, you can view a list of recently copied items by pressing window + V.. A small window will open. The most recently copied items are displayed at the top of the list.
To paste the item from the clipboard history, open the application you want to paste the text or url into, whatever you copied, then go to. on Clipboard history by pressing window + V. Keyboard shortcuts. Click on any item from the Clipboard. The selected clipboard item is immediately pasted into the open application.
How to remove items from clipboard history in Windows 11?
Step 2. Im settings window that appears, click the system Category from the left side of the page.
Step 3. Please scroll down to see it Clipboard Tab and click on it in the right pane of system.
Step 4. Now click on Clear Button next to Delete clipboard data to clear the entire history of the clipboard. The entire history of the clipboard is silently deleted.
If you don’t want to go through the Settings app to clear the clipboard history. Open the clipboard window by pressing window + V. shortcut Key. If you want to remove all of the items from the clipboard history at once, click Delete everything Button.
![]()
To remove the selected item from the clipboard, click three points next to each item you want to delete. To choose Delete symbol.
![]()
If you want to keep an item permanently on the clipboard, click on pen by doing three points Menu to pin the selected item. Even if you Restart your PC or use the Delete everything Option, pinned elements always remain in the clipboard. You can later delete the pinned item by selecting Extinguish from the three-point menu.

How do I turn off clipboard history in Windows 11?
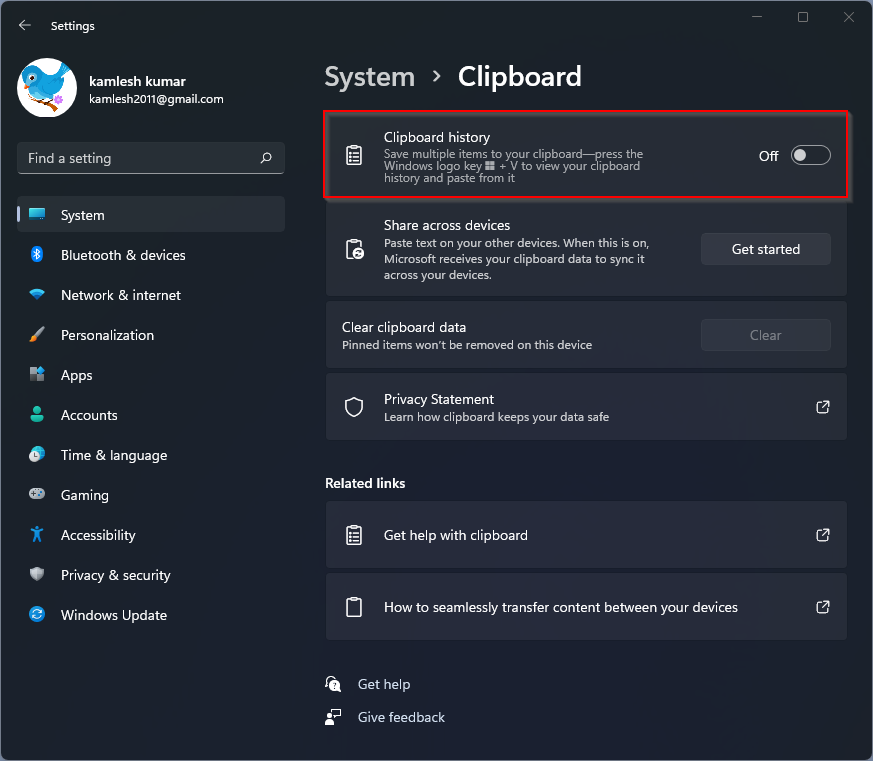
To turn off or turn off clipboard history on a Windows 11 PC, do the following:
Step 2. Im settings Window, click that system Category.
Step 3. On the right side of the system, click on the Clipboard.
Step 4. On the right side of the Clipboard, turn the toggle switch on the end Position next to the Clipboard history.
note: If the clipboard history function is disabled and you want to turn it on quickly, you can use the hotkey window + V.. click on the turn on Button to activate it immediately.
That’s all!!!
Learn too: How to enable and use clipboard history on Windows 10?