In the previous article, I taught you how to install Windows Subsystem for Android beta on Windows 11, and in this article, I will show you how to install local Android apk files on Windows Subsystem for Android on Windows 11.
You see, there are some Android apps that are listed on Amazon Appstore, there are no frequently used apps, like Tiktok, Wechat, or other apps that I used a lot. So let’s see how to install those APK files on Windows 11 Android system.
- Install ADB files.
- You can download ADB files at https://adbinstaller.com/, platform tools.
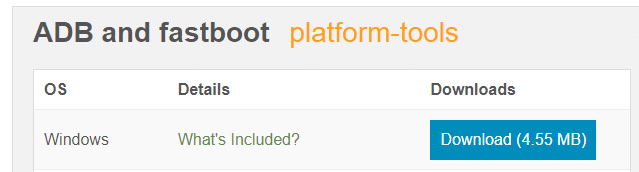
- Extract the compressed file to a place you won’t forget. For example, I extract it to the folder “D: apk”.
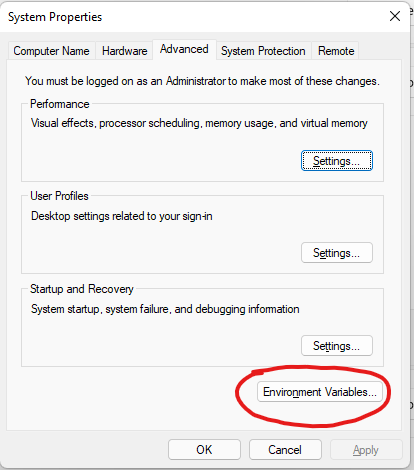
- Right click on “This PC” on the Windows 11 desktop, select Properties. And click on “Advanced system settings”

- Click Environment Variables
- Add a new “Path”, whose value is the path of the extracted adb folder where adb.exe is located.
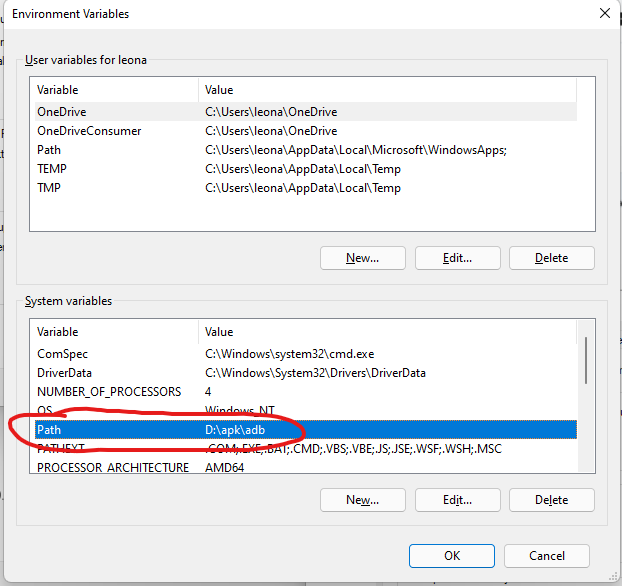
- Click OK and close Properties.
2. Enable Developer Mode in Windows Subsystem for Android
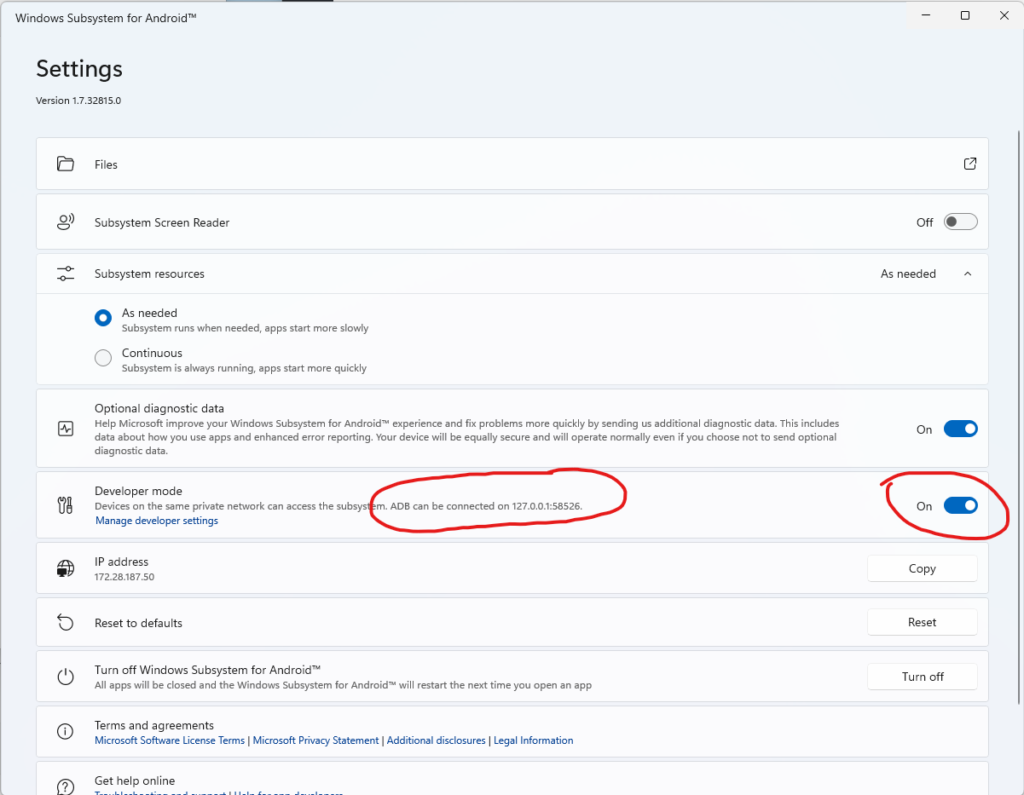
You will see that there is a connection IP address, remember it.
3, install local APK files manually in Windows 11 command
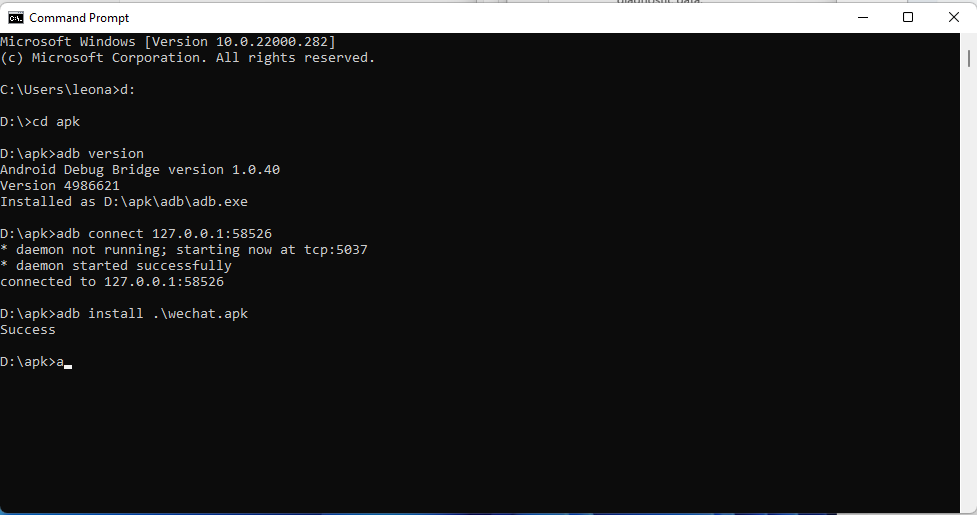
Use the following code to connect the Android subsystem
adb connect 127.0.0.1:58526And use the following code to install local APK
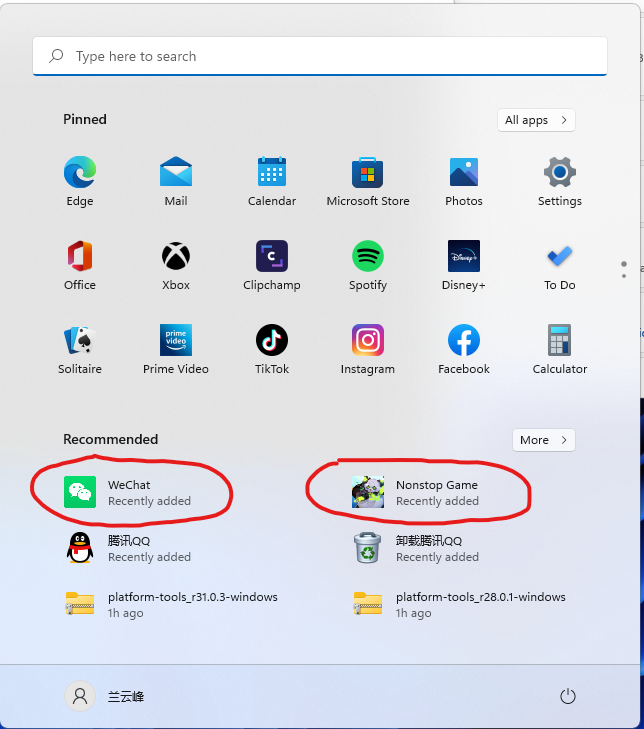
adb install .apkname.apkSeconds later, the command will tell you that the installation of the APK file was successful. Then press the Win key and you will see the Android app installed on Start.
And finally you can run local APK files this way all the time.