Prepare your Windows 10 PC for Windows 11 by enabling Secure Boot in BIOS as it is a requirement to get the new version of Windows.
With the announcement of Windows 11, Microsoft introduced a new set of minimum requirements that your PC must meet in order to get the update. While most of the requirements are pretty standard and only exclude a handful of computers, one requirement among the lot has left people scratching their heads – “secure boot”.
Many users are unfamiliar with the “Secure Boot” feature on their computer although it is still available to them. If you are also looking for a way to check if your computer supports “Secure Boot” or if you are looking for a way to enable it, read this article carefully.
What is Secure Boot?
To understand Secure Boot, you must first understand two key components, BIOS (Basic Input / Output System) and UEFI (Unified Extensible Firmware Interface). These are both firmware or you can say software installed by processor manufacturers to help you load operating systems onto your computer along with a plethora of other features.
The UEFI is more modern than the BIOS system, as the first one has been around since the 1980s, there was definitely room for improvement. UEFI USPs include support for larger hard drives (because BIOS cannot boot the operating system from a hard drive larger than 2.1TB), faster boot times , the convenience of a graphical interface, support for the mouse cursor menu), and of course, better security which includes the Secure Boot mechanism.
Now, Secure Boot’s job is to make sure that only verified operating systems and software can load to help the computer boot, and to deny access if malware or unverified software tries. to charge even before the computer starts up.
To achieve this functionality, verified software / operating systems that need to be launched at boot time are signed with public / private keys for UEFI firmware. At boot time, Secure Boot verifies these keys with UEFI and allows access to them if they have been “whitelisted” by UEFI. Windows 10 comes with such a certificate for UEFI, which serves as a key to authorize it at boot time.
Since now you understand the basics of Secure Boot, let’s learn how to check if it has been activated on your machine.
How to check if Secure Boot is enabled in Windows 10
You can check the status of Secure Boot on your Windows 10 computer very quickly.
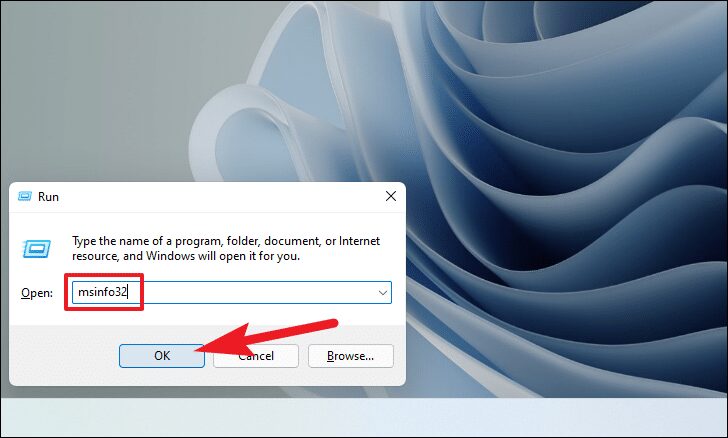
To do this, first press Windows+R on your keyboard to display “Execute command” on your screen. Then type msinfo32 in the text box on the ‘Execute the command’ pane, and click on the ‘OK’ button.
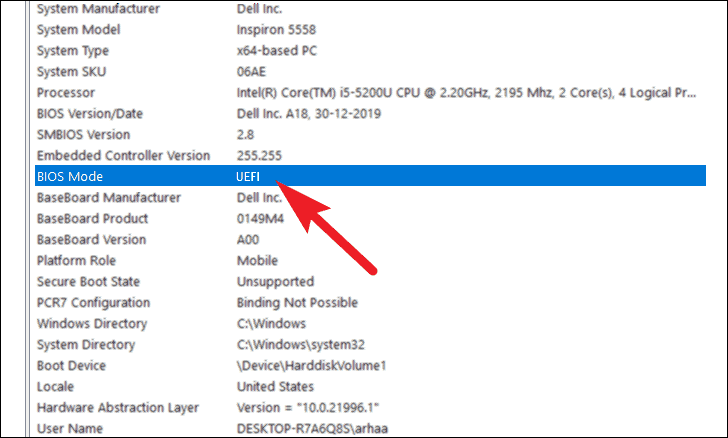
After clicking on the ‘OK’ button, a ‘System Information’ window will open on your system.
In the right part of the window, locate the “BIOS Mode” field, if it says “UEFI”, go to the next step. If it says “Legacy”, the secure boot state is not supported on your computer.
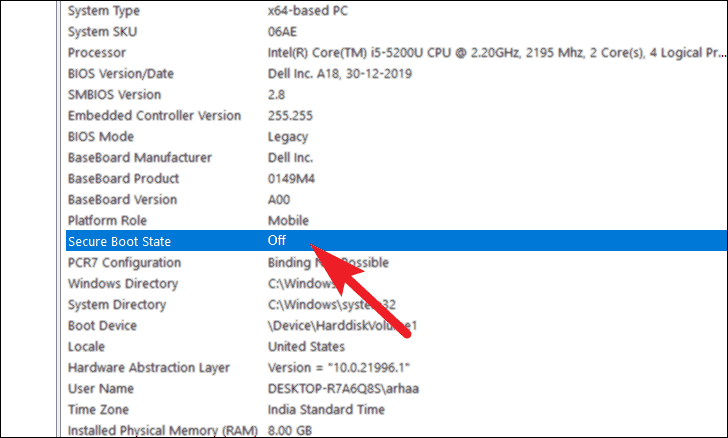
After confirming your BIOS mode, scroll further down the list and locate the “Secure Boot State” option. If the Secure Boot option is in the “Off” state, you will need to enable it from your UEFI firmware settings.
How to enable Secure Boot from BIOS settings
To note: The keyboard shortcuts listed in this section for accessing the BIOS menu are for Dell systems. Different manufacturers have different keyboard shortcuts to access and navigate the menu, please refer to your PC manual or check the manufacturer’s website for the specific keys for your machine.
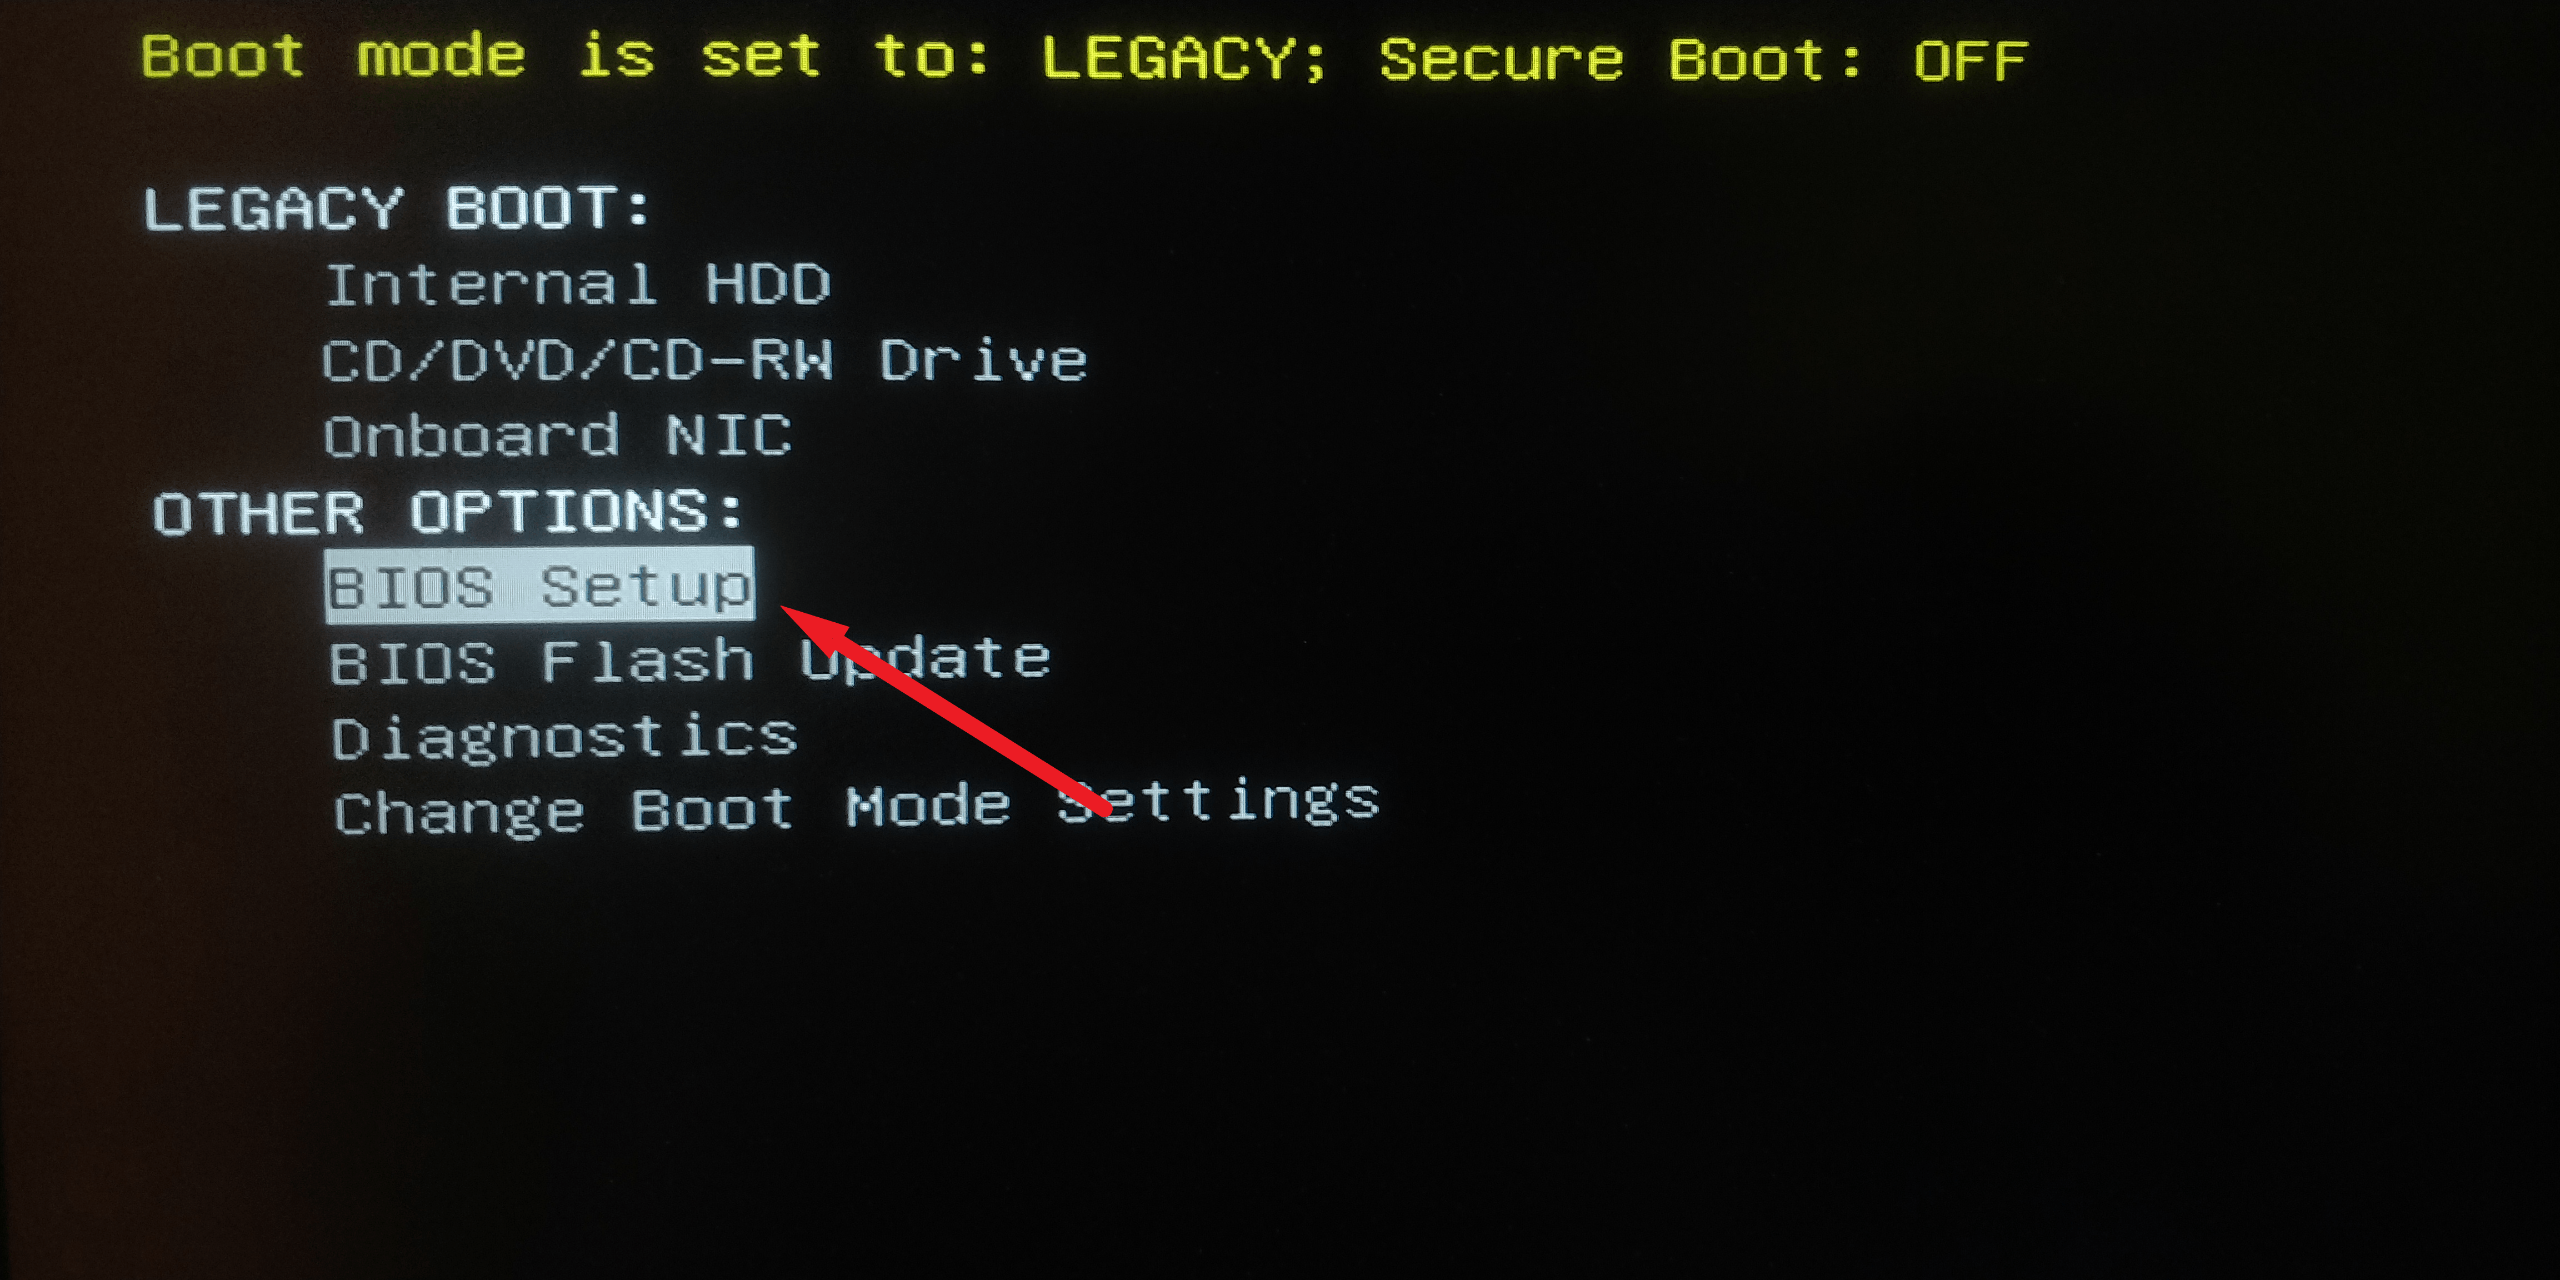
To access BIOS settings, turn off your system and then turn it back on. Then, as soon as you see the Boot logo on your screen, press the button F12 key on your keyboard. You can see an indicator on your screen as the machine prepares to enter the BIOS menu.
Next, choose the onscreen “BIOS Setup” option by navigating from the arrow keys on your keyboard or using the hot keys if they are displayed on your screen.
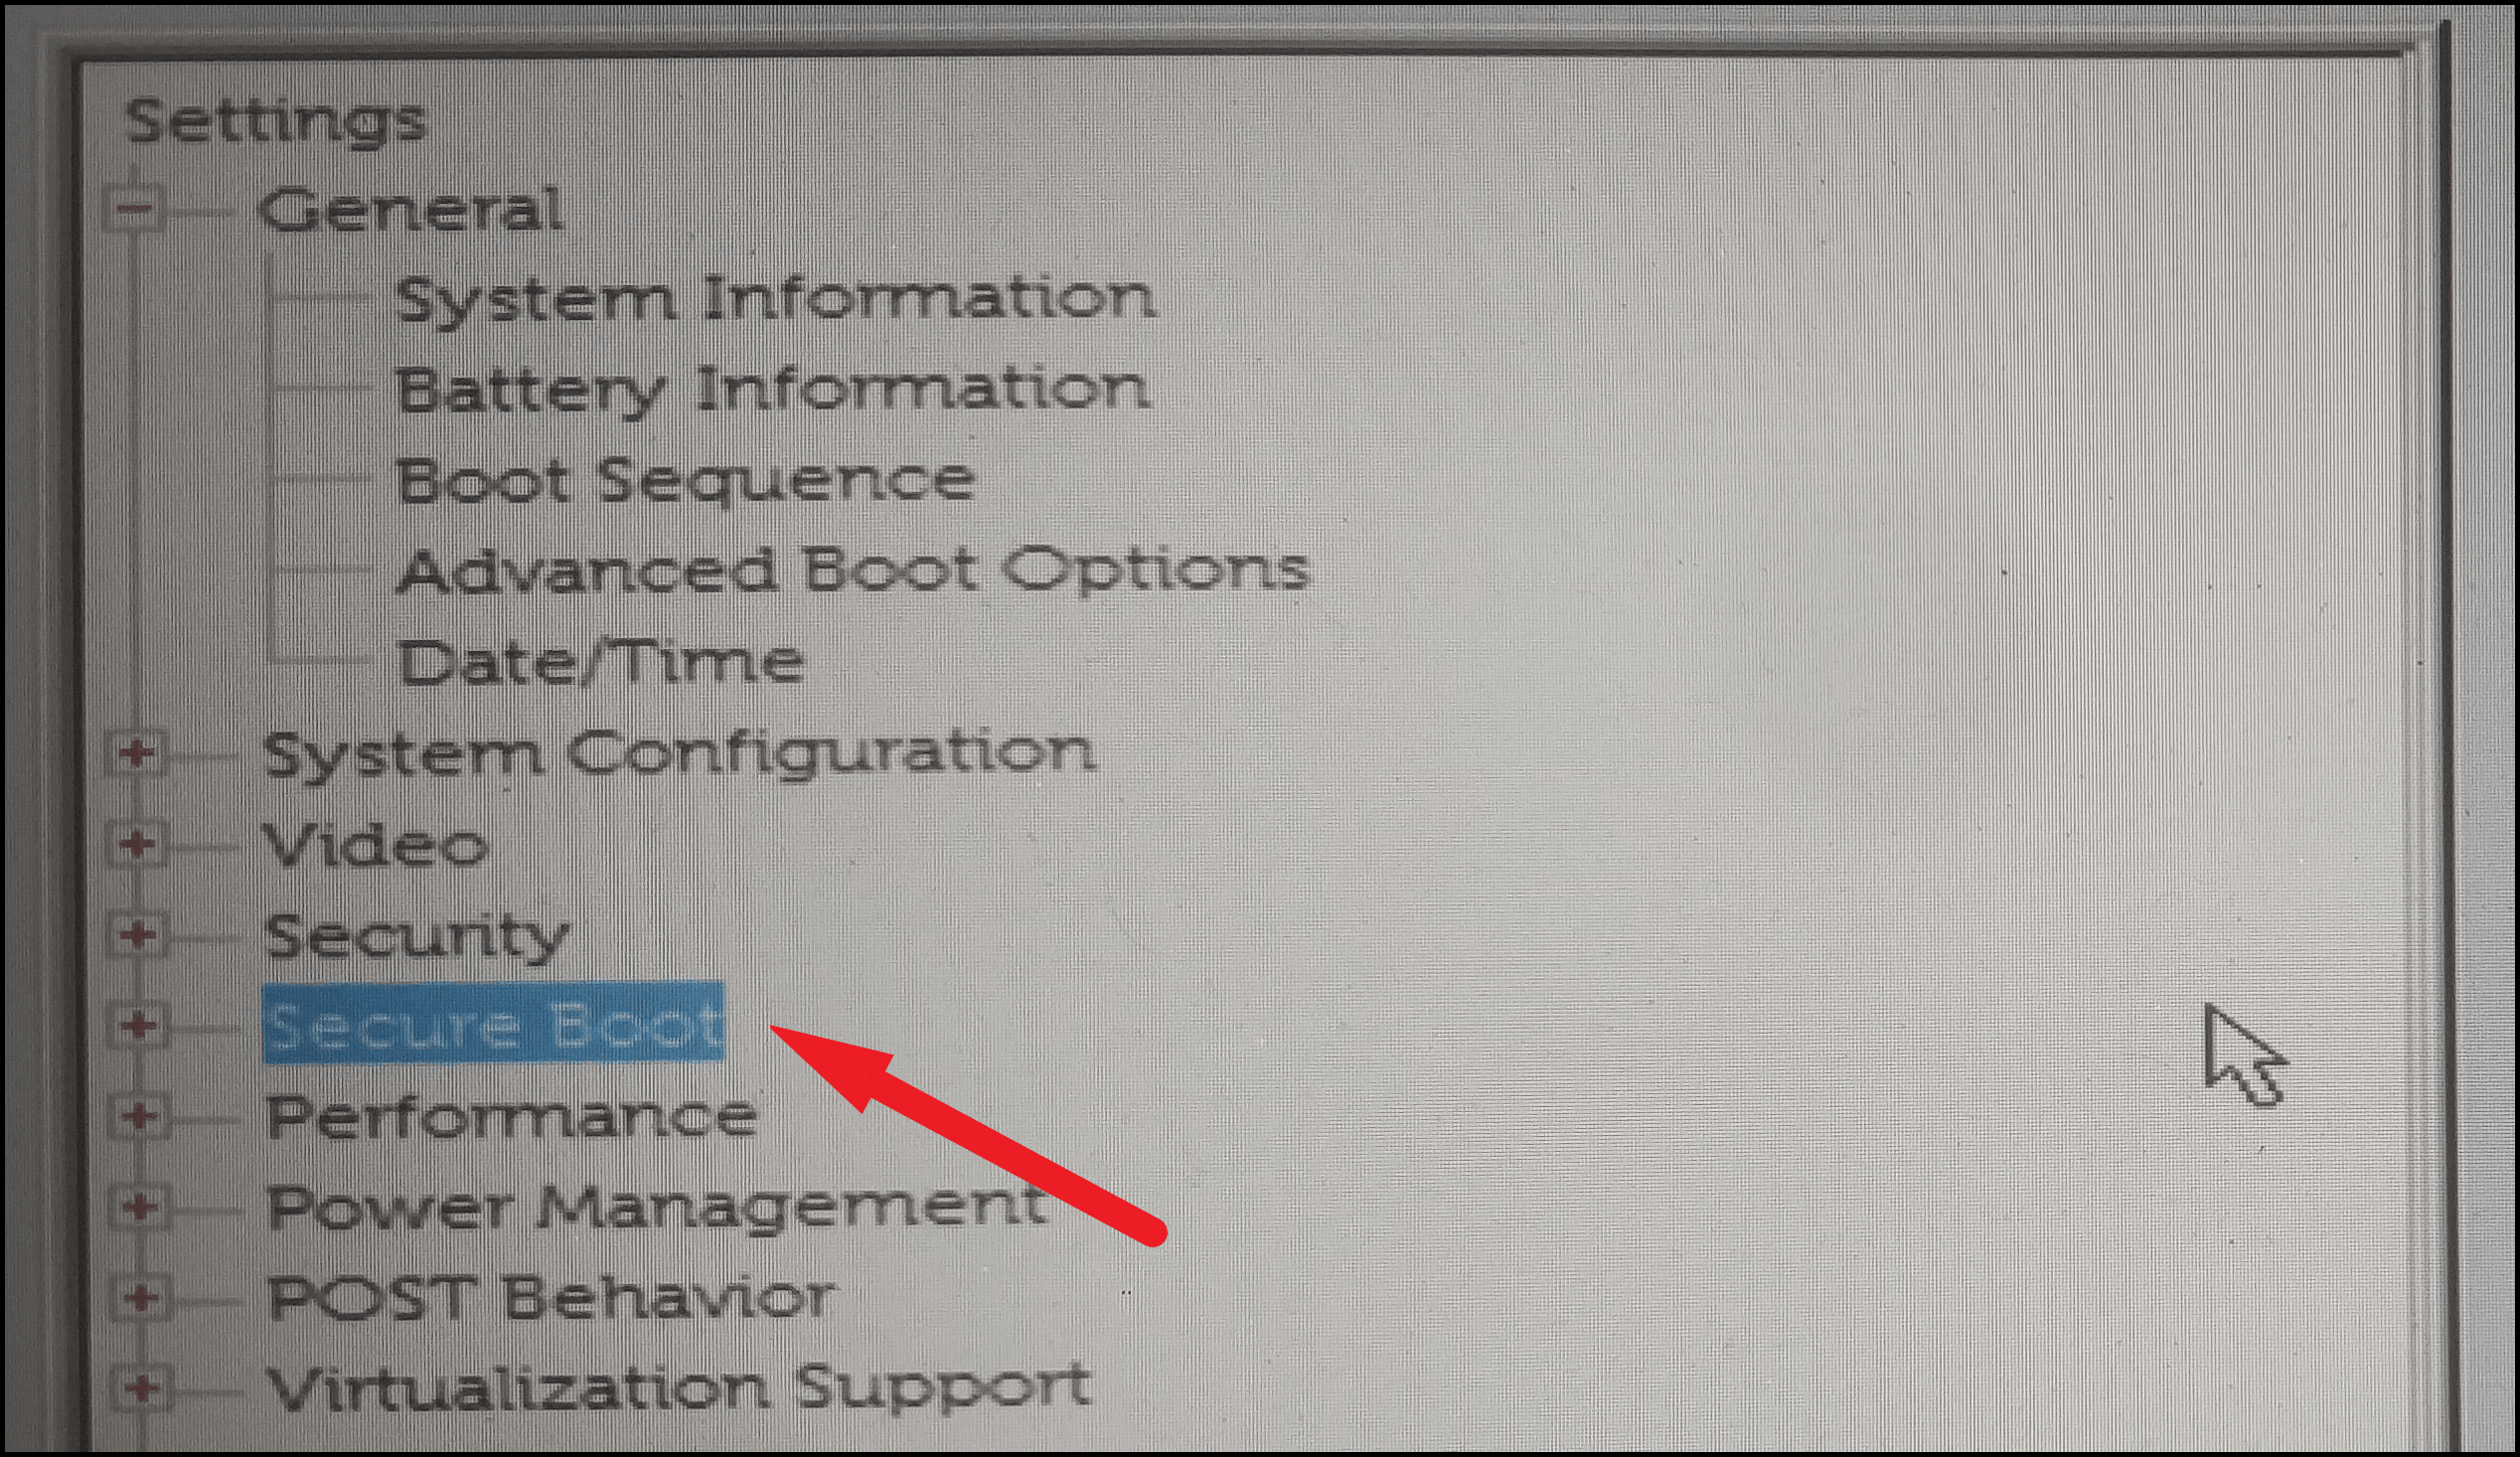
After that, click on the ‘Secure Boot’ option if your BIOS supports mouse cursor, otherwise navigate to it using the arrow keys and press Enter on your keyboard.
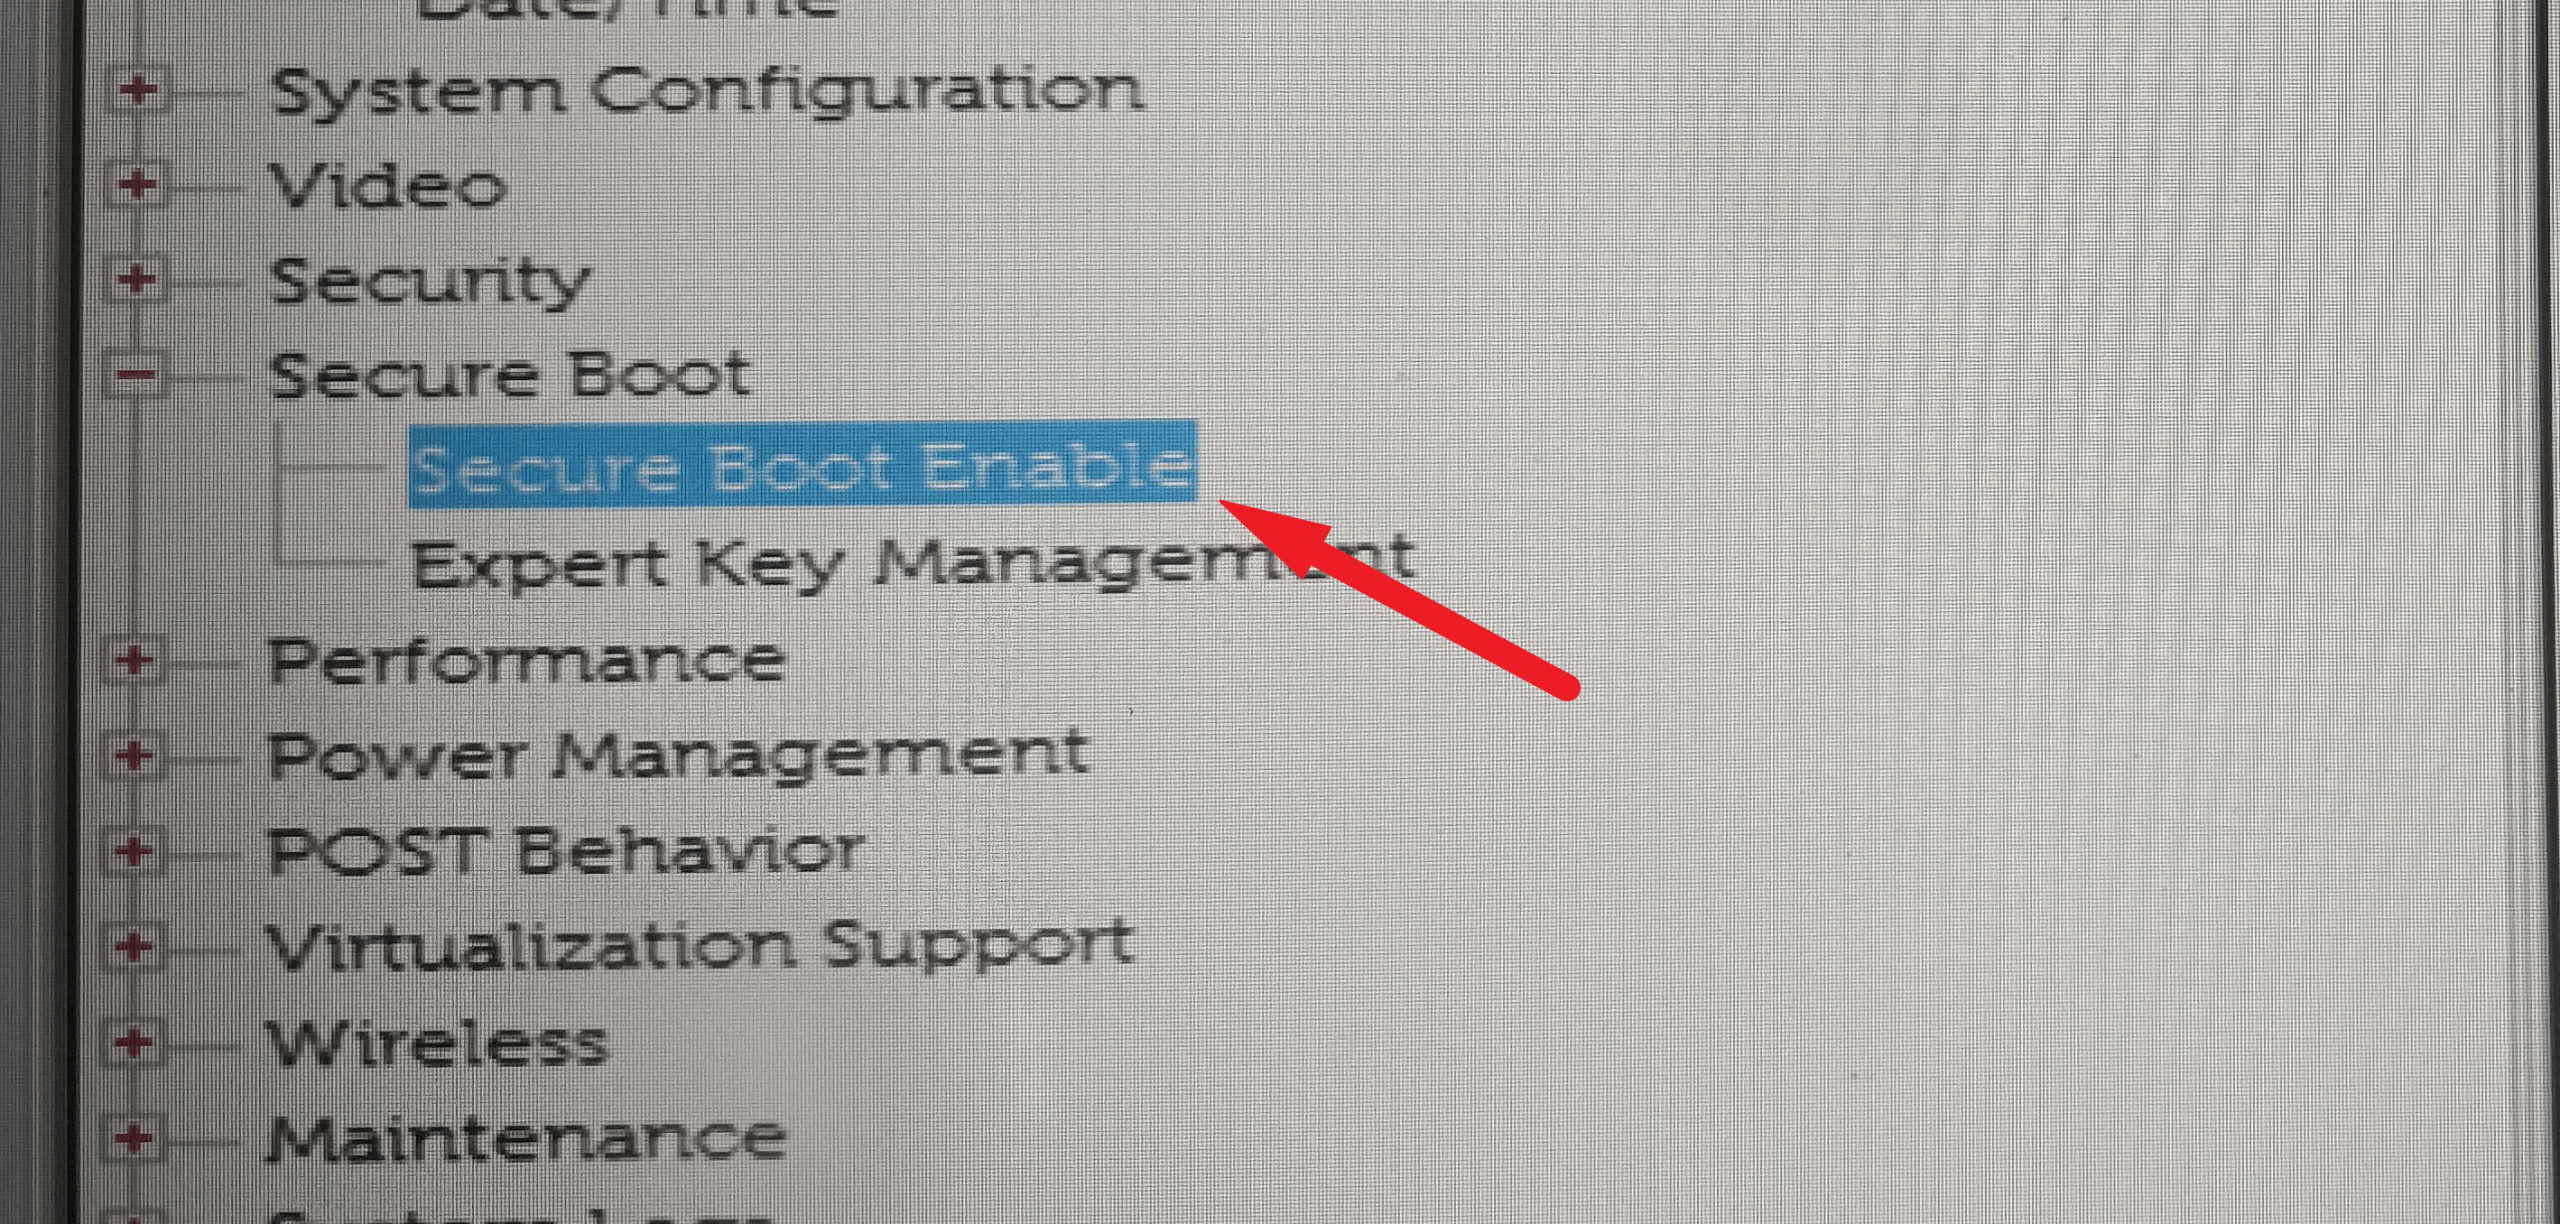
Then go to the ‘Secure Boot Enable’ option using the mouse or the arrow keys on your machine’s keyboard.
On the “Enable Secure Boot” screen, press the down arrow key to highlight the “Enabled” option, and then press the button. Spacebar to select it. You can also use the mouse cursor to select the “On” option.
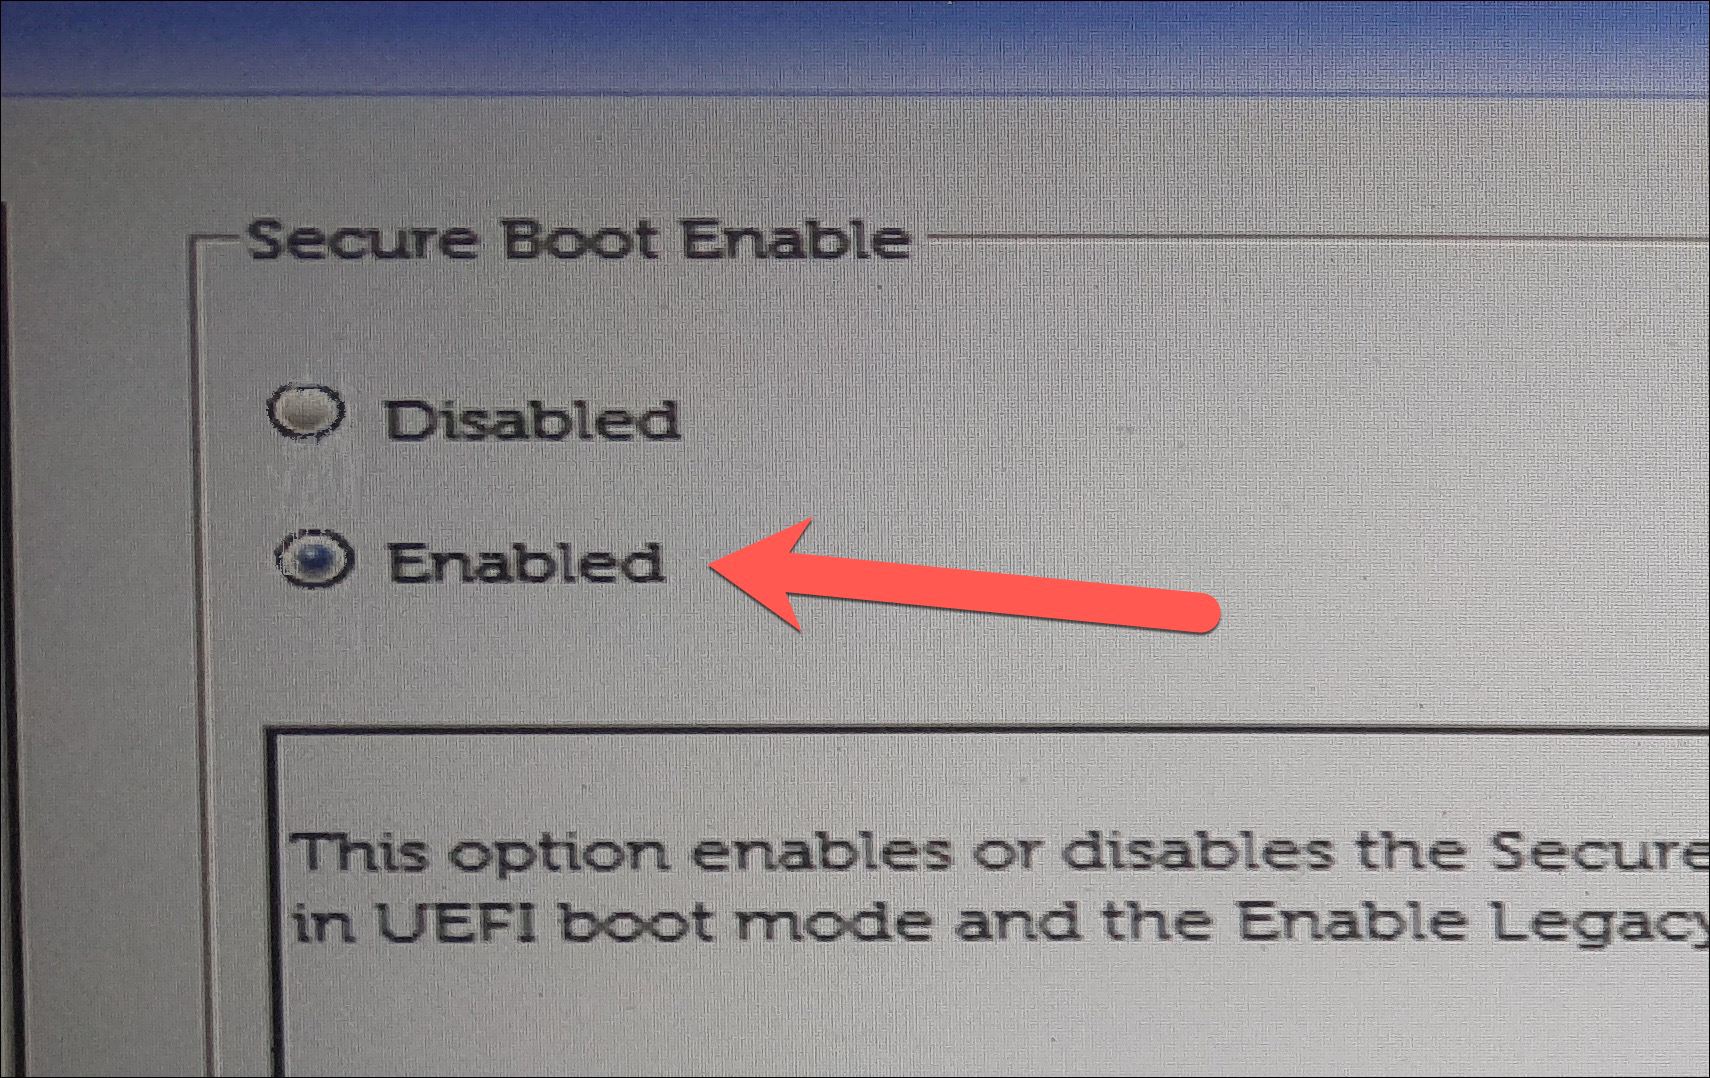
Finally, after selecting the “Enabled” option, click on the “Apply” button using your mouse or the arrow keys to access the button, then press the button. Enter key to confirm the changes.

Now use the “Exit” option to exit BIOS setup. The Secure Boot option is now enabled on your machine.

After exiting BIOS setup, your computer will continue with the Windows 10 boot process and Secure Boot will be enabled on your system.