A simple trick that can improve and make your screen time easier.
Digital brightness is the only thing that can ruin a perfectly sane mind. High levels of screen brightness are not only visual irritants, but they can also be very disturbing mentally. Fortunately, we don’t have to succumb to bright screens because we can always lower the screen brightness. But, with reduced brightness, we also reduce the quality of consumable content. Thus, the process becomes counterproductive.
So, is there a way to have optimal light levels while protecting our eyes and mind from the wrath of blinding light screens? Of course we do! Nightlight to the rescue! With this feature in the background, you can increase the brightness and enjoy a peaceful digital journey, while relaxing your eyes.
Here’s how you can use the nightlight saving grace on the new Windows 11.
How to activate the night light on Windows 11
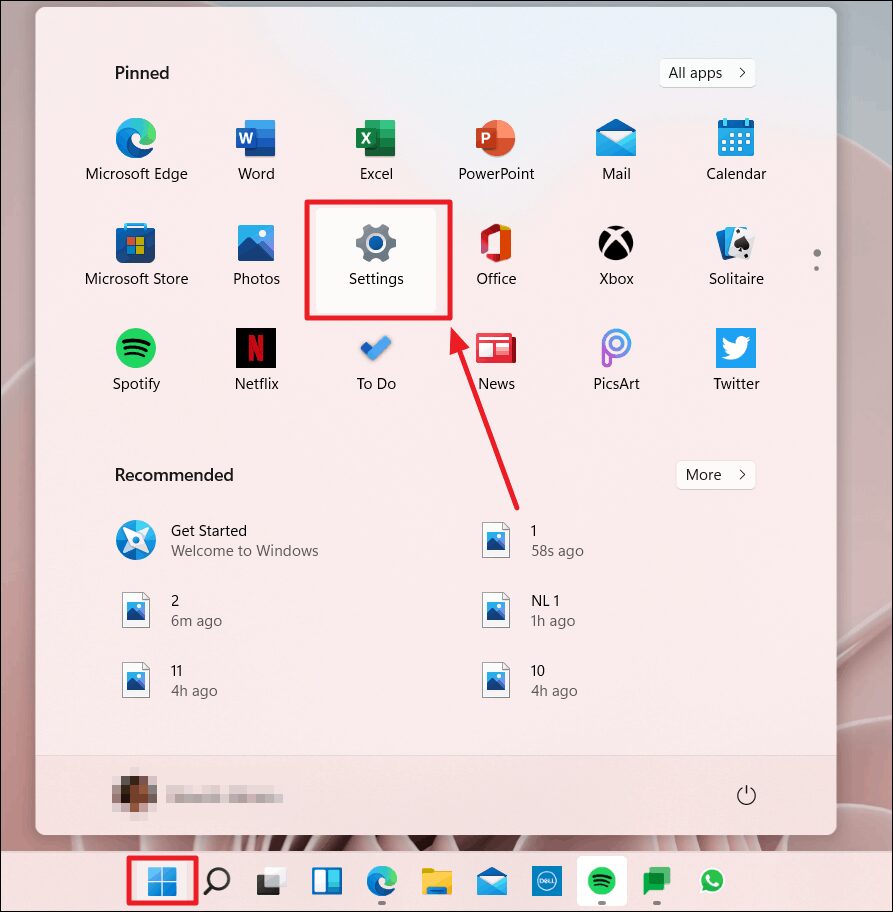
Click on the centralized “Start” button and select the “Settings” option, which is represented by a gear icon.
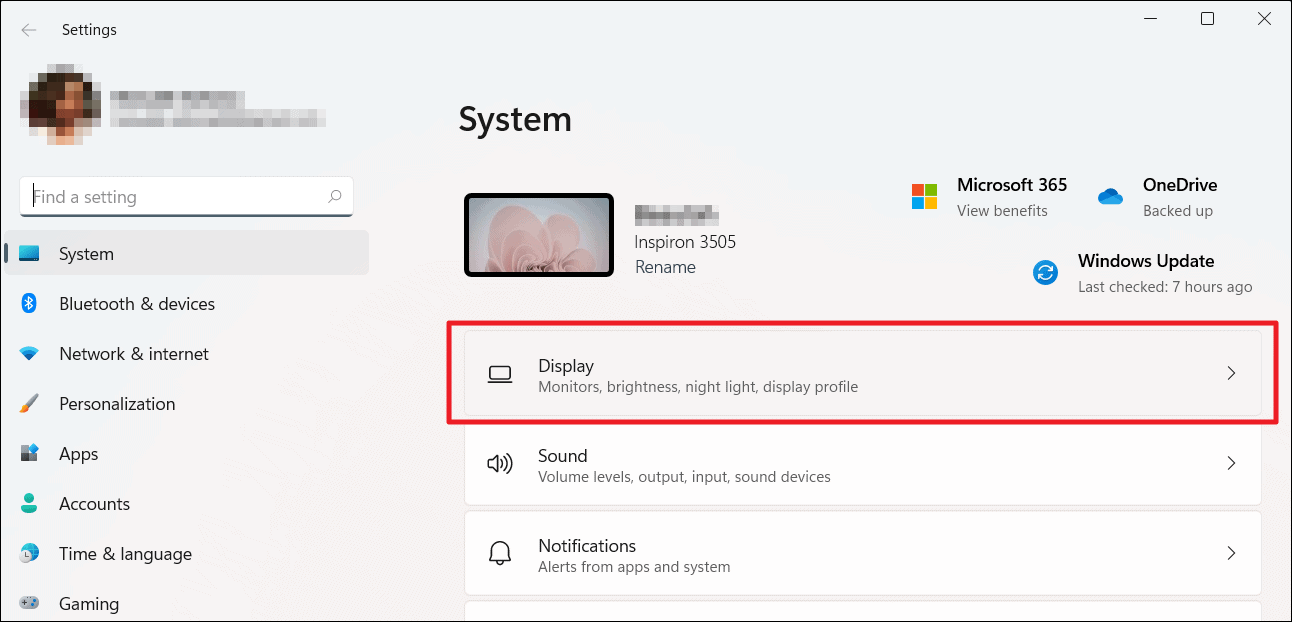
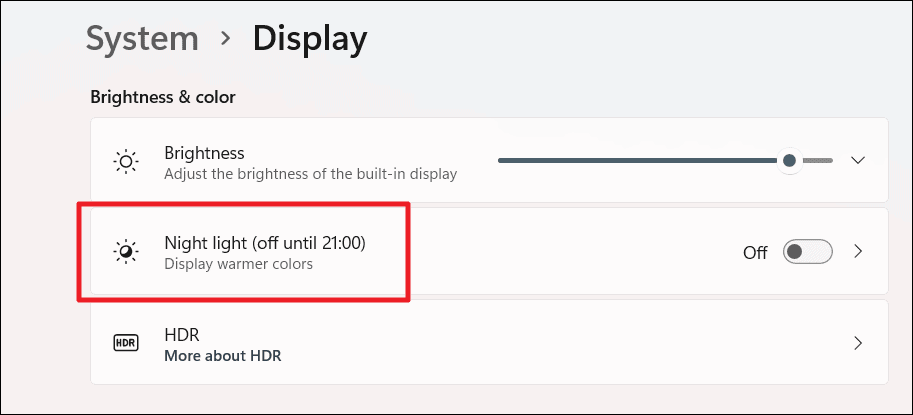
The “System” settings will be the first page to appear. On this screen, select the first option, “Display”.
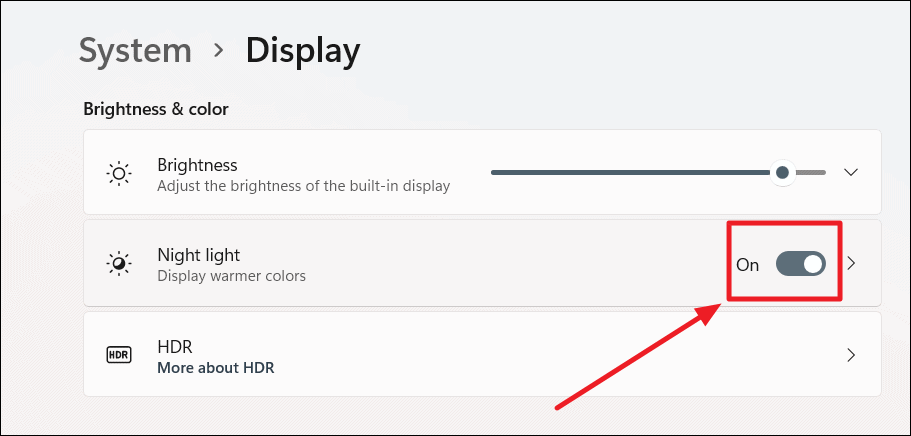
The system display settings screen will now open. Navigate to the “Night Light” option and click on the toggle bar in that section. It should change from “Off” to “On”.
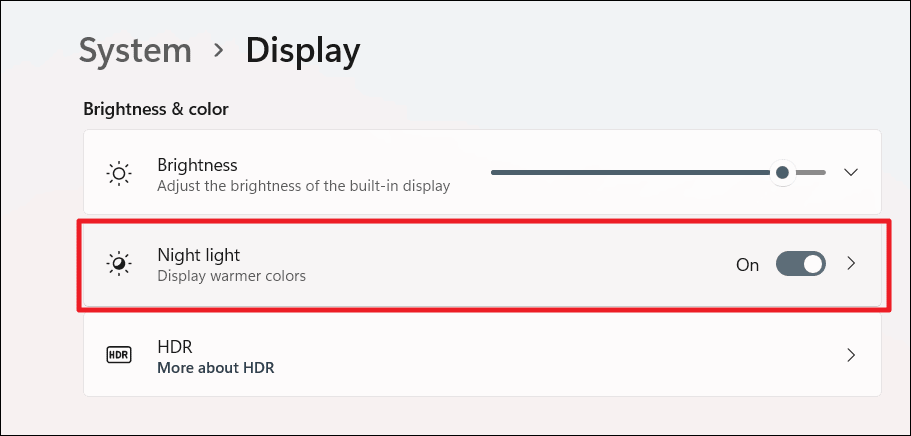
Night Light is now active on your Windows 11 device. You will notice a warm tint, like a leaf of pale yellow on all screens suggesting this activation.
How to change the nightlight heat in Windows 11
Once the night light function is activated, there is no need to be discouraged if the amount of heat on your screen does not match your needs. You can always change the heat of the night light! Here’s how.
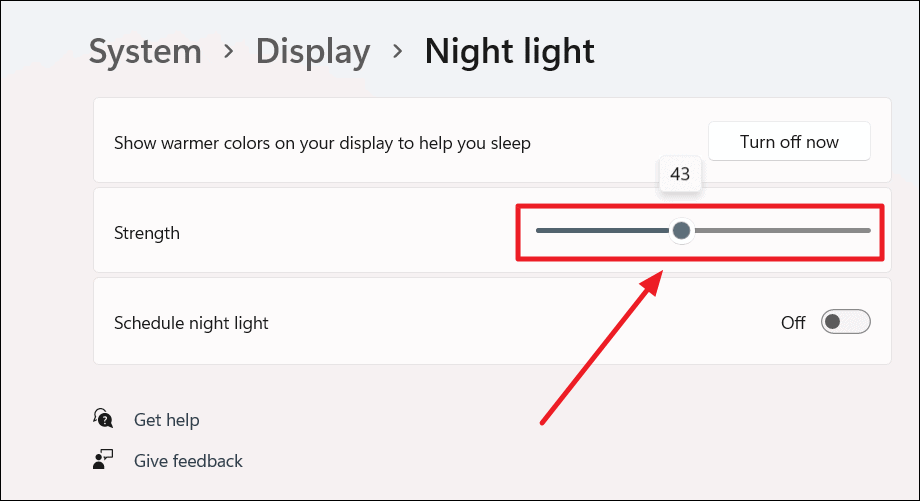
On the same system display settings page, click anywhere on the “Night Light” option.
Now the ‘Night Light’ display settings page would appear, with three sections. Go to the “Strength” section which has a toggle on a line going from 1 to 100, respectively from left to right. The closer you bring this toggle to 100, the hotter the night light.
How to program the night light on Windows 11
If you are used to the night light, activating this feature each time can be time consuming and monotonously irritating. To save time and regulate a better work flow, you can program the night light! When scheduling, this function will activate itself at the set time.
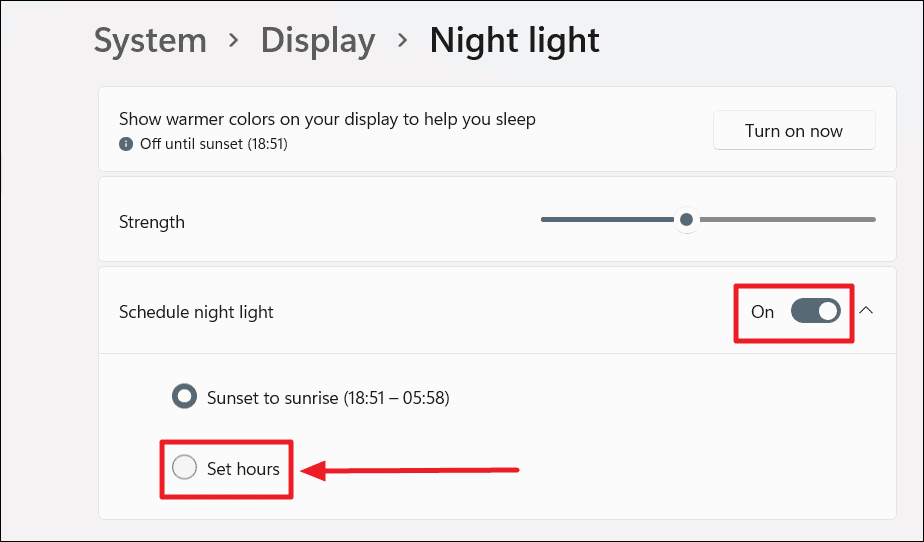
To schedule the nightlight, click on the toggle bar in the “Schedule Nightlight” option in the same “Nightlight” settings page. Push the rocker to “ON”.
There are two options for programming the night light. One is the default time settings based on your location and the other is a customizable option. The former would be automatically set between sunrise and sunset, essentially night takes over.
If you do not prefer automated programming, you can customize the night time lighting times by selecting the “Set times” option.
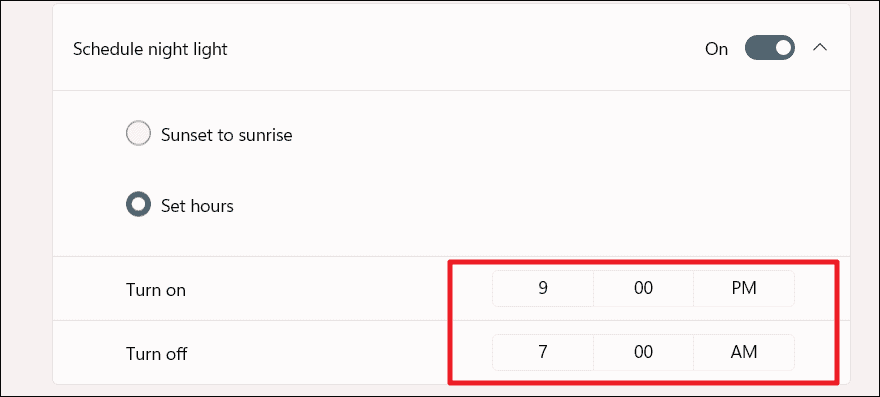
The option “Define the hours” opens on two lines; “Activate” and “Deactivate”. The first is for when you want the night light to go on and the second is for when you want it to go off. Click on the time boxes to modify the programming time.
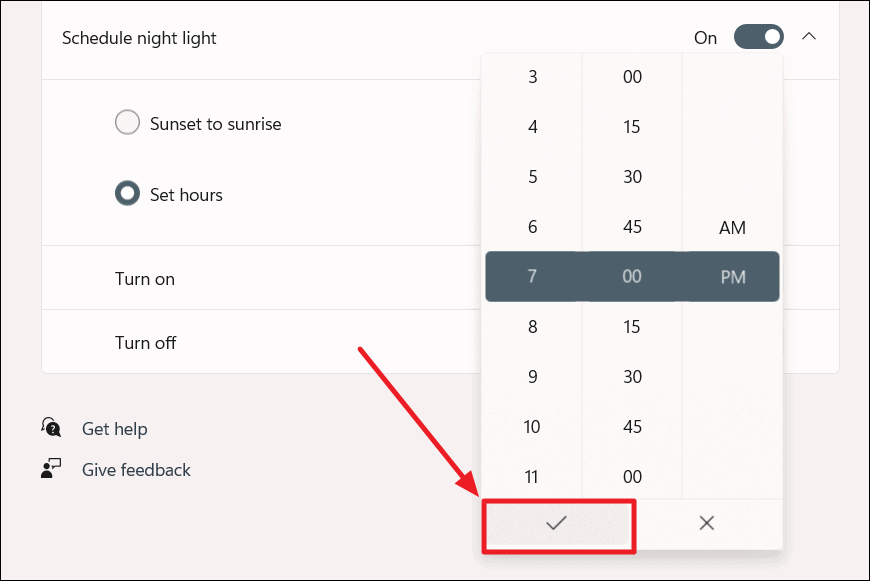
Clicking on the timetable box will open a pop-up timetable window. Here you can choose the schedule by the hour and by the minute! You can also change the default AM and PM structure according to your preference. When done, click the check mark at the bottom of the pop-up window.
You will now enjoy a personalized night light, programmed at your convenience.
The night light is very useful, especially for sensitive eyesight. The softness of the night light reduces eye fatigue. It releases less blue light and warms the screen so that the light or brightness of the screen disappears. The night light also helps the user to sleep better. Excessive exposure to screen light can disrupt sleep patterns, which can be balanced to some extent with nighttime light.