Give your personal computer a personal name.
Do you want to change the default computer name? It was simple pretty straightforward in Windows, but the latest iteration, Windows 11, made it even simpler. The option to rename the computer has now been added to the main computer “Settings” screen in the “System” tab.
Besides “Settings”, you can also change the computer name through “System Properties”, “PowerShell” or “Command Prompt”.
If you’ve bought a new computer and want to change its name, or for any other reason, here’s what to do in Windows 11.
Change computer name from Windows settings
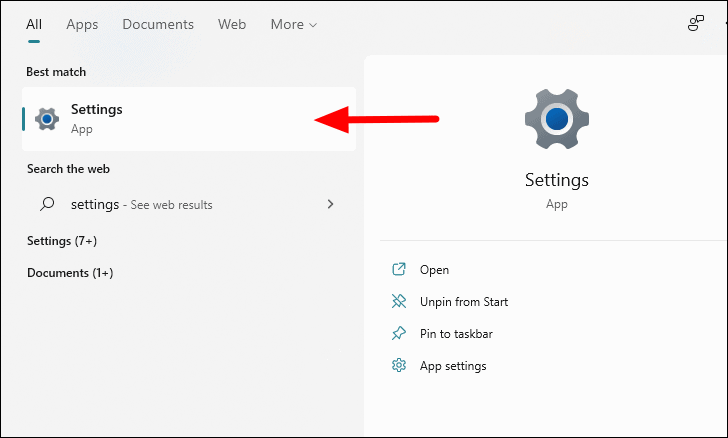
To change the computer name, press the THE WINDOWS To launch the “Start Menu”, search for “Settings” and then click the corresponding search result to launch the application.
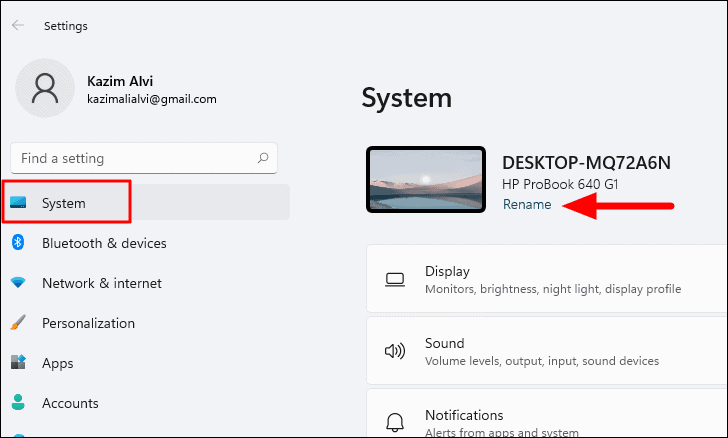
The “System” settings will launch by default and you will find your computer name mentioned at the top right. Click on the “Rename” option under the computer name.
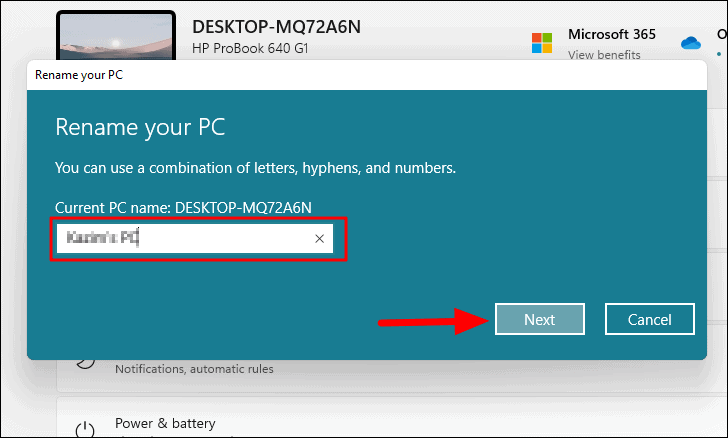
Now enter the new computer name in the text box and click “Next”.
You will now be asked to rename your computer for the new computer name to take effect. Restart the computer and you will find the new computer name mentioned in the settings.
To note: If you see ‘One or more of the characters you entered will not work. Try something different ”, this is because you entered a character that is not allowed for a computer name. Check if you’ve added a space, apostrophe (‘), colon (:), underscore (_), period (.), Or other similar characters, and remove them. For the computer name, you can use alphabetic characters, numeric characters, and a hyphen (-).
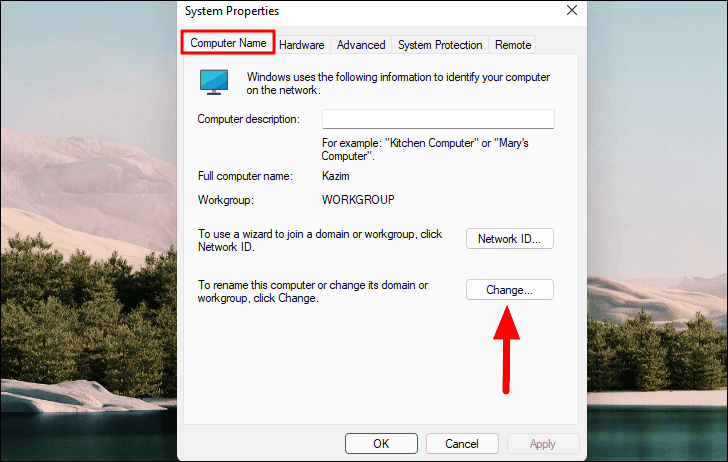
Change computer name from system properties
You also have the option to change the computer name from the properties. One of the advantages of using this method is that when you enter a character that is now allowed, a dialog box with a list of characters allowed and those that are not is displayed. This makes it possible to easily delete the characters and to have a name conforming to the standard.
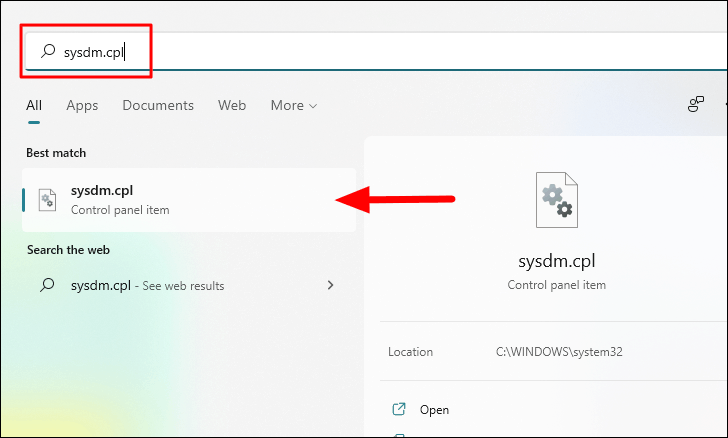
To change the computer name, press the THE WINDOWS to launch the ‘Start Menu’, type ‘sysdm.cpl’ and click on the corresponding search result.
The ‘Computer Name’ tab of ‘System Properties’ will open by default. Click on the ‘Edit’ option.
Now enter the new computer name according to the guidelines we talked about above and click “OK” at the bottom.
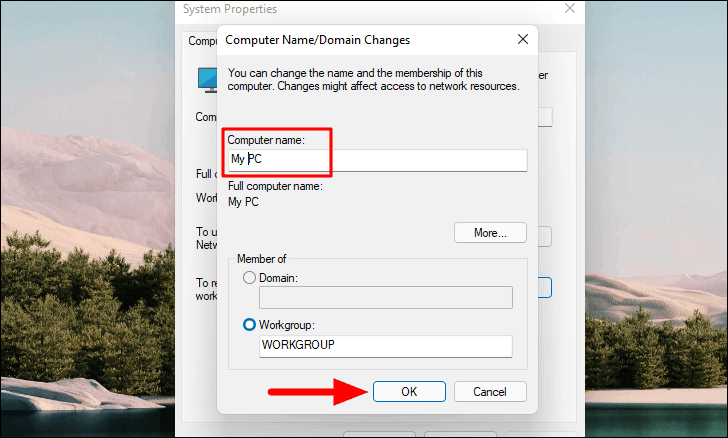
You will now be asked to restart the computer, click on ‘Restart now’ to restart it immediately. Make sure you have saved all files before restarting to avoid data loss.
Change computer name via command prompt
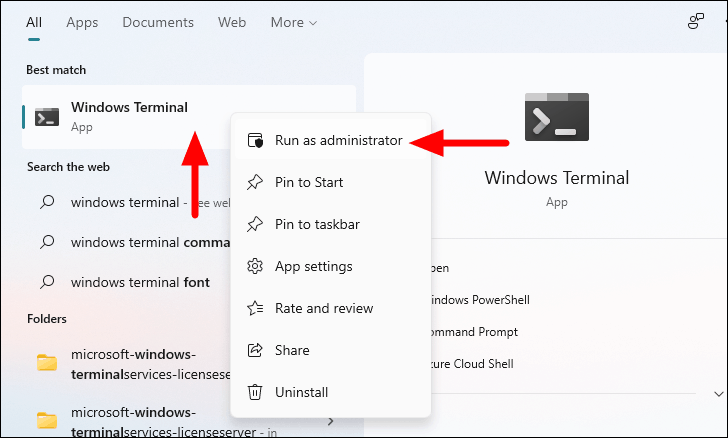
To change the computer name, search for “Windows Terminal” on the Start menu, right-click the relevant search result, and then click “Run as administrator.” Click “Yes” in the confirmation box that appears.
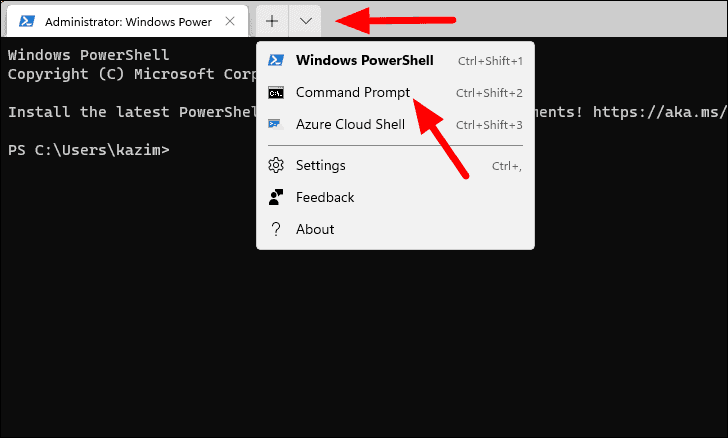
Check if the Command Prompt, PowerShell, or Cloud Shell tab opens. If it’s not “Command Prompt,” click the down arrow at the top where the tabs are listed and select “Command Prompt” from the drop-down menu.
To note: You can change the settings to launch the tab of your choice among the three, when opening the Windows terminal.
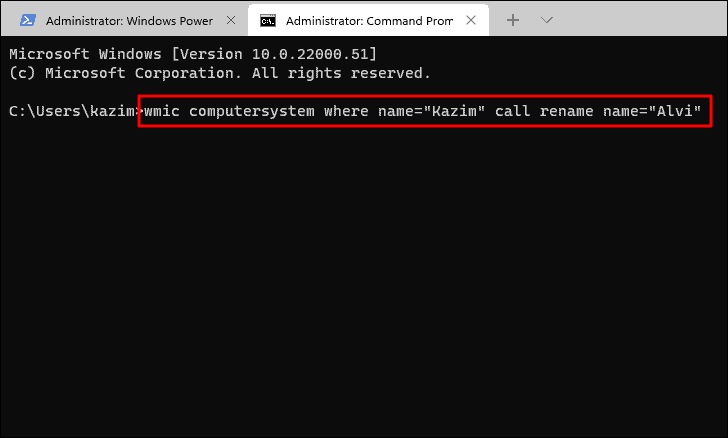
An elevated “Command Prompt” will open in a new tab, because we previously selected “Run as administrator”. Now enter the following command in the command prompt.
wmic computersystem where name="Present Name" call rename name="New Name"In the above command, replace “Current Name” with the current computer name and “New name” with the one you want to name, then press ENTER to run it.
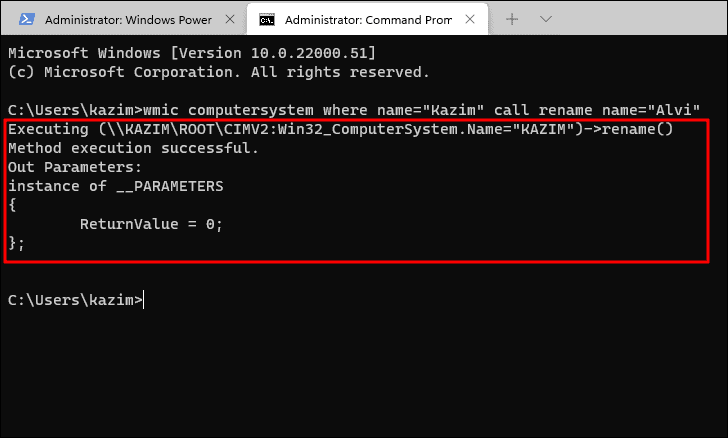
The command will now be executed, search for ‘0’ next to ‘ReturnValue’. If it shows “5”, you have not launched the command prompt with administrator privileges. Once you have ‘ReturnValue’ as ‘0’, close the ‘Terminal’ window and restart the computer for the changes to take effect.
After restarting the computer, the new name will be reflected everywhere.
Change computer name via PowerShell
You can also change the computer name with the shell command in Windows PowerShell. Launch Windows Terminal with administrator privileges as shown above and open Powershell.
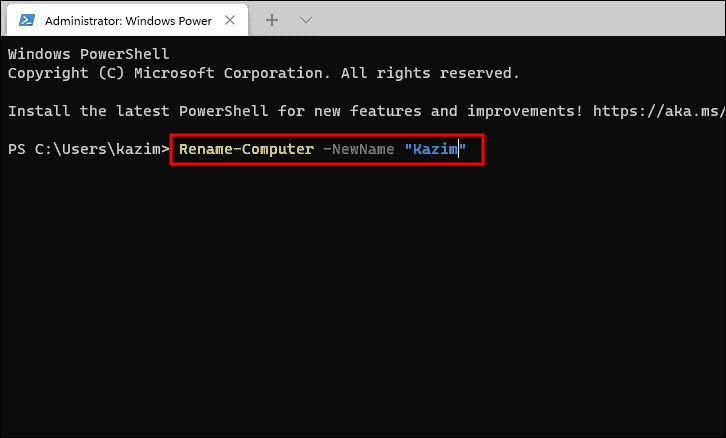
Then enter the following command in the PowerShell window.
Rename-Computer -NewName "New Name"In the above command, replace ‘New name’ with the new name of your computer and press ENTER to execute the command.
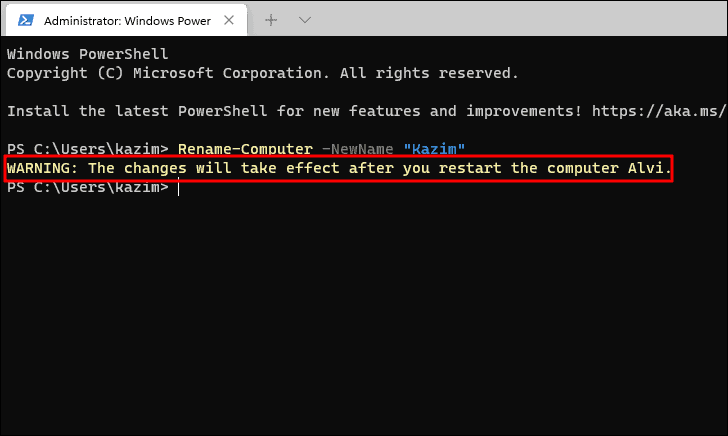
After the command is executed, you will be prompted to restart the computer for the changes to take effect. Close the Terminal window and restart the computer.
That’s all it takes to change the computer name in Windows 11.
You can use any of the four methods to change the computer name because the end result remains the same. However, we recommend that you use the first two, in case you are unfamiliar with “Command Prompt” or “PowerShell”.